Core+ Python Client
The Deephaven Core+ client allows you to connect to Persistent Queries using the Community Core engine in the Deephaven Enterprise system. You may either connect to a new temporary Persistent Query, or one of the Persistent Queries that you have access to on the server. This page provides a brief overview of using the Python client; more details are available in the reference documentation.
The Python client wheel is located on a Deephaven server in
/usr/illumon/dnd/latest/py/wheel/, with a name of the form
deephaven_coreplus_client-1.20231218.432-py3-none-any.whl. To use the wheel,
use pip (e.g., pip install deephaven_coreplus_client-1.20231218.432-py3-none-any.whl).
pip automatically installs dependencies referenced by the wheel, including the
underlying pydeephaven client
from Deephaven Community Core.
The first step in either case is to create a SessionManager, the Deephaven
installation exposes a connection.json file that is the simplest way to
create a session. Simply specify the URL from your Deephaven installation.
Alternatively, you may provide a JSON string, using the json= named parameter.
The host and port are the same ports used to configure launcher instances. Typically, this means port 8000 when your system is configured to use Envoy or port 8123 without Envoy.
Note
Mac users may run into an SSL: CERTIFICATE_VERIFY_FAILED exception when connecting to an HTTPS address. To resolve, install the default root certificates from certifi:
See https://www.python.org/downloads/release/python-360/ for more information.
After the session is created, you may authenticate with a password:
Or using a private key:
At this point, you can then connect to an existing Persistent Query. The session
object extends from the Deephaven Community pydeephaven.session.Session. The
Deephaven Community Python API documentation
provides more information on interacting with the worker session and tables.
Instead of connecting to an existing Persistent Query, you can instead make a new temporary Persistent Query to host your worker.
You can interact with the session through the Community Python API and view tables with the Deephaven Web UI. By default, the temporary queries are stopped and deleted after you close the session object.
In-Worker Use
The Deephaven Core+ Python client is installed into Python worker's virtual environment as of Deephaven 1.20231218.190. This enables you to create a SessionManager object and access the provided controller client to manage persistent queries. If no connection_info parameter is provided, then the SessionManager connects to and authenticates with the current cluster. For example, the following snippet prints the names of running queries on the current cluster:
Jupyter
The Deephaven Python client can be used in conjunction with Jupyter. To do so,
you must install the deephaven-ipywidgets package and the Deephaven client
wheel file (e.g., deephaven_coreplus_client-1.20231218.432-py3-none-any.whl) into your
environment. For example, to create a virtual environment for JupyterLab, you could run:
To start JupyterLab, then run:
JupyterLab automatically launches a new tab in your web browser. For example, it may start a server on port 8888, which
you can then access as "http://localhost:8888/lab/tree/Untitled.ipynb". The Python client's session manager and other
objects work identically as outside JupyterLab, but the deephaven-ipywidgets library provides the DeephavenWidget
function that displays the same responsive table grid as is available in the Deephaven Web UI. Most functionality, like
sorting and filtering, and organizing columns is available. However, dashboarding features like linked tables require
the Deephaven web UI.
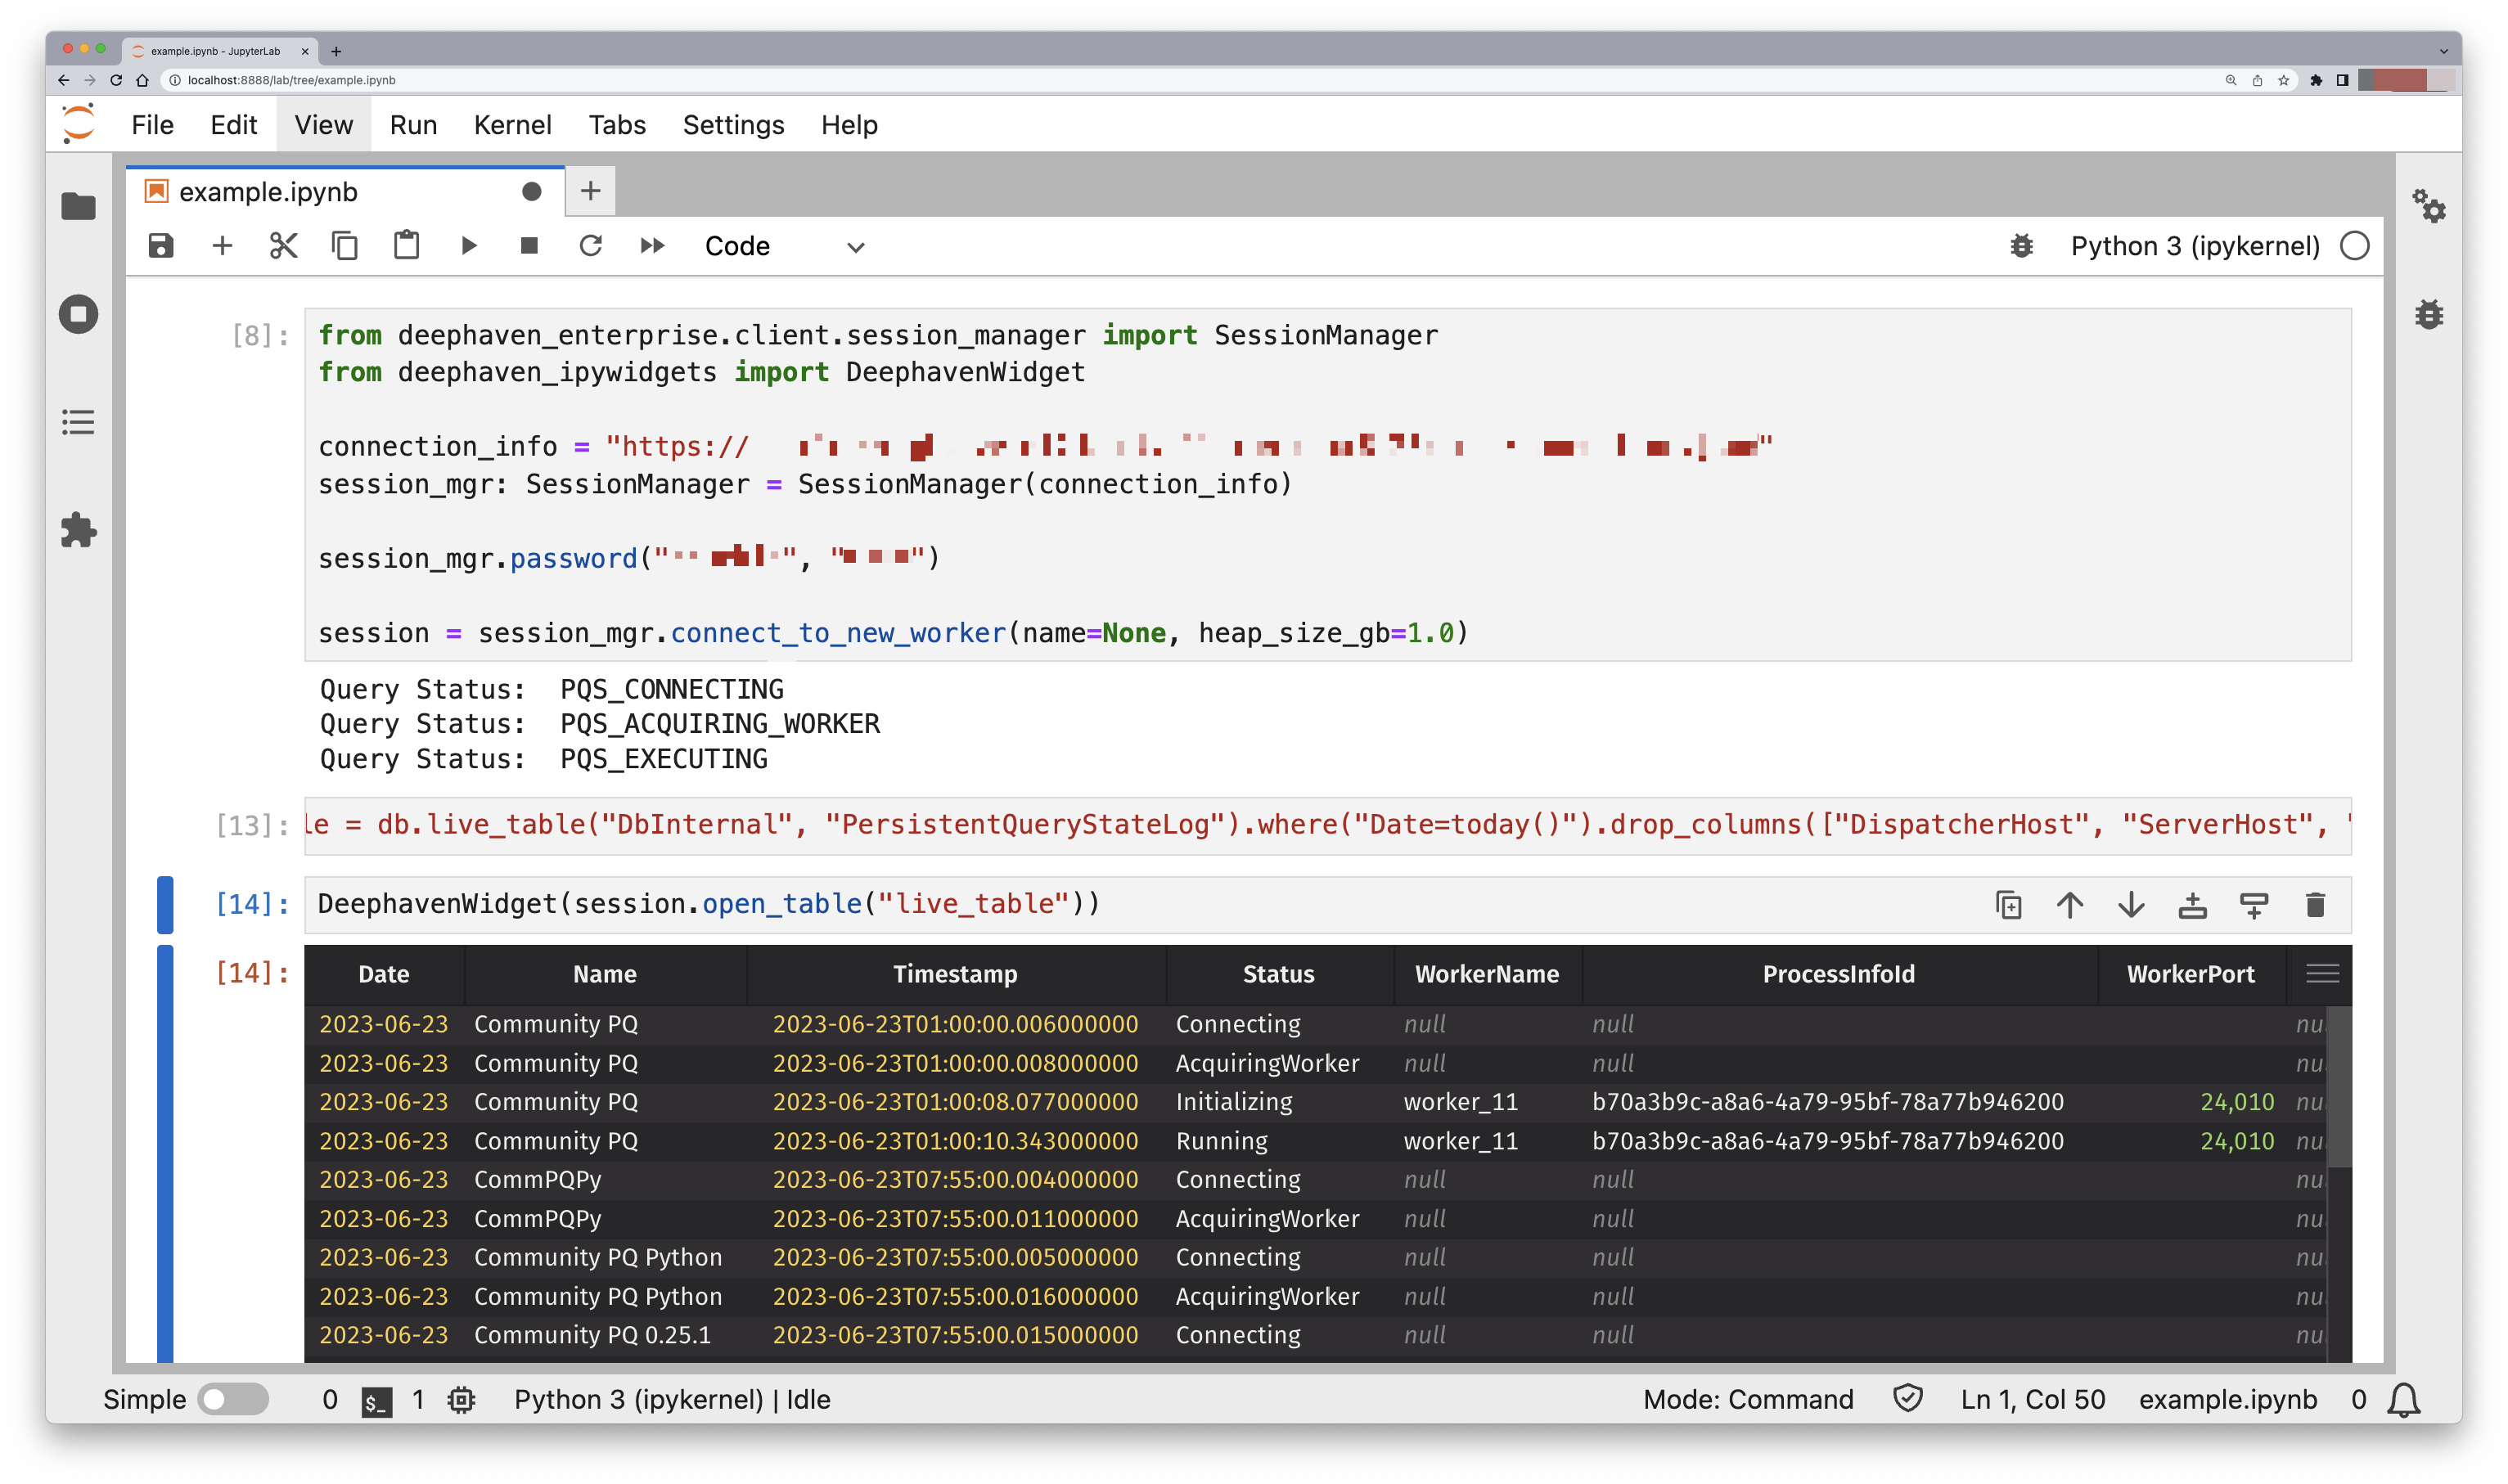
For example, the following script loads the DbInternal.PersistentQueryStateLog table and displays it as a Grid:
In your notebook, you may split operations into distinct cells. If you include session.close() in the same cell as
creating the widget, then you cannot see the table, because the widget requires the worker to be running in order to
display results. Executing the script as several cells produces a result like the following:
Displaying Server Side Logs in Jupyter
Any logging from the session.run_script commands exists on the server in the ProcessEventLog and can not be seen in the Jupyter client. The jupyter_logging package, available at /usr/illumon/dnd/latest/py/wheel/deephaven_jupyter_logging-1.20231218.432-py3-none-any.whl, contains the LoggedSession class, which fetches the STDOUT and STDERR server logs from the ProcessEventLog for the given commands.
