Fully automated trading with Deephaven and Interactive Brokers
Use Deephaven and IB to build your own fully automated market maker.
October 12 2022


Many of the world's largest and most profitable hedge funds, such as Renaissance Technologies, Virtu, Citadel, Two Sigma, Tower Research, and Jump Trading, use algorithms to determine when to buy and sell stocks, futures, bonds, options, and other securities. They have replaced human traders with emotionless computers that can act at speeds far beyond human cognition.
If you have a brilliant algorithmic trading idea, you no longer need to join a top hedge fund to trade it.
Using Deephaven and Interactive Brokers, a very popular brokerage in the quantitative finance world, you can build your own fully-automated trading strategy. All you need is deephaven-ib.
To illustrate the process, let's write a market maker.
"Market maker" may be an unfamiliar term, but the concept is straightforward. A market maker is a strategy that quotes both a buy and a sell price for a security, hoping to make a profit by buying at the low price and selling at the high price. Market makers typically turn over positions quickly, hoping to make a small amount of profit on each trade.
To learn how we put this dashboard and automated market making system together, read on.
Getting started
To get started, you will need to follow the directions on the deephaven-ib GitHub page to launch deephaven-ib.
Next, we need to:
- connect deephaven-ib to Interactive Brokers Trader Workstation,
- set our trading account,
- set our maximum position size, and
- set the length of EMA to use in predictions.
Click to see the code
Get IB real-time tables
Once that is done, it is time to get real-time input data tables from Interactive Brokers. Our market maker will need market prices, positions, and orders. All of this data is available in the deephaven-ib client.
Subscribe to market data
Next, it is time to subscribe to data for the securities we want to make markets in. In this case, we are requesting data for GOOG, BAC, and for AAPL. All three subscribe to market data from the Interactive Brokers Smart router. GOOG and BAC will place orders using the Interactive Brokers Smart router, and AAPL will place orders on the New York Stock Exchange (NYSE).
Click to see the code
Make predictions
Now that we have data, it is time to make some predictions. Our model is very simple. We use a 2 minute moving average to compute our predicted price as well as one standard deviation error bars (Bollinger Bands). We will place buy orders at the low price and sell orders at the high price.
Click to see the code
Automatically manage orders
Now we come to the cool part -- automatically generating and canceling orders. To do this, we create a Python function, update_orders, that uses the deephaven-ib API to cancel existing orders on a security and then place new orders at new prices. Because native Python functions can be used in Deephaven queries, update can be used to call update_orders every time the prediction for a security updates.
In our case, canceling and replacing orders every time the market ticks is overkill, so we use snapshot to downsample the predictions once a minute.
Click to see the code
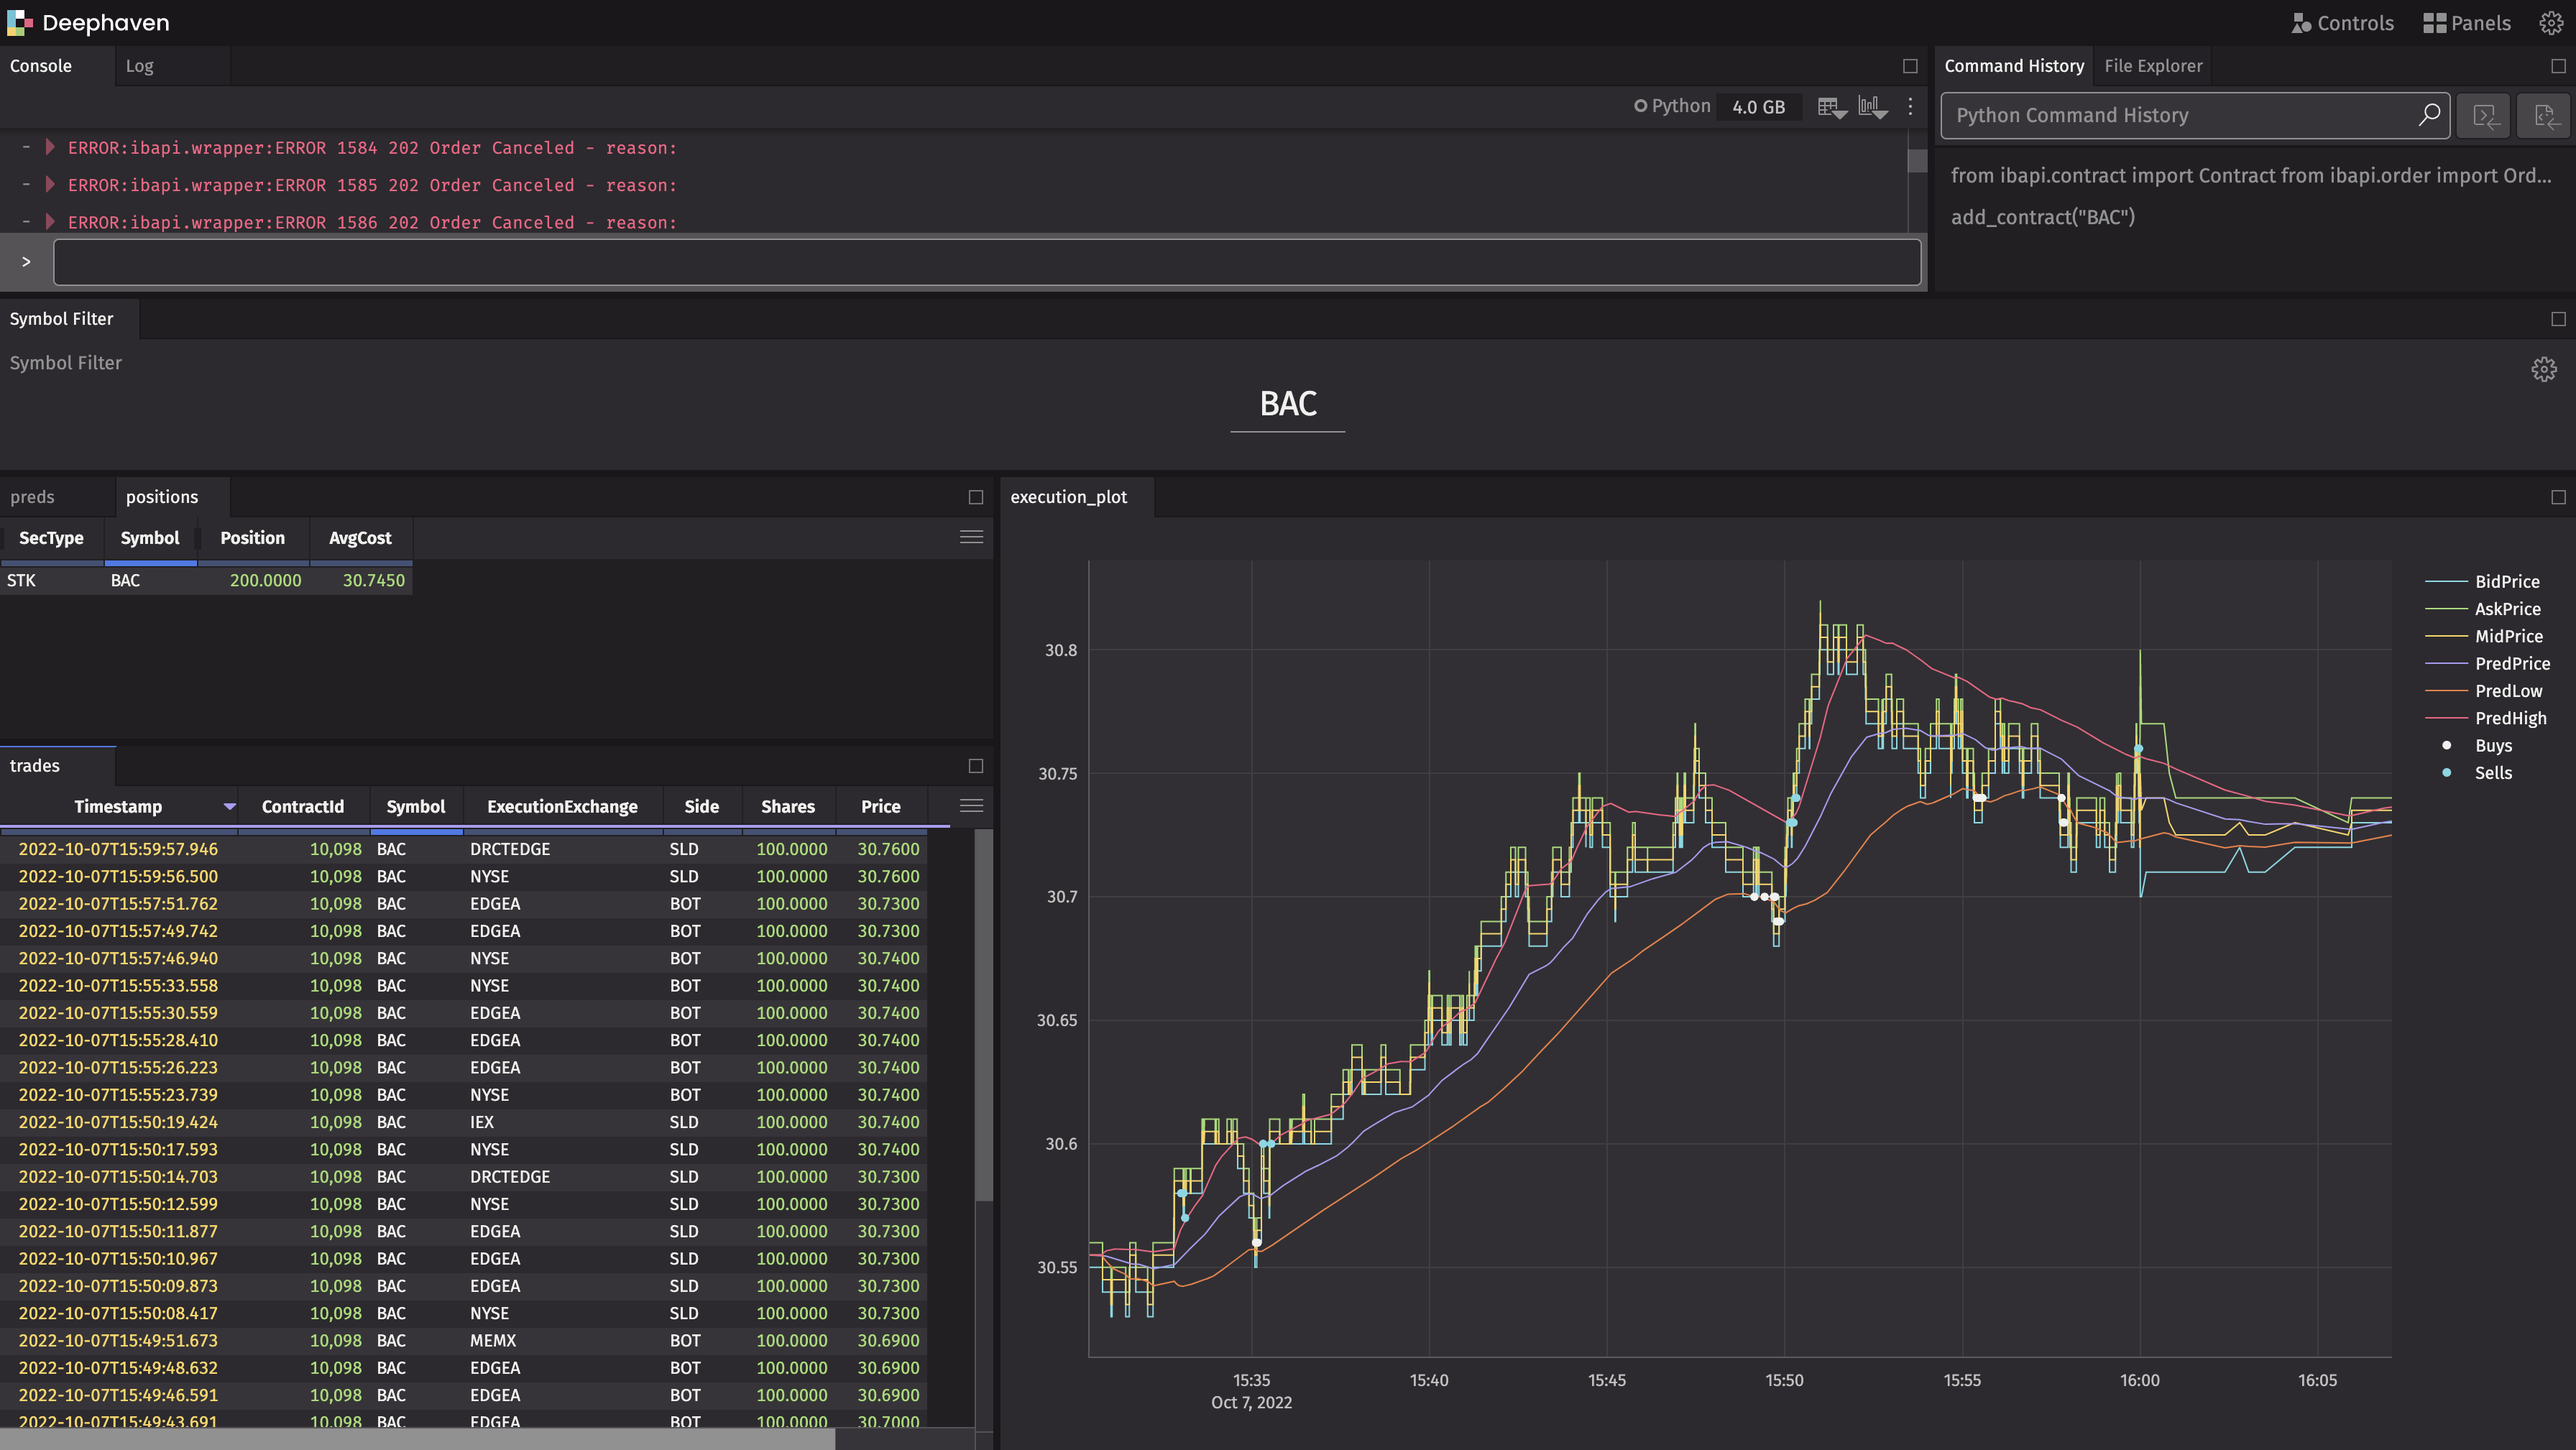
Analyze trades
Now, it would be very useful to understand how well the algorithm is working. To do this, let's plot the trades on the same axes as the predictions.
Click to see the code
You have now created your own fully-automated real-time market maker! It couldn't be easier.
Customize
What if you want to start market making AMZN? That's easy. You just need to run one line of code.
These same concepts can be used to develop algorithmic trading strategies that execute on Alpaca, BiNance, CoinBase, or any other exchange or broker that offers an API.
What algorithmic trading will you do with Deephaven? Tell us on Slack.