Get data
The Deephaven ribbon includes four buttons for getting and refreshing data from Deephaven. These are discussed individually below.
Getting Data from Persistent Queries

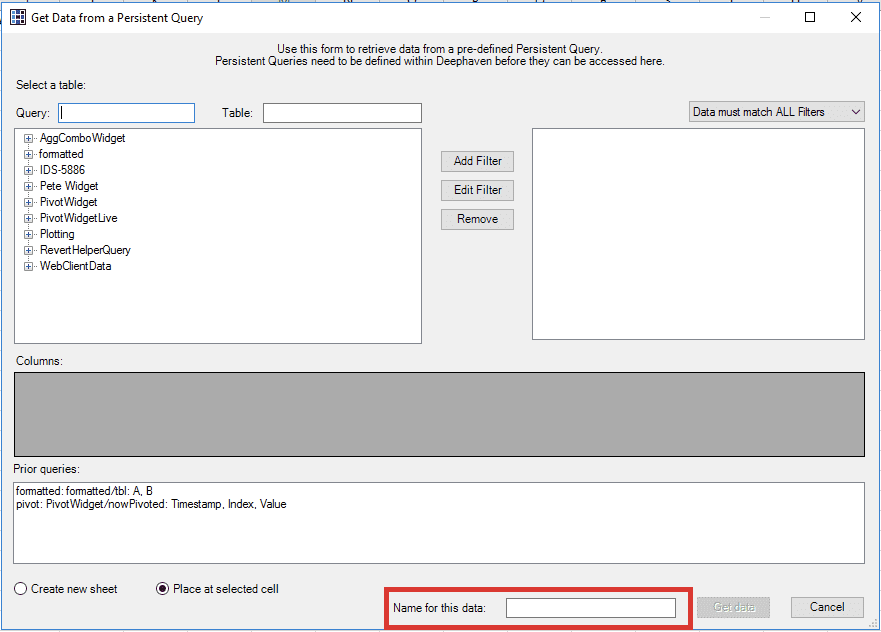
Selecting Get Persistent Query from the Deephaven ribbon opens the Get Data From a Persistent Query panel, as shown below:
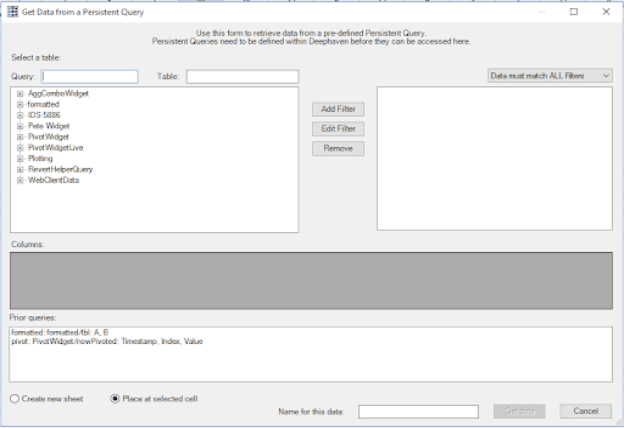
Once you have logged into Deephaven, the Get Data from a Persistent Query panel allows users to retrieve point-in-time data from existing, running Deephaven Persistent Queries. Even users who are not allowed to start consoles can still retrieve data from any Persistent Query they have been granted access to. (See Permissions).
Each section of the Get Data from a Persistent Query panel is discussed below.
Table Selection
The Select a table control lists all of the Persistent Queries available to that user. The tables generated by that Persistent Query are indented under the query name.
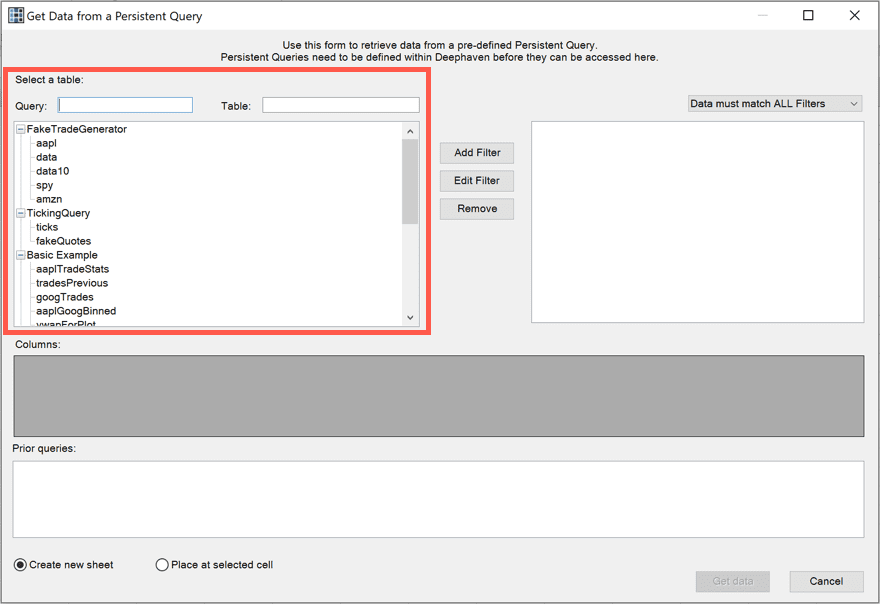
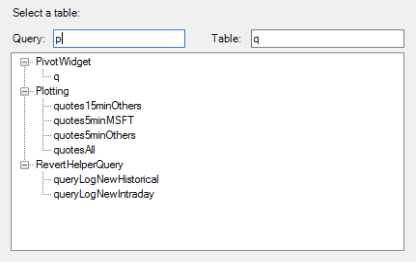
Above the list of persistent queries are the Query: and Table: search fields. These can be used separately or together to narrow the list results.
When you select a table from the Select a table control, the Columns section will be enabled.
Columns

After selecting a table, the Columns panel will populate with the name and order of each column in the selected table. To include a column in the derived data, the check box must be selected for that column. To omit a column, deselect the check box. At least one column must be checked. If your selected table includes predefined formatting, you will see columns with 'WTABLE_NUM_FORMAT' in their name unchecked; these columns include the formatting data for their related columns. Unless you explicitly need to retrieve your Deephaven formatting for use in Excel, you should leave these columns unchecked.
Additionally, you may drag and drop the columns to change their ordering on this panel, and the retrieved data will follow the order shown in the panel.
Filters
Once you select the Persistent Query, table and the columns of data, you can then filter that data using the buttons in the middle of the panel.
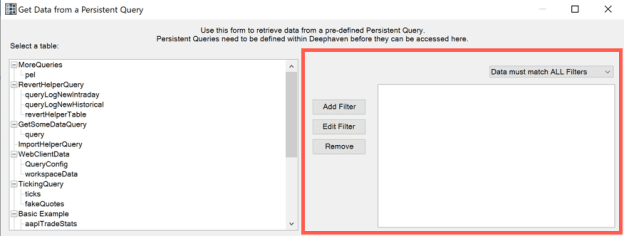
Once a filter is created, it will appear in the right side of the panel, as shown below.
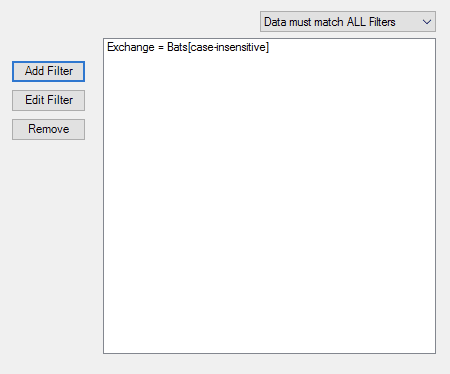
The Match Type drop-down menu in the upper right portion of the window is used to determine how multiple filters are to be applied.
The options are:
- Data must match ALL Filters (default) - When this is selected, the Get Persistent Query panel will return only rows where all the filter criteria are met separately (e.g., so if no filters are defined, all rows will be returned).
- Data must match ANY Filter - The add-in will return any row that matches at least one of the filter criteria (e.g., so if no filters are defined, no rows will be returned).
The following buttons are available:
- Add Filter - Opens the Filter Builder dialog, allowing you to define a new filter. (See Filter Builder.)
- Edit Filter - Once a filter has been created, this can be used to edit that filter.
- Remove - When an existing filter is selected and this button is clicked, the existing filter will be removed from the list of filters.
Tip
Double-clicking an existing filter is the same as clicking the Edit Filter button.
Prior Queries

At the bottom of the Get Data from a Persistent Query panel is the Prior queries field. This field will show previous operations performed while in the current workbook. Each prior query entry will list the user-created 'friendly name' (if any), the name of the query, the name of the retrieved table, a list of the columns retrieved, and a list of the filters applied.
Clicking a prior query will replace the values in the Get Data from a Persistent Query panel with the values from the prior query and creates a new query based on that prior query. Edits to filters or column selections will not affect the data previously loaded into Excel from the original query.
Caution
Note that deleting the data from your prior query will not remove the prior query from this list; if you wish to remove a prior query, you must use the Manage Workspace interface (see below).
Data Placement

These mutually-exclusive options appear on most of the data-retrieval panels.
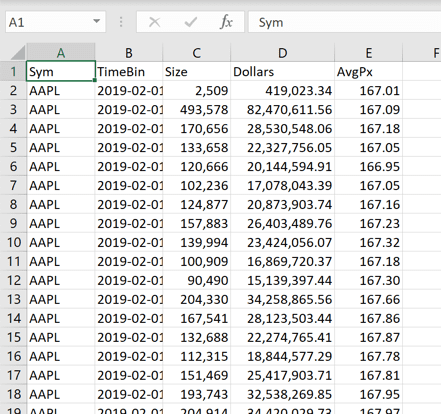
- Create new sheet - If this option is selected when you click the Get Data button on the panel, the Deephaven Excel Add-In will automatically add a new worksheet to your workbook and then place the data on that workbook, starting in cell A1.
- Place at selected cell - If this option is selected when you click the Get Data button on the panel, the Deephaven Excel Add-In will place the returned data at the currently-selected cell in the current worksheet. If multiple cells are selected, the upper-left cell will be the upper-left cell of the returned data.
You may optionally enter a name for this query (the "friendly name" mentioned above, which will appear in the Prior queries section, the Manage Workspace interface, and the Refresh Last interface, as a helpful reminder of what this query is for.
Once your selections have been made, click the Get Data button at the bottom of the panel to load the data into Excel.
Get Table Data

Selecting Get Table Data from the Deephaven ribbon opens the Get Table Data panel:
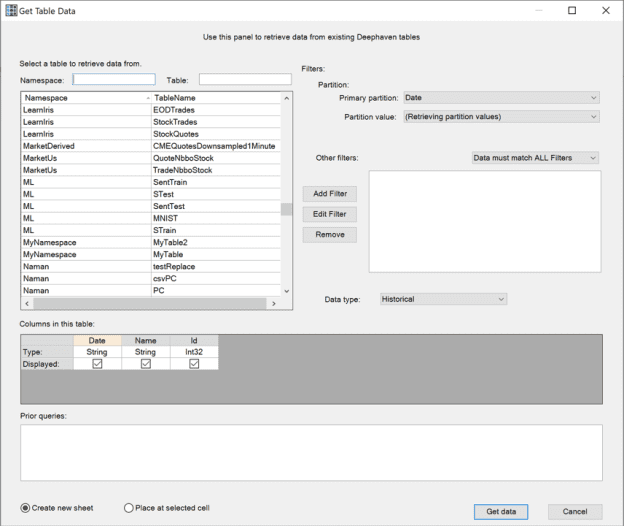
The Get Table Data panel allows the retrieval of data from any table within Deephaven that you are authorized to view/access. This panel is similar to the Get Persistent Query panel, but includes additional functionality. The options available in the Get Table Data panel are discussed below.
Table Selection
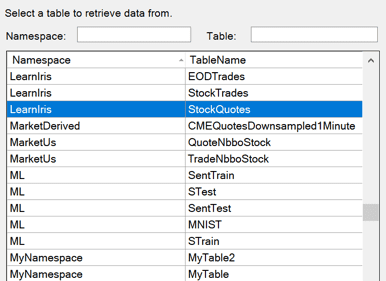
The Select a table panel allows you to select any table available in the system. Available tables are listed by namespace and table name. Both the Namespace and TableName columns can be sorted by clicking on the top row.
Above the list of tables are the Namespace: and Table: search fields. These can be used separately or together to narrow the list results.
Select a table by clicking on a row. Once you do, the applicable content will appear in the Columns panel and the Primary Partition panel.
Columns

The Columns in this table panel shows the columns from the selected table, along with the column type. To include a column in the derived data, the checkbox must be selected for that column. To omit a column, deselect the checkbox. At least one column must be checked.
Additionally, you may drag and drop the columns to change the order. Any retrieved data will follow the order shown in the panel.
Prior Queries

The Prior queries field shows previous operations performed while in the current workbook. Each prior query entry lists the user-entered "friendly name" (if any), the name of the query, the name of the retrieved table, a list of the columns retrieved, and a list of the filters applied starting with the primary filter (if any).
Selecting a prior query replaces the data in the Get Table Data panel with the values from the prior query, and creates a new query based on the prior query. Edits to filters or column selections will not affect the data previously loaded into Excel from the original query.
Primary Filter
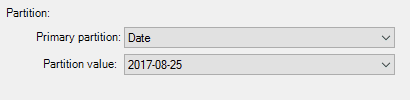
Some user tables have partition columns defined. For these tables, significantly improved performance can be achieved by filtering on one of the partition columns with a specific value from that column. The Primary Filter panel allows you to select any partition column, then filter on a known value for that column. You may also select ‘(no primary partition)’ if there is no partition column or if you do not wish to retrieve data from only one partition.
Other Filters
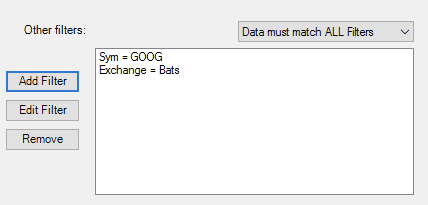
The Other filters panel allows you to select a subset of data from the selected table.
The match type drop-down in the upper right gives two options:
- Data must match ALL Filters - the Get Persistent Query panel will return only rows where all the filter criteria are met separately (so if no filters are defined, all rows will be returned).
- Data must match ANY Filter - the add-in will return any row that matches at least one of the filter criteria (so if no filters are defined, no rows will be returned). Manage your filters with the Add, Edit, and Remove Filter buttons (see Filter Builder below).
The panel on the right displays the list of all existing filters that have been constructed so far.
Tip
Double-clicking an existing filter will also open the Filter Builder dialog.
Data Type

The Data Type drop-down menu allows you to select between historical data and intraday data.
Data Placement

These mutually-exclusive options appear on most of the data-retrieval panels.
- Create new sheet - If this option is selected when you click the Get Data button on the panel, the Deephaven Excel Add-In will automatically add a new worksheet to your workbook and then place the data on that workbook, starting in cell A1.
- Place at selected cell - If this option is selected when you click the Get Data button on the panel, the Deephaven Excel Add-In will place the returned data at the currently-selected cell in the current worksheet. If multiple cells are selected, the upper-left cell will be the upper-left cell of the returned data.
Filter Builder
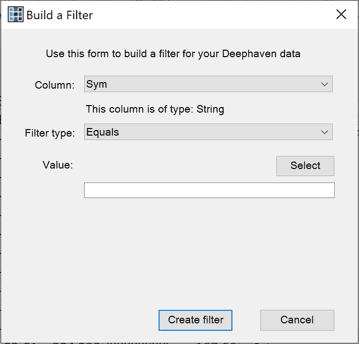
The Build A Filter dialog (or "filter builder") is used from the Get Persistent Query panel and the Get Table Data panel, allowing you to construct table-specific filters that restrict what data you get back from your query.
The filter builder includes the following fields:
- Column - This menu lists the columns that are returned from your selected table. You may filter on any column, with the filtering options restricted by the data type of the column, which is displayed under the drop-down menu. In the screenshot above, the AskSize column has been selected; its data type is shown as "Int32".
- Filter Type - The Filter Type menu lists the filter operations that are valid for the selected column. In general, the filter categories are ‘number’, ‘date’, ‘text’, and ‘other.’ Filtering options include:
- Equals: This operation may be performed on text, numbers, and dates. The value in the selected column must exactly match the chosen value.
- Equals (case-insensitive): This operation may be performed only on text columns. The value in the selected column must match the chosen value, ignoring letter casing.
- Not equals: This operation may be performed on text, numbers, and dates. The value in the selected column must not exactly match the chosen value.
- Not equals (case-insensitive): This operation may be performed only on text columns. The value in the selected column must not match the chosen value, ignoring letter casing.
- Greater than: This operation may be performed on numbers and dates. The value in the selected column must be greater than the chosen value. For dates, ‘greater than’ means ‘after’.
- Greater than or equal to: This operation may be performed on numbers and dates. The value in the selected column must be greater than or equal to the chosen value.
- Less than: This operation may be performed on numbers and dates. The value in the selected column must be less than the chosen value. For dates, ‘less than’ means ‘before.’
- Less than or equal to: This operation may be performed on numbers and dates. The value in the selected column must be less than or equal to the chosen value.
- Contains: This operation may be performed only on text columns. The value in the selected column must contain the chosen value exactly. The string ‘AaBb’ would match the filter ‘Contains aB’ but would not match ‘Contains AB’.
- Does not contain: This operation may be performed only on text columns. The value in the selected column must not contain the chosen value.
- In: This operation may be performed on text, numbers, and dates. The value in the selected column must exactly match a value on any one line from the Value textbox.
- In (case-insensitive): This operation may be performed only on text columns. The value in the selected column must exactly match a value on any one lin from the Value textbox, ignoring letter casing.
- Not in: This operation may be performed on text, numbers, and dates. The value in the selected column must not exactly match any value in the Value textbox.
- Not in (case-insensitive): This operation may be performed only on text columns. The value in the selected column must not exactly match any value in the Value textbox, ignoring letter casing.
- Is null: This operation may be performed on any column. The value in the selected column must be null.
- Is not null: This operation may be performed on any column. The value in the selected column must not be null.
- Value - This textbox will update itself depending on the chosen column and filter operation. For the
is nullandis not nulloperations, the Value textbox will not be displayed. For the variousinoperations, the Value textbox will allow multiple lines of free text entry. For numeric columns, the Value textbox will reflect a numeric entry panel, defaulting to a value of 0. For date columns, the Value textbox will reflect a date/time entry panel, defaulting to the time when the Filter Builder was opened. For text columns, the Value textbox will show a free-text entry area. - Select - This opens the cell chooser dialog, which allows users to set the filter value by clicking on one more cells in an open spreadsheet. If you are using a selected value rather than a fixed value, if you change the value in your selected cell, then refresh the data, the refreshed data will be based off of the current value in your selected cell, not the original value.
Running Custom Queries

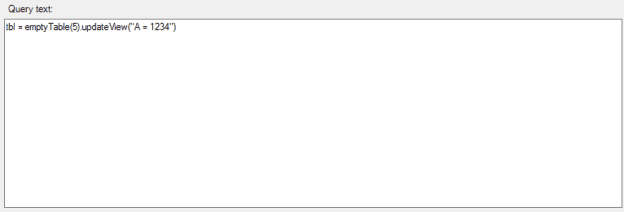
Selecting Run Custom in the Deephaven ribbon opens the Enter a Deephaven Query panel:

This panel allows you to enter queries in the Deephaven query language, similar to the way you would write queries in the Deephaven console or the Web interface.
This feature is only intended to be used for writing one-off, transient queries that will return a single table of data. However, the custom query panel is not a full replacement for the Deephaven console. For example, the Deephaven Excel Add-In does not handle Deephaven formatting (since Excel has its own formatting tools), does not produce Deephaven plots (since Excel has its own plotting methods), and other limitations.
The panel includes the following fields:
-
Query Text - This text field allows you to enter arbitrary commands, as though you were typing them into the Deephaven console. The same syntax and object access rules apply.
-
Table Name - This text field allows you to enter the name of the new table that should be returned to Excel.

-
Query Language - This drop-down menu allows you to specify the scripting language used to write your query. Currently, Groovy and Python are supported.

Refreshing Data
The Deephaven Excel Add-In includes Refresh options to make it easy to repeat a previous data pull, even if you’ve closed the workbook and re-opened it subsequent to the original data pull. To use the Refresh options, you must be logged into the Deephaven Excel Add-In, and into the same Deephaven server as the original data pull.
When using the Refresh options, your existing formatting choices in Excel will be replaced with the original Deephaven formatting, and data will be retrieved in the order defined by Manage Workspace (see below), which defaults to the same chronological order as when it was originally retrieved. If you require custom formatting, the recommended best practice is to have one sheet where raw Deephaven data is returned, then another sheet with formatting that links to cells within the raw data sheet.
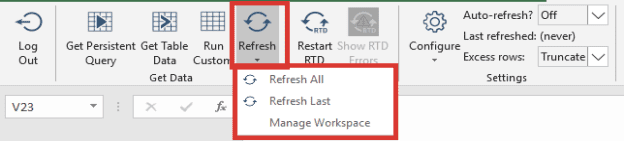
Refresh All
Clicking the Refresh button has the same effect as clicking Refresh All from the drop-down menu. Any data retrievals you have previously executed, anywhere in the current workbook, for the server you are currently connected to, will be repeated. Any queries that use cell references for filters will be repeated with the current value of those cells.
Refresh Last
Selecting the Refresh Last option in the drop-down menu will open the Select Tables to Refresh panel:
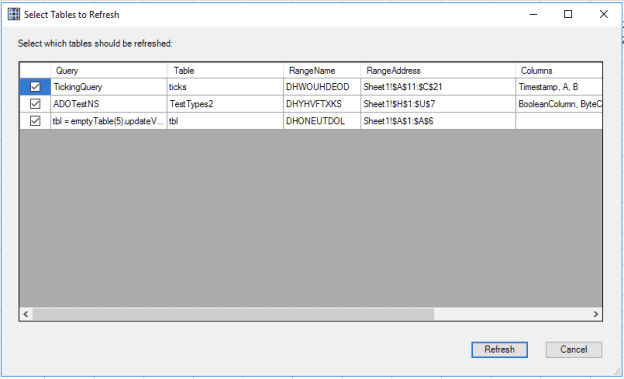
The Select Tables to Refresh panel allows you to selectively refresh any previously-run query from the Deephaven server to which you are currently connected. Any queries that use cell references for filters will be repeated with the current value of those cells. The following options are presented:
- Selection column: Any query with a checked box in this column will be refreshed. By default, only the most recent query is selected, but you may choose any queries you want.
- Query: For a Persistent Query, this is the name of the Persistent Query from which data was retrieved. For a custom query, this is the text of the custom query. For a user table, this is the namespace of the user table that was retrieved.
- Table: For a Persistent Query, this is the name of the table within the Persistent Query that was retrieved. For a custom query, this is the name of the table from the custom query that was retrieved. For a user table, this is the name of the table itself.
- RangeName: Each time you retrieve new data from the Deephaven Excel Add-In, the data is entered into a range. This is the randomly-generated name of the Excel range where the data from this query was placed.
- RangeAddress: This is the location of the range specified above, so you can easily identify where in your workbook the data is located.
- Columns: For Persistent Queries and user tables, these are the columns that were selected to be displayed, in the order they were output. Custom queries do not show anything here because you control the column output from within the custom query itself.
Manage Workspace
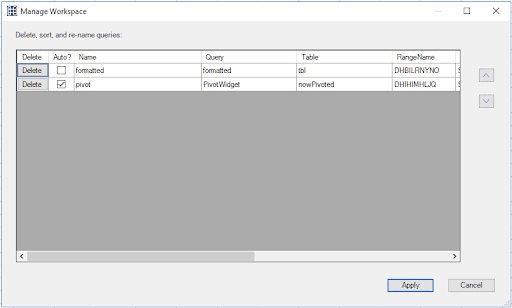
The Manage Workspace option allows you to manage the queries you've previously run from the Deephaven Excel Add-In. You can change the names of your queries, remove unwanted queries, change their sort ordering (which controls the order they will appear in the Prior Queries sections), and set queries to auto-refresh. After choosing which queries will auto-refresh, you still need to set your refresh frequency before refreshing will start.
- The Delete button in each row allows you to remove this prior query from your workbook entirely. Deleted queries will no longer appear in the Prior Queries box, Refresh Last, or Manage Workspace.
- The Auto checkbox allows you to specify whether this query should be included when auto-refreshing is turned on. By default, queries do not auto-refresh; they must be included on this page.
- The Name column allows you to view or edit the 'friendly name' for each query. This is a user-readable reminder of what each query's purpose is.
- The remaining columns are non-editable and display information about what data each query was retrieving, identical to the Refresh Last form.