Jupyter Lab’s Deephaven kernel
Jupyter Notebook is an open-source web application that allows you to write code in your prefered programming language, such as Python, to generate tables and visualizations, as well as text using markdown styles. After connecting to Deephaven's repository, you can access our Example Notebooks, or create and share your own that use Deephaven data.
You may wish to refer to Jupyter's full documentation for more details about the user interface and notebook features.
Note
See: You may wish to refer to Jupyter's full documentation for more details about the user interface and notebook features.
Starting the Deephaven Notebooks
Tip
Note: The Deephaven Jupyter dashboard also includes a version of these instructions in the README file.
In order to start and run the Deephaven Notebooks, you must have Docker installed and up to date on your local computer.
There are three primary ways to run a Deephaven notebook, as detailed below. We recommend using one of the two bash script methods, as the manual docker image requires more configuration.
1. Easy bash script
This is the recommended way to start the Deephaven notebook.
The bash script provided helps greatly in the initialization, configuration, and running of the Deephaven notebook. The script can be found at your web server's /notebook/start.sh path.
The simplest way to run the script is to invoke it as follows in your command line interface:
bash <(curl -Ss https://<web-server-host>/notebook/start.sh)
The <web-server-host> placeholder must be replaced with the particular name of the server you need to use.
This method will ensure that you are always using the version of the Deephaven notebook that matches the server's running version.
The default URL here is the base URL of the Web API: https://server-name-or-FQDN:8123. This would be the same URL, minus /iriside, that would be used to reach the Web UI from a browser.
If the Web API is running on a different port, or is being redirected through the envoy front proxy, then the custom port or envoy port will be needed here instead.
If the correct port is not provided, this command will usually return an error like:
/dev/fd/63: line 1: syntax error near unexpected token `newline'
/dev/fd/63: line 1: `<?xml version="1.0" encoding="iso-8859-1"?>'
After running your script, you will be prompted to enter your username and password. The command line interface will generate a URL with the appropriate token.
Copy and paste the URL that contains 127.0.0.1 into your web browser (Chrome, Safari, or Firefox) to open the Jupyter dashboard. Keep the command line interface open and running in the background as you access Jupyter.
2. Two-step bash script
More technically inclined users who prefer to inspect the script can download it before running it.
Download step (once):
curl -Ss https://<web-host-url>/notebook/start.sh > start.sh
Run step (as often as required):
bash start.sh
However, by invoking the Deephaven notebook in this manner, it will not be kept up to date with the server's running version. When such version changes become backwards incompatible, the download step will need to be repeated.
Additionally, the steps necessary to execute the notebook image, e.g. start.sh, will change over time. These changes will need to be monitored and incorporated when choosing this option.
After running your script, After running your script, you will be prompted to enter your username and password. The command line interface will generate a URL with the appropriate token.
Copy and paste the URL that contains 127.0.0.1 into your web browser (Chrome, Safari, or Firefox) to open the Jupyter dashboard. Keep the command line interface open and running in the background as you access Jupyter.
3. Manual Docker image
In order to run the Deephaven Notebooks in this manner, you must have Docker installed and up to date on your local computer.
The Deephaven notebook repository is deephaven/notebook. When manually starting up a Deephaven notebook, it's best to use the tag that is associated with the release of the Deephaven database you will be connecting to. Note that if you upgrade to a newer version of Deephaven, you will need to pull the current version of the Deephaven notebook repository.
The recommendations for initializing, configuring, and running the Deephaven notebook are encapsulated in the /notebook/start.sh script. This script will create three Docker volumes (one for notebook data, one for Deephaven configuration, one for Jupyter configuration), configure the volumes, and then run the image, similar to the following:
As you can see above, there is a fair amount of detail that the /notebook/start.sh encapsulates. For technical users / administrators who wish to invoke the Docker images manually, it is best to derive your workflow from the commands in /notebook/start.sh.
Note though, the script may be updated with each release, and administrators may need to update their custom workflows on any backwards-incompatible releases.
After running your script, the command line interface will generate a URL with the appropriate token.
Copy and paste the URL that contains 127.0.0.1 into your web browser (Chrome, Safari, or Firefox) to open the Jupyter dashboard. Keep the command line interface open and running in the background as you access Jupyter.
Configuration
If you chose one of the first two options using the bash script, your Notebooks will already be configured. However, you may wish to adjust the settings, such as worker heap size, via the .json file on the Jupyter home dashboard. If you chose the third manual Docker image option, you must modify the newly created configuration volume. This only needs to be done once per source.
From the dashboard, open the "config" folder, then the "deephaven.json" file:
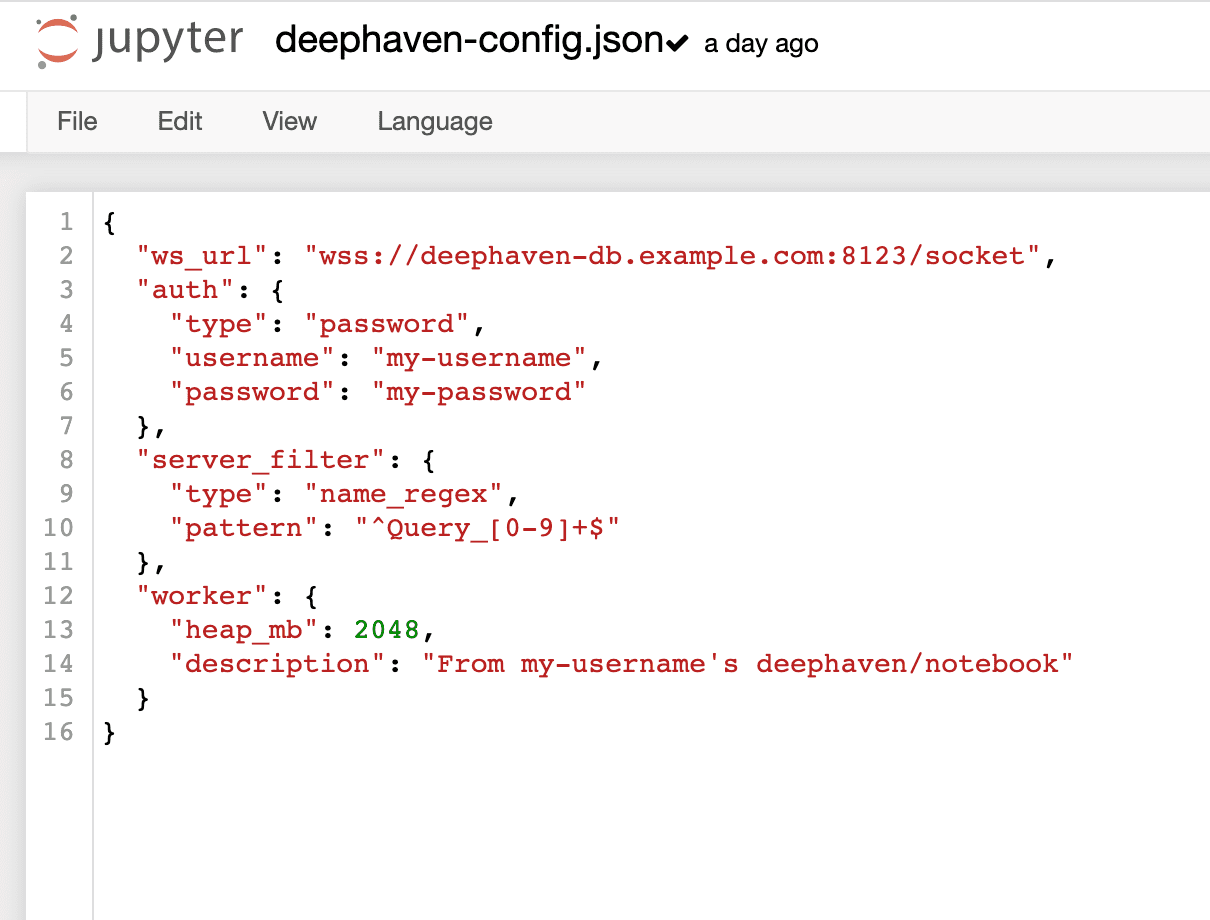
Configure the following:
ws_url: The websocket URL. This must be the appropriate web server API. However, if the system is reconfigured later (changing the API port or adding Envoy as a proxy in front of the API), existing users will need to manually update the configuration with the new port number and save it. If you use the two-step bash script from above, you will need to download the script again and run it to get the new configuration. If you used a manual docker image, you will need to manually update thews_url.auth: Enter your credentials. Note that this saved data remains on your local computer.server_filter: This is the Deephaven server your Notebooks will connect to; e.g., Query_1$, the nickname of the server rather than the actual server name.worker: Here you can choose a max heap size and enter a description for your notebook.
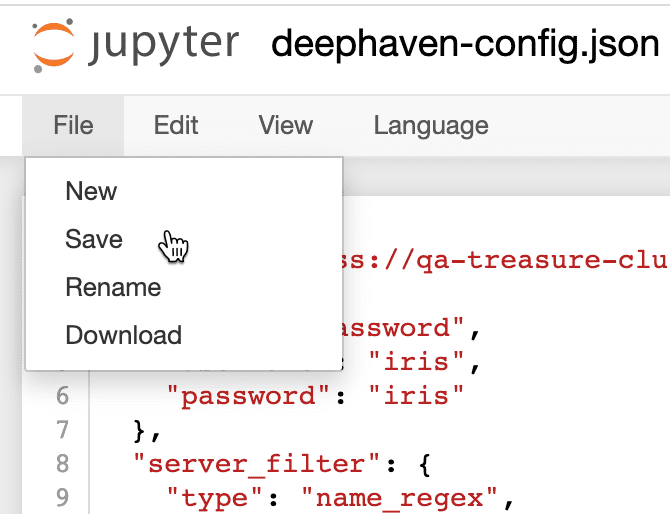
After you make your changes, save the .json file:
Dashboard
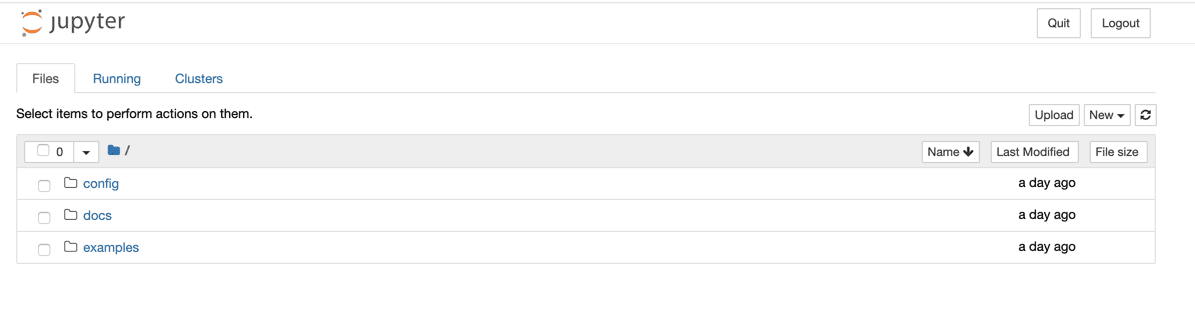
Once you copy and paste the URL into your web browser, the Jupyter dashboard will load:
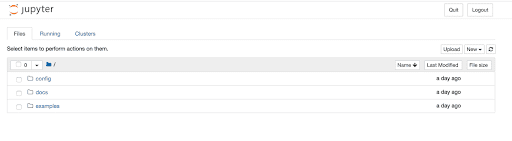
As shown above, your initial dashboard will open to the Files tab, which includes three folders:
- config - This contains the configuration file for your Notebooks. See Configuration above.
- docs - This contains the README document.
- examples - This contains example notebooks.
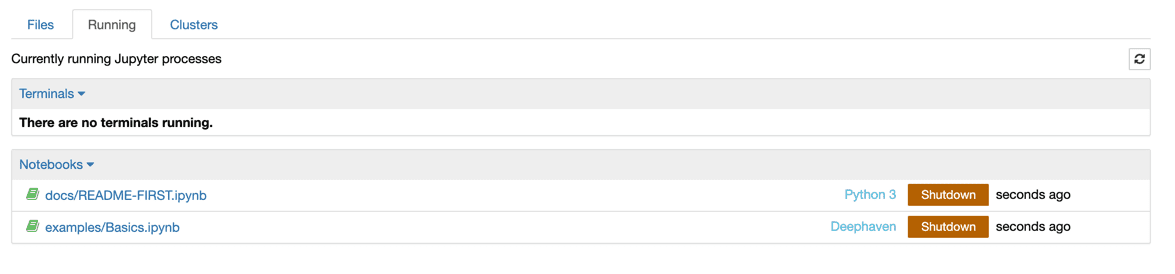
The Running tab shows any Jupyter processes currently running, with the option to shut them down. When you open the "Basics" example notebook, you'll see it listed here.
Using and Creating a Notebook
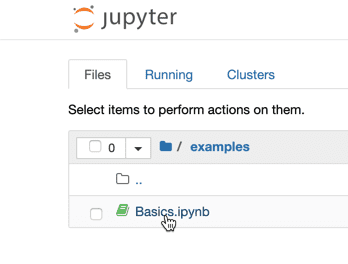
Let's start by opening the "Basics" notebook from the "examples" folder:
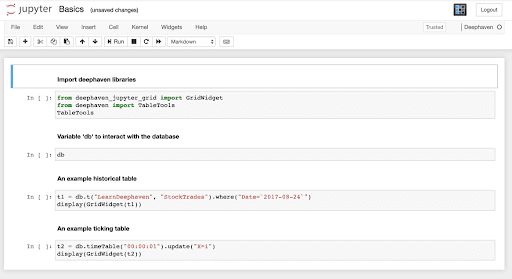
This notebook contains two simple examples of a historical table and ticking table, with the required imports to use these tools with the Python scripting language. Jupyter notebooks are composed of cells; in this case, we have four code cells and four markdown cells that create the informational headings.
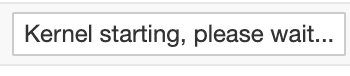
Before running any code, wait until the Kernel is connected. This status is displayed at the top of the interface (next to the Trusted icon), as shown below, but will disappear once successfully connected.
Note
You can also see these status updates in your command line interface.
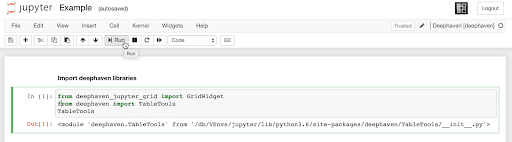
Next, you'll want to run the import statements first in order to successfully execute the rest of the code.
Select the cell (it will become highlighted in green) and then click the Run button:
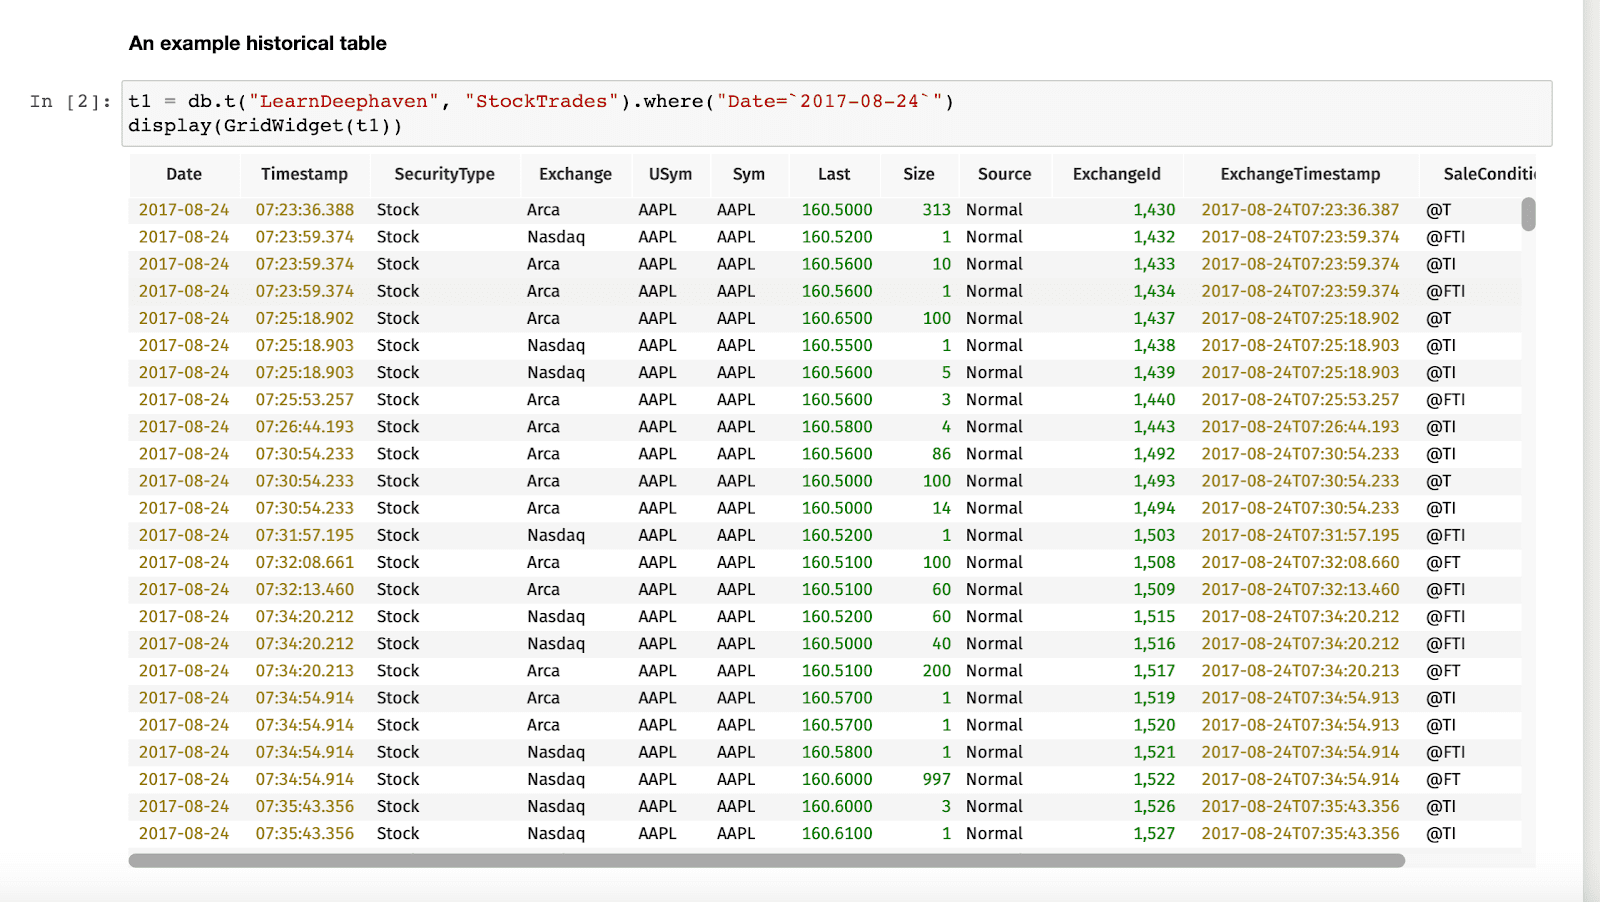
You can now run the other queries. For example, run cell three and the StockTrades table will open in your browser, which behaves just as any other Deephaven table - scroll through the data, hover over the column names to see statistics, right-click the headers to hide columns, filter, sort, or format the data.
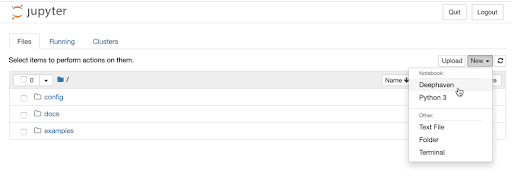
To create your own notebooks, return to the main directory within the Files tab.
Warning
Note that changes made to "docs" or "examples" directories are not persisted.
Click the New menu and select "Deephaven" to create a Deephaven notebook. A Python 3 notebook can be saved to your local computer; however, it will not connect to our server. You can also create new folders within this directory to organize your notebooks.
Once the blank Deephaven notebook opens, you can get started adding cells. For complete details about each option, please refer to the Jupyter documentation.
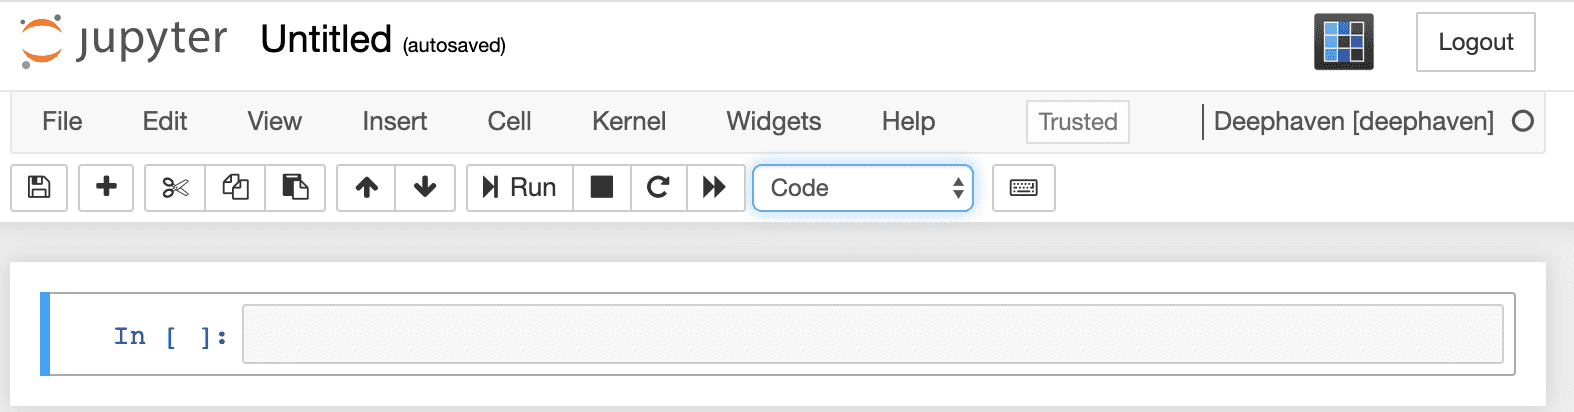
Rename your notebook by clicking "Untitled" and typing in your own title. Buttons to save your work, add, remove, copy, paste, and move cells run across the top left.
To change the type of cell, use the drop-down menu highlighted in blue:
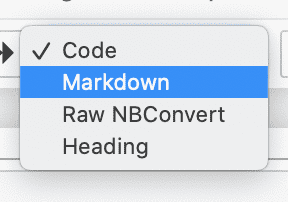
Code
A code cell can use any of the available Python methods using the Deephaven Query Language. At this time, plots are not supported. See Python Integration and Table Operations for more information.
Markdown
A Markdown cell can be styled using the Markdown syntax, and is useful for creating notes or headings. Examples of this syntax follows:
| Syntax |
|---|
| # Heading 1 Text |
| ## Heading 2 Text |
| ### Heading 3 Text |
This is **bold text** |
This is *italic text* |
> This is a block quote |
This is `inline code` |
 |
<img src="url" width="e.g., 250"> |
Additional styling options are available in Markdown, including code blocks, tables, links, lists, horizontal lines, etc.
Note
To learn more, please refer to Markdown Guide's Basic Syntax page.
Troubleshooting
Tags
The notebook tags are maintained on a per-version basis, and on a per-source basis. If your version of Deephaven has been updated, you'll need to update your initial Docker command to pull the Jupyter notebooks. Note that you'll also need to reconfigure your .json file. The current versions can be found in the README document.
The full list of tags can be found here.
Debugging
The following instructions use the command line to troubleshoot the notebook image.
Container bash:
Container bash with sudo:
The following script runs a command line interactive interface into the Deephaven kernel. This is useful for quick troubleshooting, such as to test out a quick command without requiring graphical output, or to test connectivity.
Deephaven terminal console:
Changes in credentials
By default, the container start script will (the first time its run) ask for credentials and store them in the local docker volume:
If the user needs to update their credentials, their choices are:
-
Override the config and embed username and password in it as shown in example above.
-
Delete their Docker configuration and download a fresh container:
docker volume rm {reverse-domain}.jupyterdocker volume rm {reverse-domain}.kernels -
Edit the hidden file in the browser:
http://127.0.0.1:8888/edit/config/.auth.json
Retrying a failed connection
If something goes wrong, you might need to terminate and restart your connection (e.g., you mistyped your password, etc.). You can nuke KERNELS_SOURCE and JUPYTER_SOURCE:
docker volume rm <kernels_source>docker volume rm <jupyter_source>
For example:
There are three different volumes that are mounted:
WORK_SOURCE=${WORK_SOURCE:-io.deephaven.work}- where the user’s notebooks are stored (and it is shared among all systems they connect to).KERNELS_SOURCE=${KERNELS_SOURCE:-your.server.kernels}- where the connection info to DH is stored.JUPYTER_SOURCE=${JUPYTER_SOURCE:-your.server.jupyter}- where the Jupyter notebook config is stored.
Notice that KERNELS_SOURCE and JUPYTER_SOURCE are based on the server you are connecting to.
Note
After deleting your Docker volumes, your notebook data will not be deleted.