Swing Input Tables
Input Tables are user-modifiable database tables. Much like a spreadsheet, Input Tables are used to store user-provided data, which can then be used to drive calculations. Data in Input Tables can be added, changed, or removed instantaneously, either manually in the user interface or automatically via the Java API.
Note
To learn more about the query methods, see Input Tables
Once you have created an Input Table in Deephaven Classic, you can edit the table as follows.
Table shortcuts
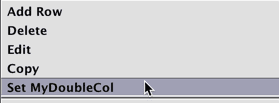
To add a row to the Input Table, right-click either the table header or the body of the table. The right-click column menu and the right-click table data menu will show Add Row. Note: if you have not added any rows to your table yet, right-click the column header.
| Column header menu | Table data menu |
|---|---|
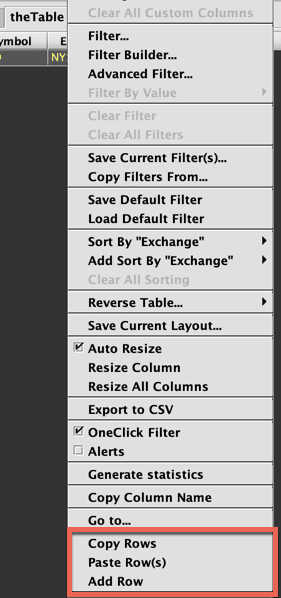 | 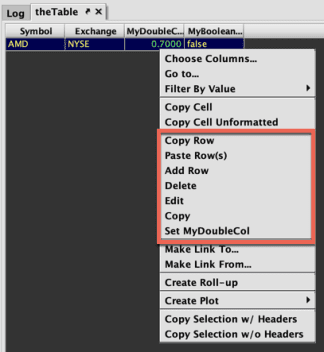 |
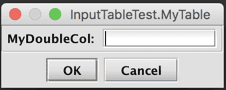
Selecting Add Row opens a dialog window that identifies the Input Table and its namespace, and provides fields for each column in the Input Table.
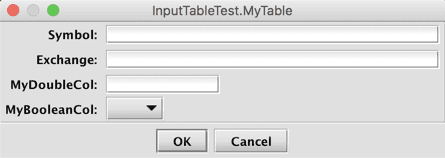
Type in the information desired for the new row:
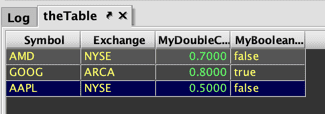
A new row will be added to the table.
Paste Row(s)
To paste one or more rows from a spreadsheet created in another program into an Input Table, first copy the data from the other program, and then right-click either the table header or the body of the table. The right-click column and table menus will show Paste Row.
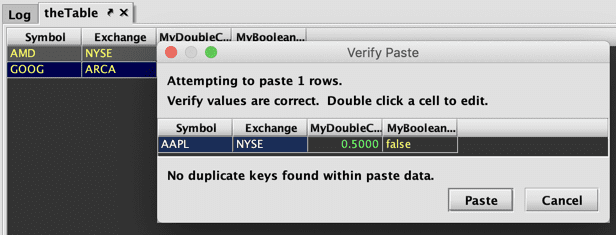
Selecting Paste Row opens the Verify Paste dialog opens with a preview of the additions to the Input Table. This action cannot be undone. If the data is correct, click Paste.
Copy Row(s)
You can copy rows from the Input Table into a spreadsheet outside of Deephaven. Select the row you wish to copy and right-click either the table header or the body of the table. Select Copy Row. The highlighted data will now be available on your clipboard.
Edit Rows
The table data menu for the value columns in your Input Table provides additional options:
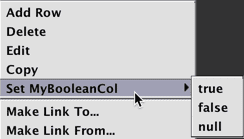
Set
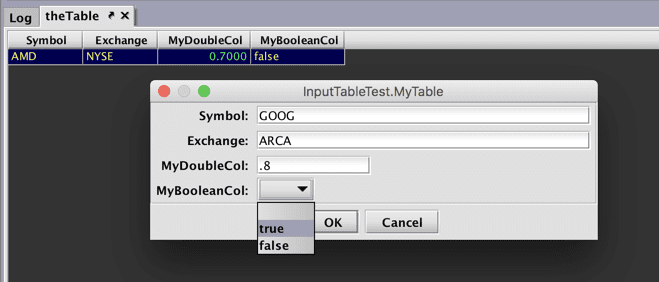
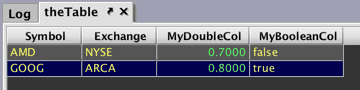
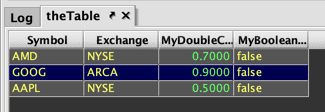
The data in value columns can be manually set using the table data menu. When setting a row, the options available depend on the value type of the column. For example, when the MyDoubleCol cell in the GOOG row is right-clicked, the following menu appears:
Selecting Set MyDoubleCol opens a dialog that allows you to manually input values in that row:
For example, a user can change the value from the previously added row from 0.8 to 0.9.

Clicking on a cell in MyBooleanCol opens a similar right-click context menu. In this case, users can select from options presented in a drop-down menu to set the row value.
In this example, MyBooleanCol for GOOG changes from "true" to "false".
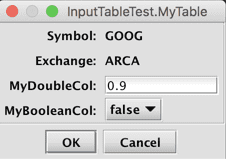
Edit
Selecting Edit Row opens a dialog that presents fields for each value column in the Input Table. In this case, users may type a value for MyDoubleCol and choose from the available options for MyBooleanCol.
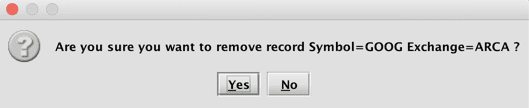
Delete
Selecting Delete Row will open a dialog prompting you to confirm whether or not you wish to delete a particular row in the table.
Live Input Table Editor
Another option to make editing your Input Table is to add a Live Input Table Editor (LITE) to the table. The following lines tell Deephaven where to import the class, and then add specify the variable of our table (theTable):
Tip
You can run these lines directly from the console. If added to a persistent query, "LITE" will appear in the Show Widget menu in the Query Config panel.
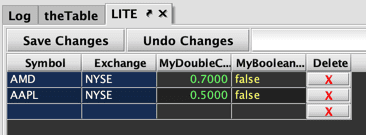
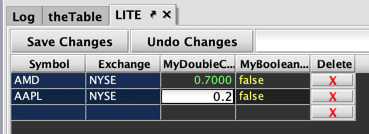
The value column cells of the Input Table can be edited directly. For example, clicking MyDoubleCol in the second row allows a value to be typed directly into the cell:
Clicking MyBooleanCol opens a drop-down menu:
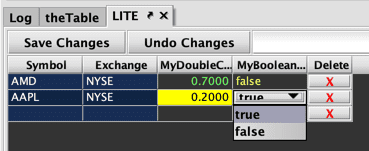
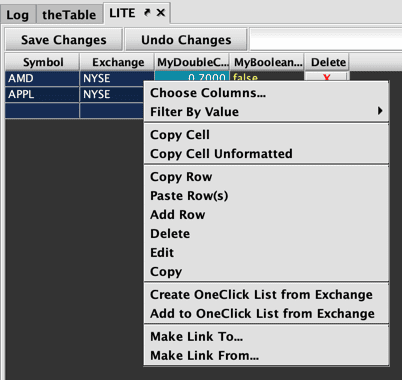
Pending changes made to individual cells will be highlighted yellow in the table:
- Select Save Changes to permanently accept the edits.
- Select Undo Changes to remove any pending edits and revert to the previously saved version of the table.
The right-click menus offer the same options to edit the Input Table as discussed above. However, one additional option is available in the right-click table data menu for key columns. Selecting Create OneClick List from [ColName] opens a dialog to name a new OneClick list:


Clicking OK will add the value in the selected cell to a new OneClick list, which will be available in the OneClick List Manager. For example, if the ARCA cell is right-clicked, ARCA will be added to the OneClick list named "LITE." Once a list is created, the right-click table data menu will include an option to add to the list:
Note
Tip
In order to sort columns in LITE, use the column header right-click menu.
Set Input Table permissions
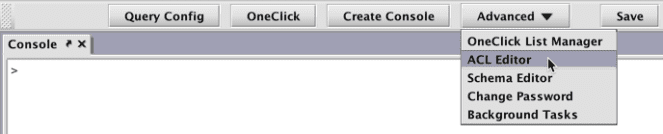
The ACL Editor in the Deephaven console allows authorized users to configure access to the Input Table(s). To review or edit these permissions, click the Advanced button at the top of the console, then select ACL Editor.
You will be prompted to enter a new panel title.
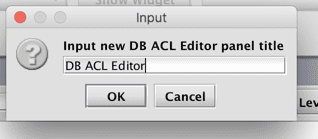
Click OK. When the DB ACL Editor panel opens, navigate to the Input Tables tab.
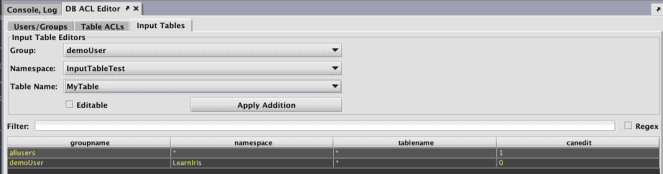
Choose which groups of users are authorized to write to the Input Table. Locate your Input Table using the Namespace and Table Name drop down fields.
In the example below, the group demoUser will be granted access to MyTable. Click Apply Addition to make the changes.
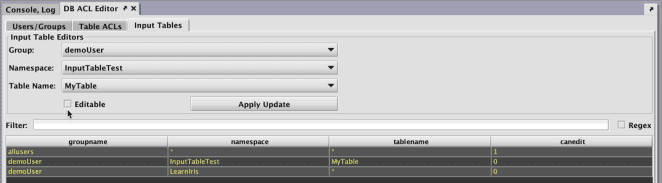
Now any user in the demoUser group can view MyTable. However, the column "canedit" shows 0, which means these users cannot edit the table. Selecting the Editable checkbox allows users to write to the table.