OneClick filtering
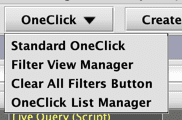
The OneClick button at the top of the Deephaven console offers the following menu items:
The OneClick features filters all the tables and/or plots that it is paired with in your workspace with one click. It must be nested within the same panel group as the objects that you wish to filter.
OneClick
To initiate the process, click OneClick at the top of the Deephaven interface and select Standard OneClick.
Next, nest the OneClick panel within the panel containing the data you want to interactively filter:
To filter the data in the table with the OneClick filter, you first need to select the name of the column to be filtered. In this case, we want to filter the data in the USym column, so there is no need to change that value in the Column list. We can then enter the value in the Set Filter field, and press the Enter key.
In the example below, the table is filtered from "GOOG" to "IBM" to "MSFT" in a matter of seconds:
You can also type a OneClick List name into the Set Filter field.
Note
The OneClick panel will also filter plots with a SelectableDataSet within its panel group.
Note
See: OneClick on plots
The OneClick panel filters ALL the tables and dynamic plots nested in the same panel group. However, there may be times when you do not want to apply the OneClick filter on some of the tables contained in the panel group. This can be accomplished by disabling OneClick on specific table(s).
Note
Additional Options
When you right-click in the panel, additional options are presented:
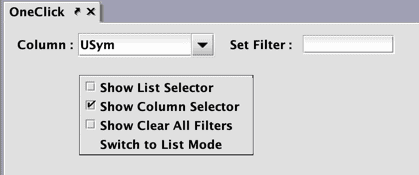
These are discussed below.
Show List Selector
When Show List Selector is selected, the OneClick panel enables content filtering based on the values in a OneClick List. You can filter the content of the shared workspace on all values in the list (collectively) or by cycling through individual values in the list one at a time. See: OneClick List Manager
Show Column Selector
When Show Column Selector is selected, the OneClick panel enables content filtering based on the values entered in the Column field and the Set Filter field.
For example, to filter the shared workspace on a single value, select or enter the name of the table's column in the Column field, and then enter the filter value in Set Filter field. After pressing Enter, the table(s) and/or plot(s) contained in the shared workspace will be filtered to the value entered.
Show Clear All Filters
When Show Clear All Filters is selected, the OneClick panel will include a button that clears all filters for all items paired with the OneClick panel, such as Tables, Pivot Widgets, and Charts.

Switch to List Mode
When Switch to List Mode is selected, you first need to select a OneClick List from the drop-down menu. See: OneClick List Manager
Note
If a OneClick List has not yet been created, there will not be any options available for selection in the List drop-down menu.
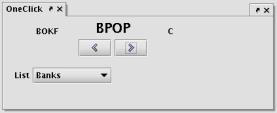
Once a OneClick list has been selected, the values from that list are presented individually. You can cycle through each individual value in the OneClick List by clicking the left arrow or right arrow buttons under the value. Each time you change the value, the workspace is filtered to that individual value.
Switch to Text Mode
When Switch to Text Mode is selected, you also need to select a OneClick List from the drop-down menu.
Once a list is selected, the content in the table of shared workspace will be filtered based on all of the values contained in the OneClick List selected.
OneClick on plots
When using the OneClick feature to filter a plot (or plots), the data source must be a SelectableDataSet. This is easily accomplished with the use of the oneClick method:
.oneClick(source, "ColName1", "ColName2", ...)
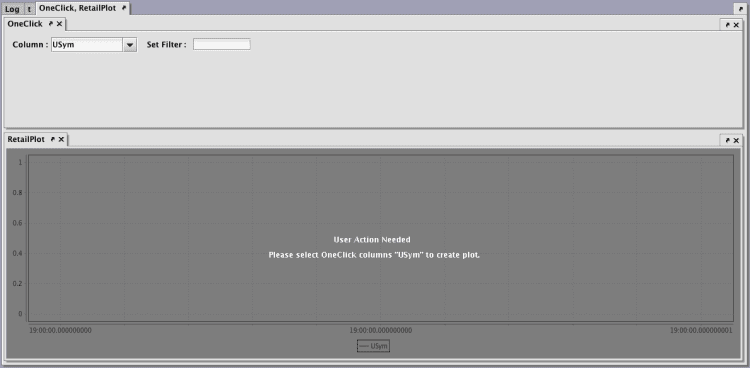
In the example below, the oneClick method is applied to the source table t, and the argument specifies the column USym should be enabled for OneClick filtering. The OneClick SelectableDataSet is saved to the variable toc; however, toc is not visible in the console.
When the query runs, a panel named "RetailPlot" is presented in the console. The data used to generate the plot is a SelectableDataSet, so no data shown until a OneClick filter is initiated.
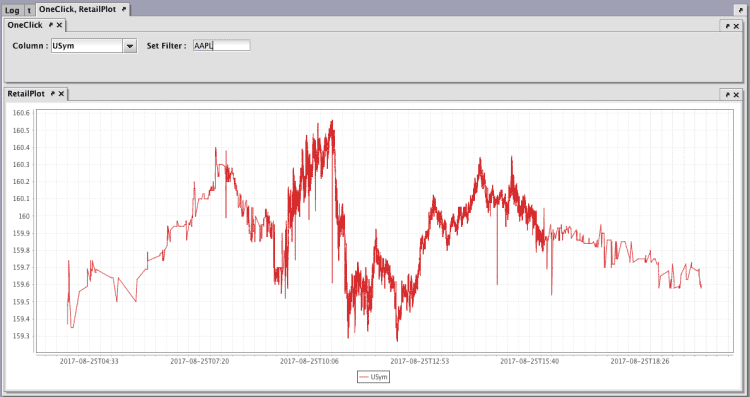
Once an appropriate value is entered into the OneClick filter, the plot for that USym appears.
OneClick on multiple values
The OneClick panel can be used to filter on multiple values. These values can include multiple individual values, OneClick Lists, or a combination of both.
To filter on multiple values, type the first value into the Set Filter field and press Enter. To add an additional value, first hold down the Ctrl key and then press Enter. Your content will then be filtered on both values entered.
You can add additional filter values by repeating the same steps.
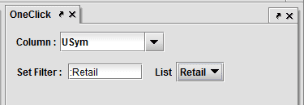
You can also nest multiple OneClick panels to filter the same table. For example, the example below pairs both a standard OneClick filter and a OneClickList filter to the StockTrades table:
OneClick filtering with Lists
OneClick can be used to filter your data based on the values contained in lists that you create, called OneClick Lists.
To add a List drop-down menu to your panel, right-click within the panel and select Show List Selector. When the List drop-down menu appears, click on the down arrow and select the list with which you want to filter:
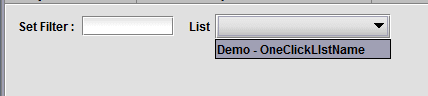
When you release the mouse, the data paired with the OneClick filter will be filtered with the respective content of the OneClick List selected.
You can type a OneClick List name into the Set Filter field usiing the OneClick List prefix, which distinguishes a OneClick List name from an individual value. The default value for the prefix is a colon (:). This can be changed in Settings.
For example, to use the list named "Retail" in the Set Filter field, you would type ":Retail".
There are two ways to create a OneClick List:
- Using the OneClick List Manager. See below.
- From values in a table.
Creating a OneClick List from Values in a Table
You can create lists directly from the data in a table. First, click and drag your mouse over the table to highlight the values you want to include. (Note: Entire rows will be highlighted as your drag your cursor over the table. However, the OneClick List is created using only the values in the first column in which you originally clicked.) Release the mouse after you've highlighted all of the values to be included. Then right-click in the highlighted area and select Create OneClick List from [column name] in the drop-down menu. In the example below, you would select Create OneClick List from USym.
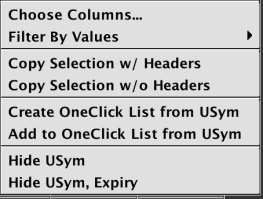
As shown above, you can also add to an existing OneClick list in the same manner by selecting Add to OneClick List from [column name].
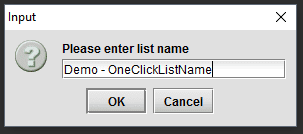
First, enter a name for your new list, then click OK to open the OneClick List Manager.
Filter using both individual values and OneClick Lists
If you wanted to filter the workspace based on two individual values and one OneClick List, you would do the following.
For this example, we will assume the individual values are AAPL and GOOG, and then add a OneClick List called TechStocks.
- The Column value is set to USym, so you would type AAPL into the Set Filter field and press Enter. To filter on the additional individual value, type GOOG into the Set Filter field, hold down the Ctrl key and then press Enter. Your workspace is now filtered on the two individual values of AAPL and GOOG.
- To include the values in the OneClick List, type ":TechStocks" into the Set Filter field. This is the OneClick Prefix (a colon) followed by the name of the OneClick List. Then, hold down the Ctrl key and press Enter. Your workspace is now filtered to AAPL, GOOG, and the values found in the OneClick List named TechStocks.
Settings
Changing the default column for OneClick filtering
When you first use the OneClick feature in Deephaven, "USym" is used as the default value in the Column drop-down menu.
You can change the value contained in that field by either typing a new value into the field or by using the drop-down menu to select a different value. However, you can also change the default value.
To change the default value used, click Settings at the top of the Deephaven interface and then type in a new value in the field labeled Default OneClick Panel Column:

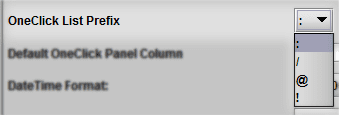
Changing the Default OneClick List Prefix
The OneClick List prefix is used to distinguish the list from an individual value. The default value for the prefix is a colon (:). For example, to use the list named "ListOne" in the Set Filter field, you would type ":ListOne".
You can change the default OneClick List prefix symbol by clicking Settings at the top of the Deephaven interface, and then selecting a different option as shown below:
Disabling OneClick filtering
OneClick filtering is, by default, enabled for every table in Deephaven.
OneClick can be disabled on any table by right-clicking anywhere in the header column for the table, and then deselecting the OneClick Filter check box as shown below.

To re-enable the OneClick filter on a given table, right-click in the column header and select the OneClick Filter check box.
Note
See also: Configuring OneClick Restrictions
Filter View Manager
Deephaven's Filter View Manager allows users to save a collection of filters, called Filter Views, across an entire set of panels. This makes it easy to apply different filters to a variety of panels in the same group all at once. Filter Views provide a finer degree of control over the various filters applied, and also expedites restoring filters across all panels. As with a OneClick panel, the Filter View Manager panel must be paired with the tables for the Filter Views to be applied.
First, select Filter View Manager from the OneClick drop-down menu:
Next, pair the Filter View Manager with the desired content you want to filter. To do that, locate the tab with the table(s), then click, hold and drag the FilterManager tab over to the active panel and release the mouse. The two panels have now become embedded in the same panel group.
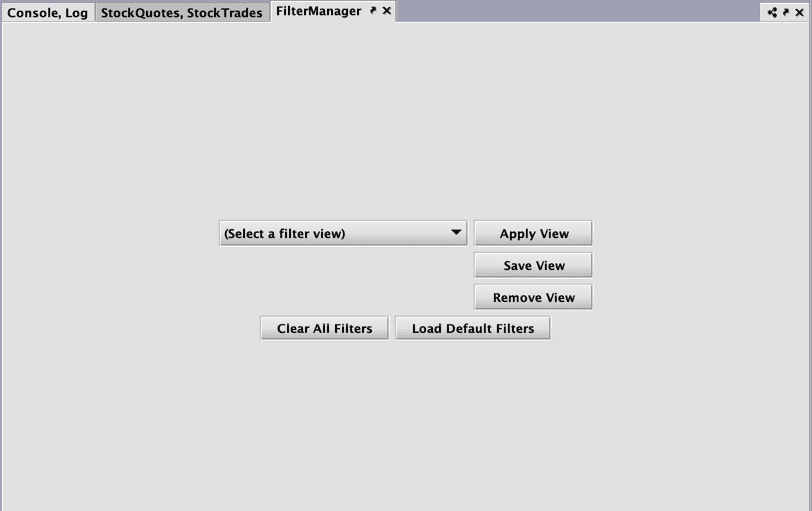
Once the FilterManager tab is nested into a panel group, it can be used to save, remove, and reload various Filter Views that you create. The filters selected will apply to all panels nested together, and will not affect views on any other top-level tabs.
The Filter View Manager will save any filters applied to your panel group as a set, including OneClick filters and filters applied per column. Each button is described below.
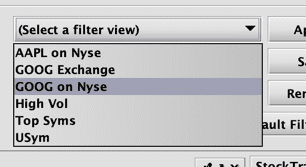
Select a Filter View
Select a Filter View shows all of the Filter Views that have been created thus far, with the names the user has given them.
Save View
The Save View button allows a user to save all of the filters in place in the panel group with a descriptive name. This makes it easy to restore that set of filters later. Multiple different Filter Views of this sort can be saved, allowing for quick switching between views of the same data.
Apply View
Apply View will replace the current filters in your panel group with the filters defined in the Filter View indicated in the Select a Filter View drop-down. Note that if you have added new tables since the Filter View was created, those new tables will not be affected; the Filter View has no effect on tables that did not exist when it was created. If a filter saved in a Filter View was triggered by a OneClick panel, loading that Filter View will not reopen a closed OneClick panel, although it will reapply the most recent associated filter.
Remove View
Remove View will remove/delete the Filter View indicated in the Select a Filter View drop-down menu.
Clear All Filters
Clear All Filters will clear all filters from the panel group, the same as the Clear All Filters button on the OneClick panel. A separate Clear All Filters panel, available from the OneClick drop-down menu at the top of the interface, can also be added to the workspace.
OneClick List Manager
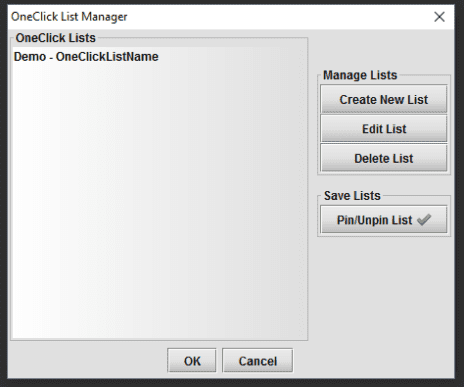
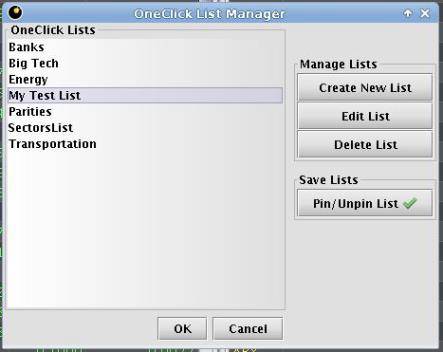
The OneClick List Manager is accessed from the OneClick drop-down at the top of the interface.
The OneClick List Manager includes a list of all existing OneClick Lists on the left side (if there are any). On the right side of the window, there are options to Create, Edit, Delete, and to Pin/Unpin List.
Create New List
After clicking Create New List, the following dialog window will open:
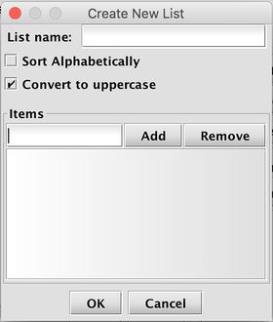
- Enter the name of the new list.
- Select the Sort Alphabetically check box if you want the contents of the list to appear in alphabetical order.
- Select the Convert to uppercase check box if you want all of the list values to be converted to uppercase. This is particularly useful when all of the values in a given column are already presented in uppercase (e.g., USym column). If the check box is not selected (or deselected), the values will return to the same case used when they were entered.
- To add values, type each individual value into the field under Items and click Add.
- To remove values, select the item in the field and click Remove. (You can also Shift-click or Ctrl-click to remove multiple items.)
After you click OK, the new list will be added to the left side of the OneClick List Manager. The new OneClick List will also become available in the List drop-down menu located in the OneClick panel.
Edit List
To edit a list, select the name of the list from the left side of the OneClick List Manager and click Edit List. The list editor window will open and present the options available. You can change the name of the list, add values or remove values. When you have finished editing the list, click OK to save the list or Cancel to cancel the editing process.
Delete List
To delete a list, select the name of the list from the left side of the OneClick List Manager and click Delete List. A dialog box will then open, asking you to confirm or cancel the process.
Pin/Unpin List
All OneClick lists are presented in alphabetical order in the OneClick List Manager. However, you can pin selected items to the top of the OneClick List Manager (and the List drop-down menu in the OneClick panel).
Select the name of the list you want to pin to the top of the list and click Pin/Unpin List. A green checkmark will appear adjacent to the list name, indicating that the list is pinned.
You can pin multiple lists. These will be presented in their own alphabetically ordered group at the top of the list. For example, in the image below, the Energy and Transportation lists are pinned, and they appear in alphabetical order within their own group.

To unpin a list, select the name of a pinned list and click Pin/Unpin.
Clear All Filters Button
This selection from the OneClick menu opens a Clear All Filters button in a new tab in your workspace.
![]()
Just as with OneClick panels, the ClearAll panel must be paired with other tabs. Clicking the button will remove all filters within a panel group.