Notebook
The Notebook is a Deephaven feature in which users can develop query components, stage draft queries, or simply store notes. Think of the Notebook as a "sandbox" in which queries can be developed and refined, and then easily executed in Deephaven. See our Deephaven Example Notebooks, which can be run directly in a Deephaven console to demonstrate working examples of commonly used query operations.
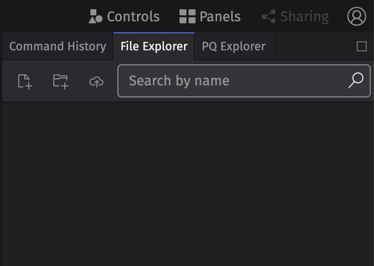
Notebooks can be added to your workspace using the File Explorer or the PQ Explorer in the Code Studio the web, or from the More Actions menu in Deephaven Classic.
File Explorer
New notebooks can be added to your workspace by selecting the File Explorer tab at the top right of the Code Studio. Either select New notebook to create a new one, or Import notebook to open a existing notebook from your local computer:
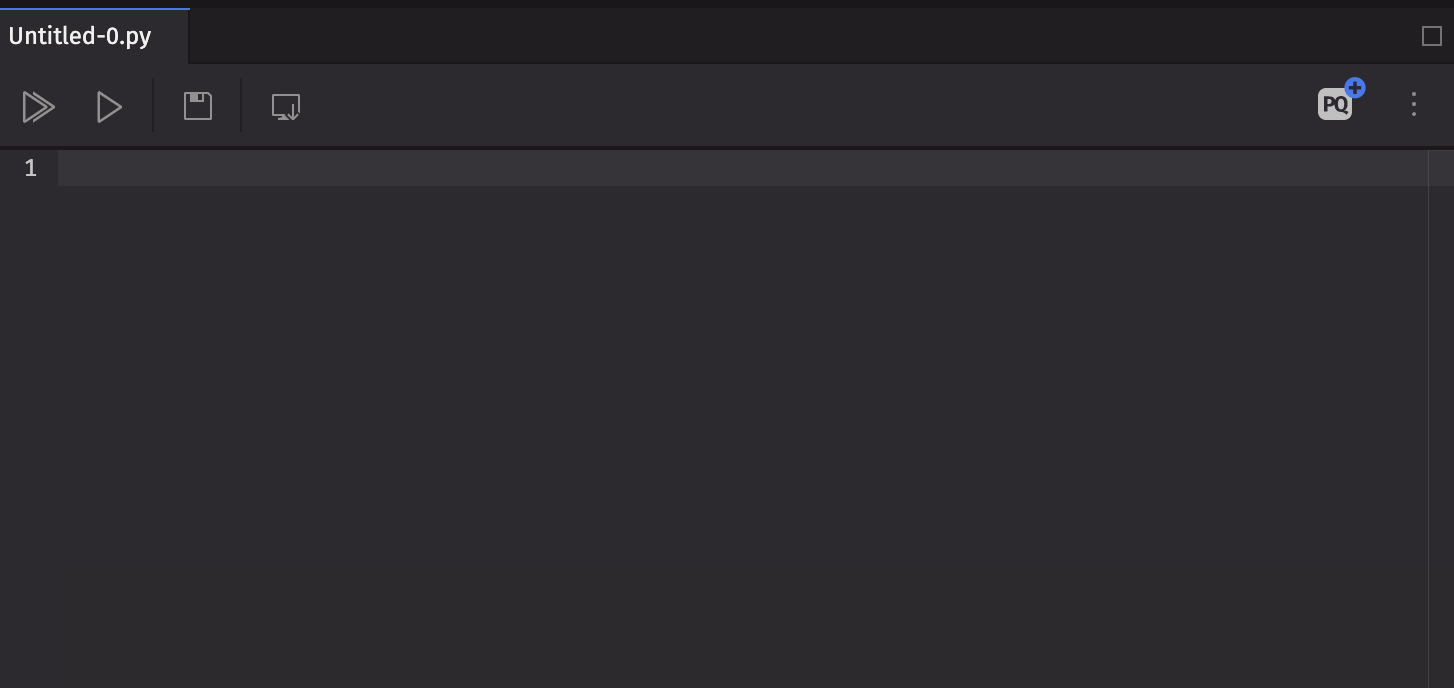
The Notebook is now ready for use. The file name extension will reflect the programming language of your current session.
You can also create folders to store your notebooks using the New folder button:
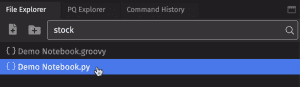
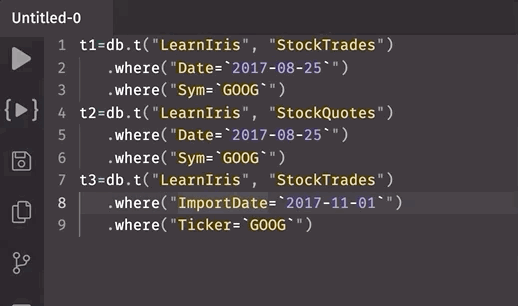
The File Explorer displays a list of saved notebooks and user folders. You can search for notebooks by content. In the example below, the File Explorer will show any notebooks that contain "stock" in the file. To open an existing notebook, highlight and double-click its name.
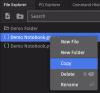
Right-click any item to open the File Explorer context menu with options to create new files or folders, delete or rename existing files, and copy the content of a notebook file:
Notebooks can also be downloaded to your local computer:
- From the Notebook toolbar, click the Export button to download that notebook.
- From the File Explorer, select one or more individual notebooks or folders, right-click, and choose Export.
PQ Explorer
The PQ Explorer tab at the right of the Code Studio lists all the persistent queries available to you, as well as some status information.
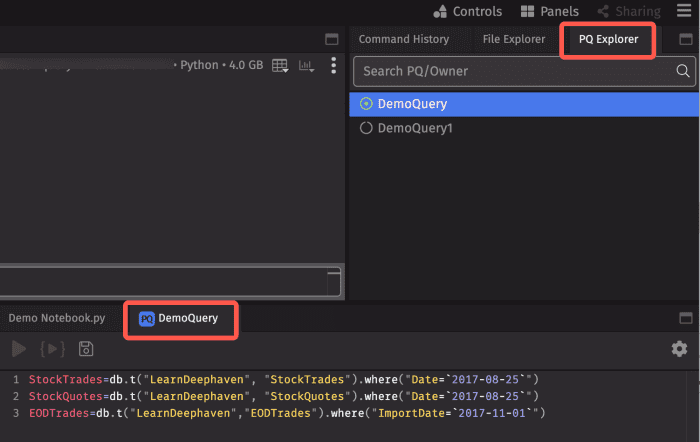
As shown above, the green circle indicates that the persistent query named "DemoQuery" is active, while "DemoQuery1" is not. Selecting any query automatically opens its script in a new notebook panel. When a notebook generated from the PQ Explorer is saved, any edits will be automatically applied to that persistent query script and reflected in the Script tab of the Persistent Query Configuration Editor.
Notebook Toolbar
Content entered in the Notebook panel can be acted upon by using the buttons in the Notebook Toolbar along the top of the Notebook panel.
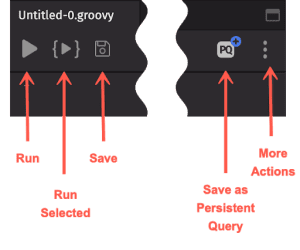
- Run - Automatically copies all of the content in the Notebook window, and then executes the content in the Console.
- Run selected - Copies the content you have highlighted in the Notebook window and then executes those selected lines in the Console. This option runs the entire selected line (or lines), even if you have highlighted only a portion of the line.
- Save - Saves all of the content of the Notebook into a web directory. When Save is clicked for the first time, the Save dialog window prompts the user to enter a filename and select the file location. Depending upon the content in the Notebook, the file is saved as a .txt, Groovy or Python filetype. Clicking Save again overwrites the existing file with the current Notebook content. After the file is saved, the name shown on the Notebook tab changes to match the filename used during the Save process. A blue circle in the Notebook's tab indicates that there are unsaved changes.
- Save as Persistent Query - This will open a pop-up version of the Persistent Query Configuration Editor, with the Settings, Scheduling, and Permissions tabs. Once you configure and save your selections, a new persistent query will be created in the Query Monitor that contains the text of the Notebook in the Script tab.
- More Actions - Copy, Rename, or Delete your file from this pop-up menu.
Notebook Context Menu

Right-clicking within the body of the Notebook panel opens a context menu with following options:
- Run - Automatically copies all of the content in the Notebook window, and then executes the content in the Console.
- Run Selected - Copies the content you have highlighted in the Notebook window and then executes those selected lines in the Console. This option runs the entire selected line (or lines), even if you have highlighted only a portion of the line.
- Change All Occurrences - Highlights all other occurrences of the selected text within the Notebook window, and when the selected text is edited, all occurrences change simultaneously.
- Cut - Deletes the content you have highlighted in the Notebook window.
- Copy - Copies the content you have highlighted in the Notebook window and saves it to the clipboard.
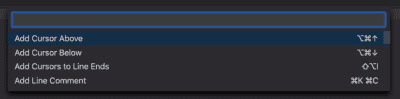
- Command Palette - Opens the Command Palette, which provides an exhaustive list of commands for editing, including keyboard shortcuts for the most common operations.