Use C#
DeephavenOpenAPI provides most of the functionality that is available to you from the Deephaven Console, however, it provides a means for accessing Deephaven programmatically. Using the Deephaven OpenAPI involves writing code in one of the supported languages, and invoking the library to interface with Deephaven.
You might want to do this if you'd like to:
- Interface existing code with Deephaven.
- Use Deephaven as a database backend for another system you are building.
- Use code to perform data analyses drawing from multiple heterogenous systems alongside Deephaven (file systems, other databases, live feeds).
Note
We are planning OpenAPI support for C# (or, any .NET language), C++, and Java. Currently, the first released OpenAPI library is C#.
In this document we provide a step-by-step tutorial for using the Deephaven OpenAPI from C# using Visual Studio. For more detailed information on the OpenAPI, see the primary documentation.
Compatibility
We have tested the OpenAPI plugin with Visual Studio 2019 on Windows and with JetBrains Rider, though we expect it to work with other .NET IDEs as well. Currently the library is distributed as a Nuget package, with DLL’s targeting .NET Standard 2.0, .NET Framework 4.6.1, and .NET Framework 4.7.2. For authenticating to the server, we currently support the username/password method. Public key / private key authentication will be added shortly.
Preparing your environment
For this tutorial you will need the following things:
- A Deephaven server running version 1.20200901 or later.
- Your Deephaven credentials.
- The .nupkg file for the Deephaven OpenAPI .NET library.
- Your development environment. (For this tutorial, we will use Visual Studio 2019 to make a fresh console application with .NET 4.7.2.)
These steps are detailed below.
Create Your First Project
First, identify your Deephaven server and get your Deephaven credentials ready.
You probably know the name of your Deephaven server. If not, contact your local administrator. In our example we will use username/password credentials.
Next, download the nupkg file.
Point your web browser at your Deephaven server, using the address: https://your-deephaven-server:8123/
You should see a directory listing, with the Deephaven .nupkg near the top, as shown below.
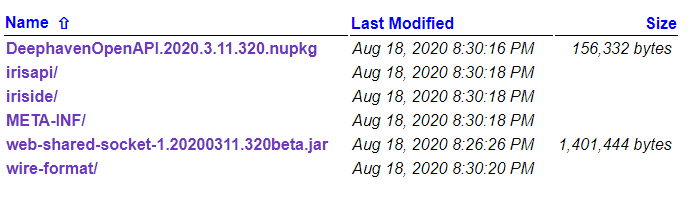
Download the .nupkg file and put it in a folder where you can reference it later. For this tutorial we are using a folder called “mypackages” in our home directory.
Now, start Visual Studio.
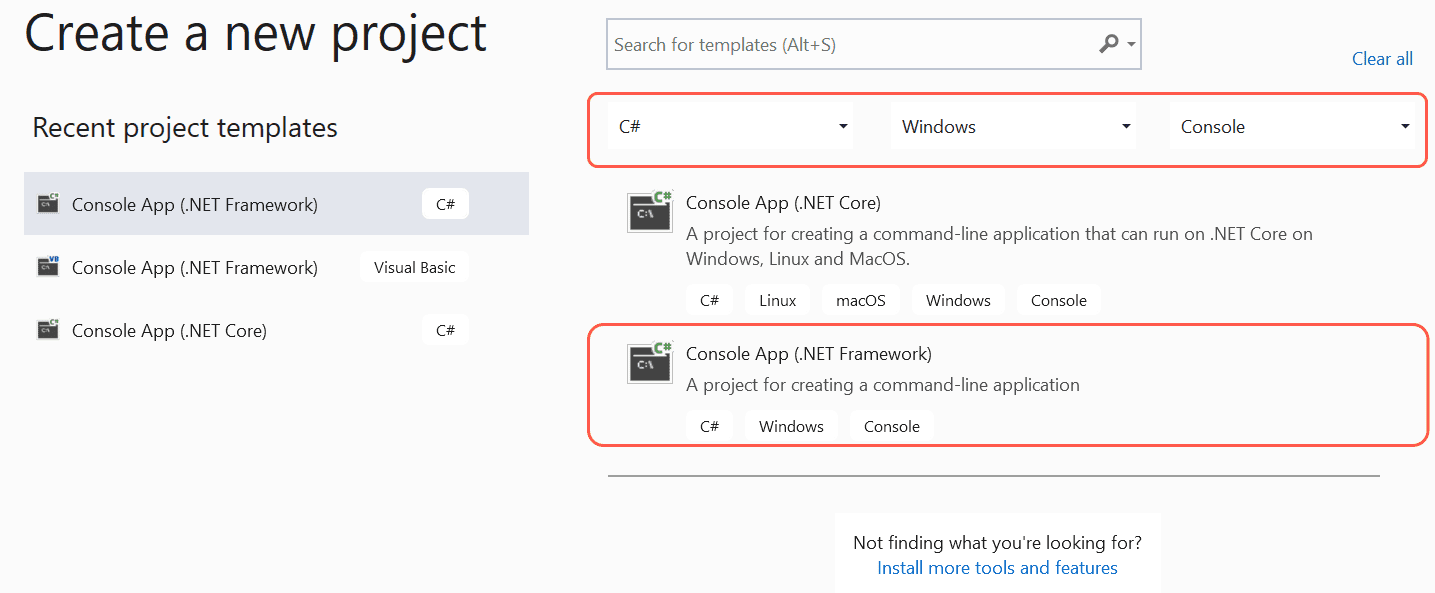
Create a new project
In this tutorial we will be creating a C# Windows Console App in the .NET Framework.
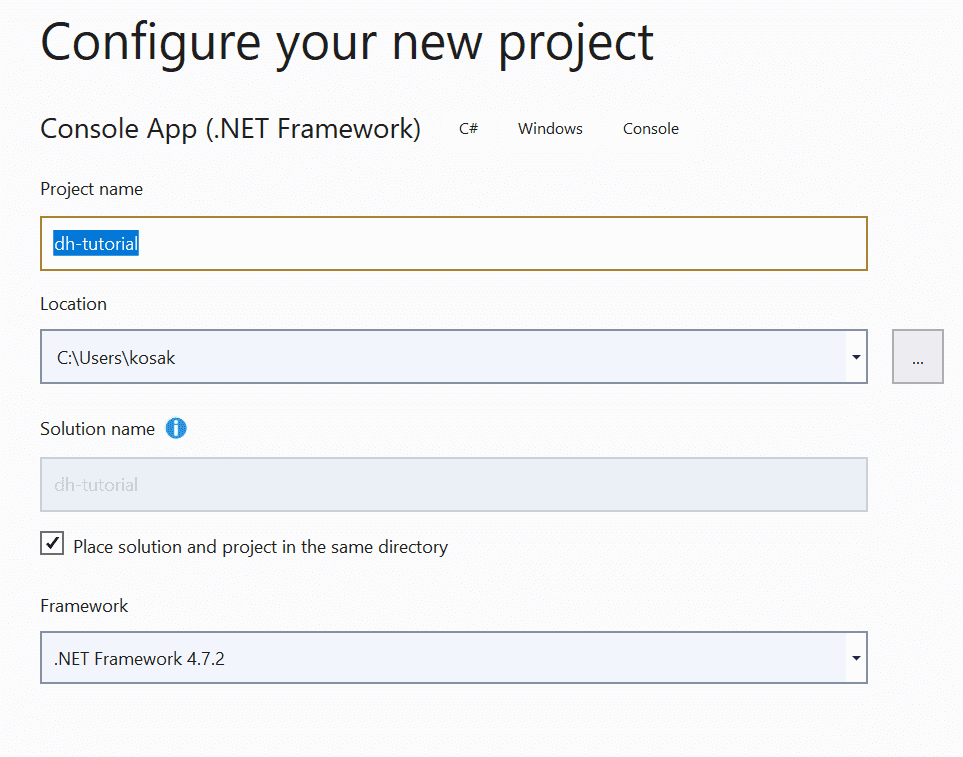
Choose a name for your project, a location, select the framework version (we’re using .NET Framework 4.7.2) and click Create:
Add the Deephaven Libraries
You should now have an empty C# template ready for writing code. The next step is to add the Deephaven libraries. To do this, we will open the NuGet package manager and tell it about the folder we created in the previous step above.
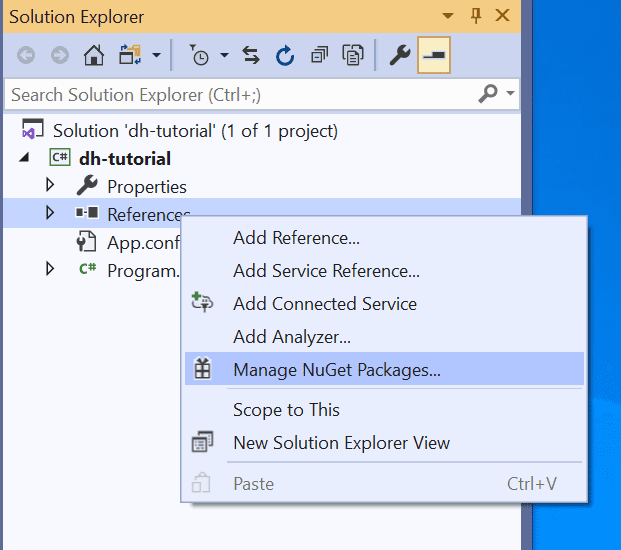
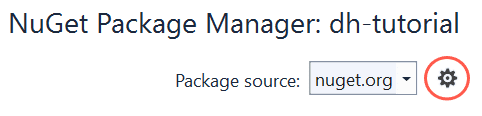
First, right click on your project’s references and select Manage NuGet Packages:
Then, click on the gear icon in the NuGet Package manager:
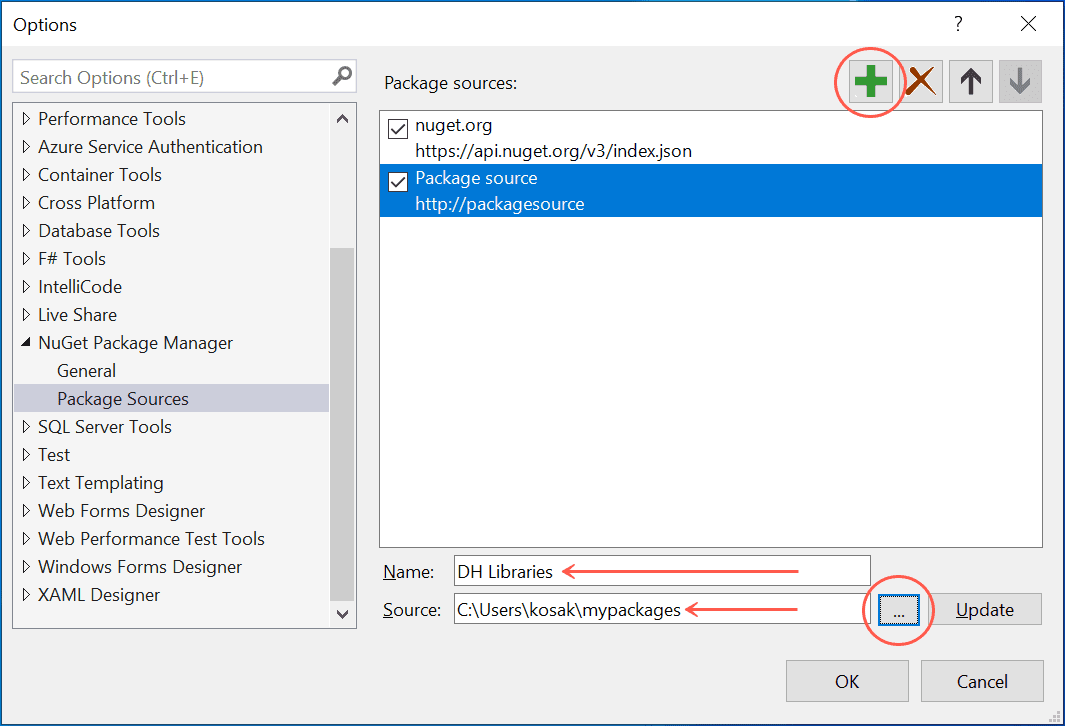
Do the following steps in order:
- Press the green “Plus” icon to add a new source.
- Give it a name like “DH Libraries”.
- Use the “...” button to navigate to the folder you created above which contains the Deephaven .nupkg file (or type the full path directly).
- Click OK.
Now, back in the Browse tab of the package manager, you should be able to find the Deephaven package:

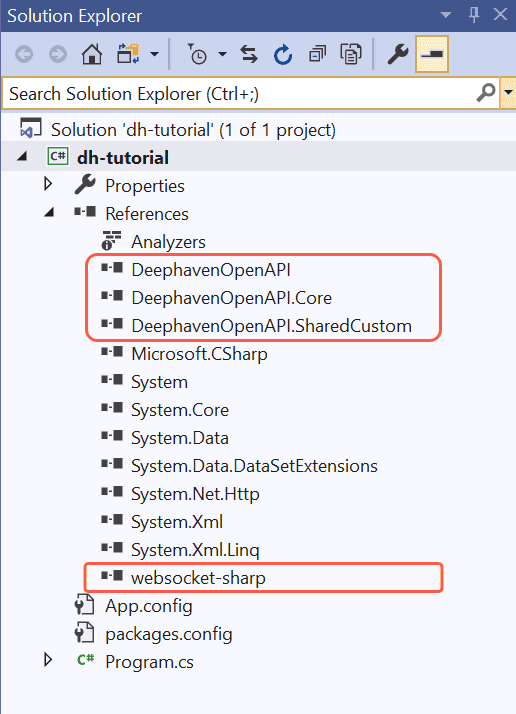
If all goes well, you will see the three Deephaven projects, as well as "websocket-sharp", added to your project references:
Now you are ready to write your first query.
Your First Query
Enter the following C# code. You can also find this code in the Hello World example of the C# documentation.
Note that you will need the “using” directives to reference the Deephaven libraries. Also you will need to specify your host name (e.g., myserver.internal.mycompany.org), and your username and password.
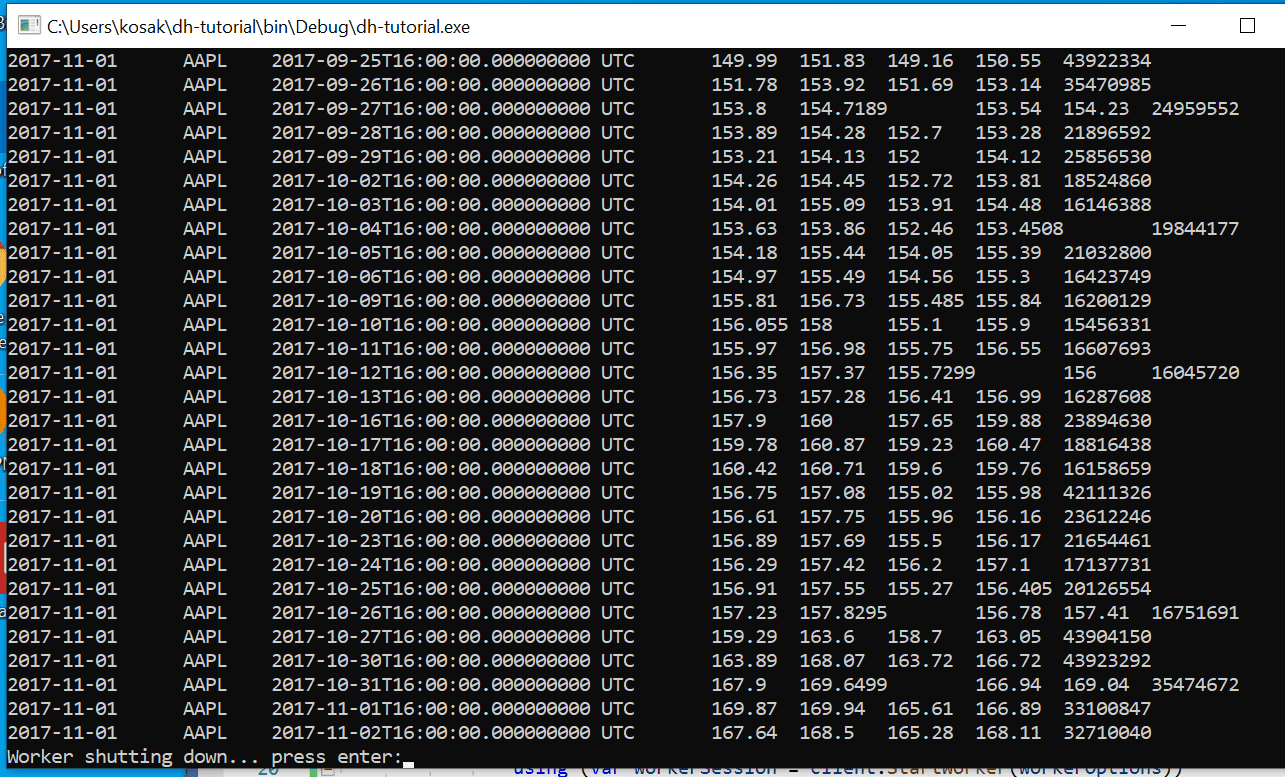
When you run this program you will see a big list of “trades” in the LearnDeephaven.EODTrades sample table, filtered by the ticker AAPL.
Next Steps
This simple program was intended to give a feel for how to access Deephaven from a C# program. There are a lot of additional capabilities available, including joins, formulas, and the entire power of the Deephaven query engine.
Note
See also: To delve deeper into these topics, see the Deephaven OpenAPI documentation.