Deephaven VS Code - Configuration
By default, the extension is configured to connect to a single Community server hosted at http://localhost:10000.
To add more servers or change the configuration of the default server, head to VS Code settings. This opens a settings UI, where you can search for the extension with @ext:deephaven.vscode-deephaven. It shows two items you can configure:

You can also set configuration parameters in workspaces by navigating to the Workspace tab in the settings UI.
Note: There are some known VS Code bugs that can cause flakiness with the
runbutton. VS Code v90 introduced an optional settingworkbench.editor.alwaysShowEditorActions. Setting this totrueboth improves the experience and prevents the run button from disappearing when running commands or selecting the dropdown. See here for more details.
Community Servers
Community servers can be configured via the "deephaven.coreServers" setting in VS Code user or workspace settings.
Enterprise Servers
Enterprise servers can be configured via the "deephaven.enterpriseServers" setting in VS Code user or workspace settings.
Basic example:
An optional label can be included:
When connecting to an Enterprise server, you will be presented with a panel to configure your query using the standard query creation UI.
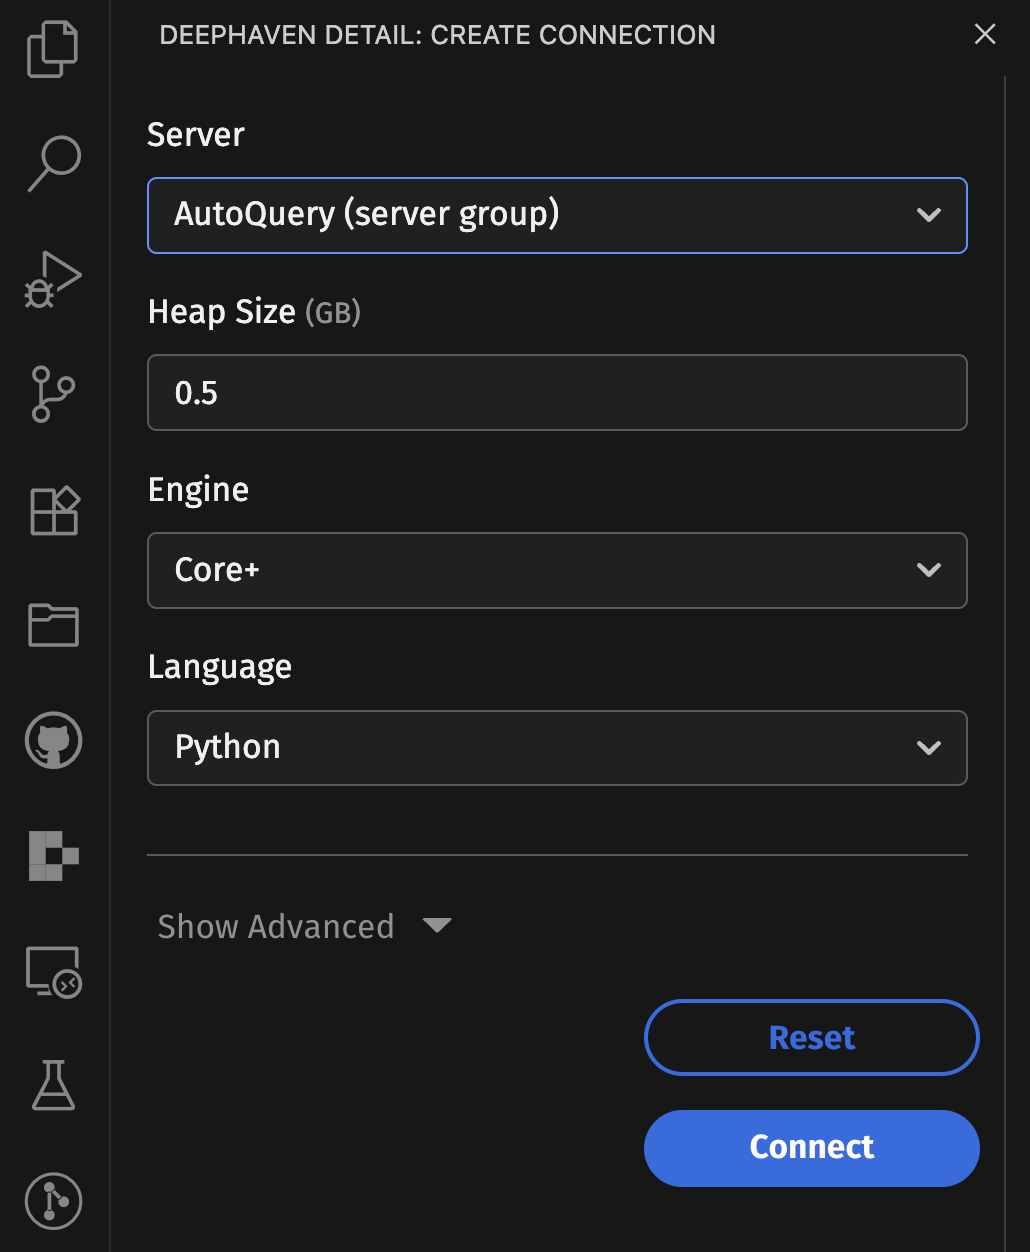
Grizzly servers do not support the query creation UI, but you can use the experimentalWorkerConfig property to specify query (worker) settings directly in your VS Code settings.
Example configuration:

For information on how to authenticate with enterprise servers, see Enterprise Authentication.
Model Context Protocol (MCP)
The extension can expose MCP (Model Context Protocol) server integration for AI assistants in VS Code and compatible IDEs. This is disabled by default.
To enable MCP features:
Via the Settings UI:
- Open VS Code Settings (
Cmd+,on macOS,Ctrl+,on Windows/Linux). - Choose User settings (applies to all workspaces) or Workspace settings (applies only to the current workspace).
- Search for
deephaven.mcp.enabled. - Check the box to enable.
Via settings.json:
Once enabled, AI assistants like GitHub Copilot and Windsurf can interact with the extension to manage Deephaven servers, execute code, and more.
For detailed information on MCP features and usage, see Model Context Protocol (MCP).
SSL Certificates
Deephaven servers using self-signed certificates or internal CA's will require configuring VS Code to trust the signing certificate.
Option 1 - NODE_EXTRA_CA_CERTS Environment Variable
-
Save the signing certificate in PEM format somewhere on the machine running VS Code. Multiple certificates can be concatenated together in the same file if there are multiple certs that need to be configured.
-
Set the
NODE_EXTRA_CA_CERTSenvironment variable to the path of the signing certificate.On Mac / Linux, set the env variable, or if you'd like for it to persist, export it from an appropriate config file for your shell.
On Windows, you can use
setto set the variable in your current shell, orsetxto persist it.Note that paths in env variables should not be wrapped in quotes on Windows.
-
Start VS Code in a shell that has the
NODE_EXTRA_CA_CERTSvariable set.
Note: VS Code runs in NodeJS which does not consult the trust store of the OS to determine trusted certificates. Instead, it comes pre-installed with a set of trusted root CA's. Any CA's that are not installed with NodeJS will need to be configured as described above. See here for more information on
NODE_EXTRA_CA_CERTS.
Option 2 - (Experimental) Using OS Trust Store
Note: This option changes the underlying transport used by all installed VS Code extensions and is still in active development by the VS Code team. It is possible this may cause undesirable side effects with some extensions.
This step assumes your signing certificates are already configured as trusted by your particular OS's trust store. The process for doing this varies based on OS and is outside of the scope of this README.
Configure VS Code to use the OS trust store:
- Click
f1and type> Preferences: Open Settings (UI) - Search for the
Http: Electron Fetchsetting
- Enable it
- Restart VS Code