Web Schema Editor
The Web Schema Editor enables users to create and modify schemas within Deephaven.
Permissions
To use the Web Schema Editor, a user must be a member of the iris-schemamanagers group.
Connect
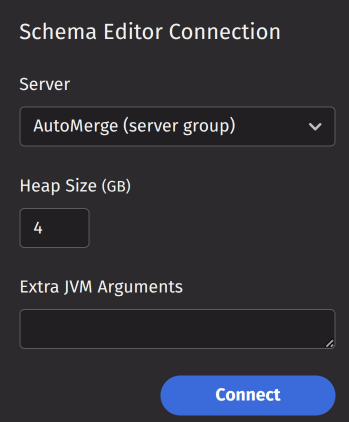
To open a new Schema Editor, navigate to the New Tab screen and select it from the Advanced menu. The Schema Editor displays a connection panel on the left side, allowing you to configure the server, heap size, and additional JVM arguments. Click Connect to start a Schema API Query that the Schema Editor uses to perform operations.
Disconnect
To disconnect from the Schema API Query, use the "..." menu in the upper right corner of the Schema Explorer panel and select Disconnect. The connection will also automatically terminate when you close the Schema Editor or log out of the UI.
Schema Explorer
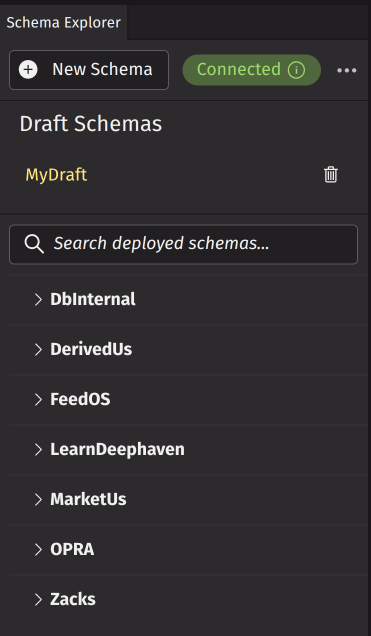
The Schema Explorer is located in the left panel and contains the following UI elements:
- New Schema button - Creates a new draft schema.
- Connection info button - Displays connection information.
- Menu - Contains bulk operations and disconnect options.
- Draft schemas - Displays draft schemas that have not been deployed (this section is omitted if there are no drafts).
- Search bar - Type to search through deployed schemas.
- Deployed schemas - A tree view of schema namespaces that expand to show table names of deployed schemas; select a schema to edit.
Schema Config
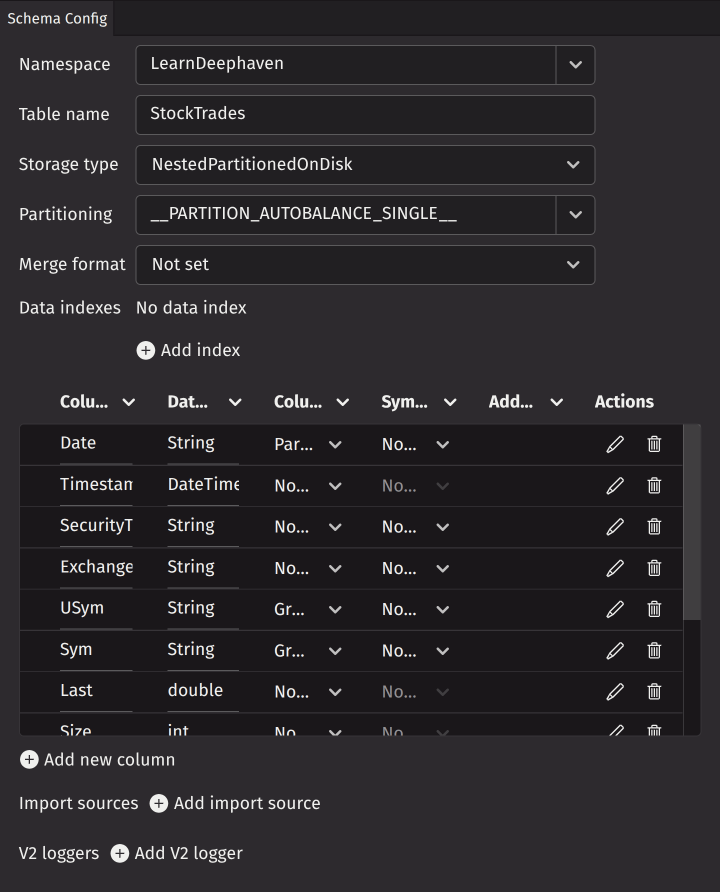
The Schema Config panel is located in the center and provides UI elements for editing schema properties. This panel allows you to modify schema elements and their attributes. For comprehensive information about schema elements and attributes, see Tables and Schemas.
The XML preview updates automatically as you make changes to the schema elements. You can change the following schema attributes:
- Namespace - The system namespace to which this table belongs.
- Table Name - The name of this table.
- Storage type - Specifies the way data for this table will be organized on disk.
- Partitioning - The partitioning key formula attribute to map table rows to the available storage partitions.
- Merge format - Specifies the format in which merged (historical) data will be written.
Data indexes
Each data index entry directs the Merge process to group the data being merged by the set of columns (called keys) in the columns attribute. The data index is then written to disk, sorted in the same order as the columns are specified in the data index. Choosing an ordering of these columns based on how they are expected to be used in queries can improve the performance of operations that can take advantage of data indexes.
Columns
The column elements contain detailed information for defining each table's columns, including the column name, data type, and role as a partitioning or grouping column.
The columns table displays multiple columns with options to add, edit, delete, and reorder them. Click Add new column to create a new column entry. Delete columns using the trash icon in the actions column. Reorder columns by dragging rows to new positions. Edit column values directly in the table cells or click the edit action for a dialog with complete configuration options.
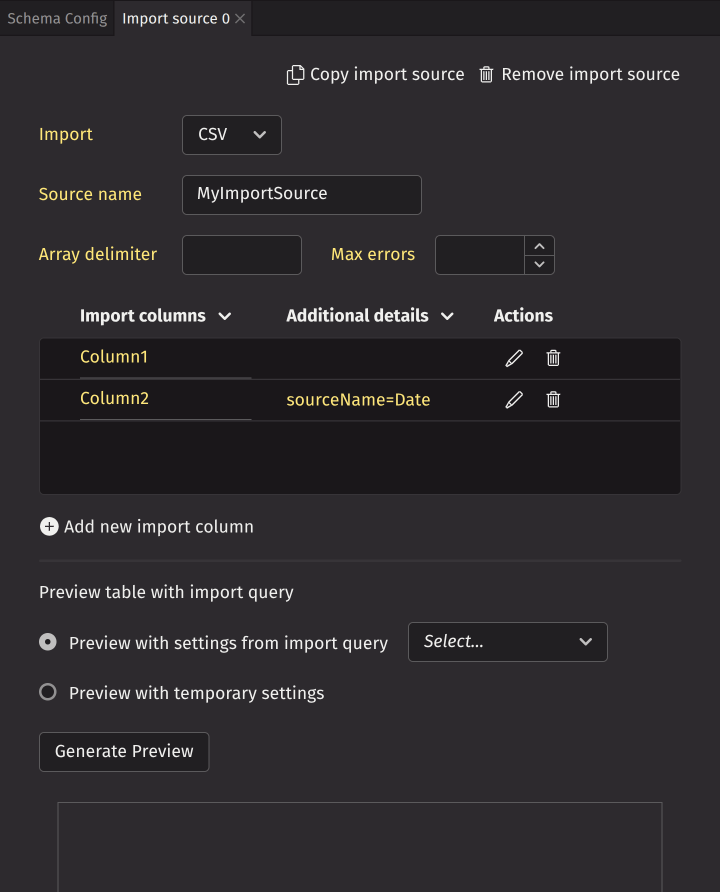
Import sources
The import source component of a schema provides additional metadata to control and modify the import process.
A schema can have multiple import sources. Click Add import source to create a new one. This opens a new panel in the same tab stack as Schema Config. The new panel prompts you to select CSV or JDBC. After making your selection, the panel provides a UI to configure the import source.
At the top, you can copy or remove the import source. You can specify the import source name, array delimiter, max errors, and add import source columns. Below, you can generate a preview of the import source using settings from a query or with custom temporary settings.
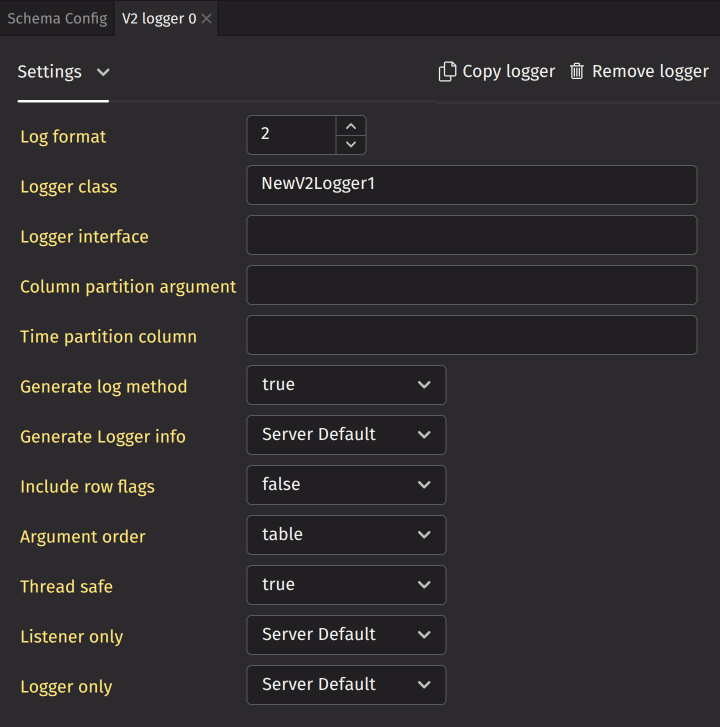
V2 loggers
The V2 logger component of a schema is used by the binary logger factory to generate logging classes.
A schema can have multiple V2 loggers. Click Add V2 logger to create a new one. This opens a new panel in the same tab stack as Schema Config. The panel provides a UI to configure the V2 logger.
At the top, you can copy or remove the V2 logger. You can specify the logger class, logger interface, column partition argument, and time partition column. Additionally, you can set various flags. These default to "Server Default", which means the logger will use the default value on the server if the value is not explicitly set in the V2 logger.
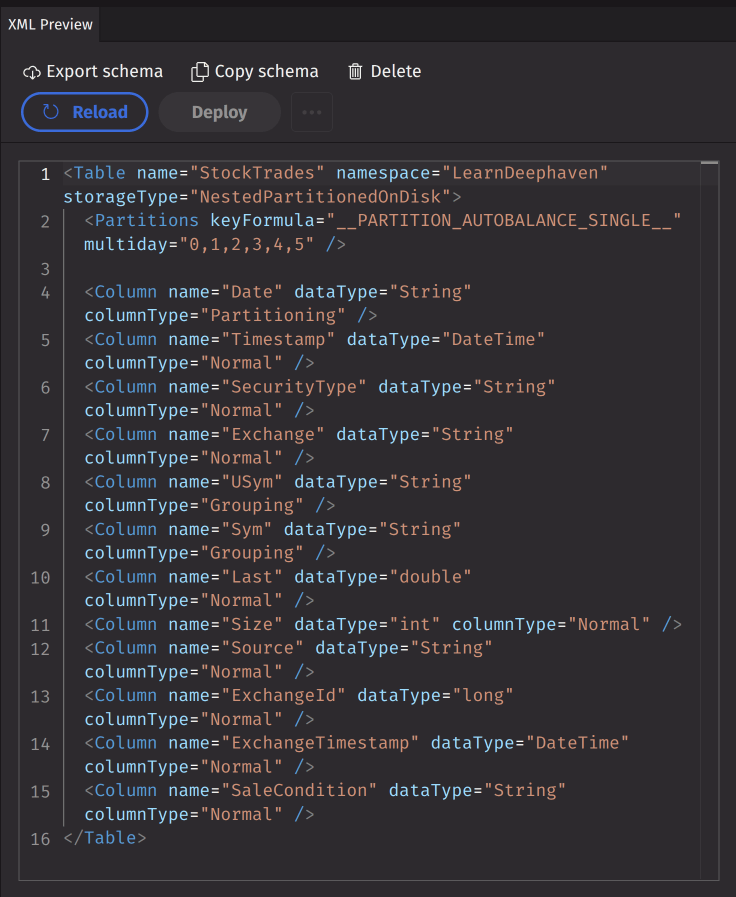
XML preview
The XML preview panel is located on the right side and displays the schema XML in an editor. You can edit the XML directly in this panel, and changes will automatically update the Schema Config panel to match. The panel also displays validation or parser errors when they occur.
Above the XML editor are action buttons with the following options:
- Export schema - Exports the schema to an XML file.
- Copy schema - Copies the selected schema to create a new draft.
- Delete - Deletes the selected schema from the server.
- Reload/Revert - Reloads the selected schema from the server; reverts any unsaved changes if the schema has been modified.
- Deploy - Deploys the selected schema to the server.
Deploy without compiling
A standard deployment will attempt to compile the schema and fail if compilation errors occur. To bypass compilation, use the dropdown menu next to the Deploy button and select Deploy without compiling.
Create a new schema
To create a new schema, click the New Schema button in the Schema Explorer panel. This displays three options in the Schema Config panel:
- CSV
- JDBC
- Manual
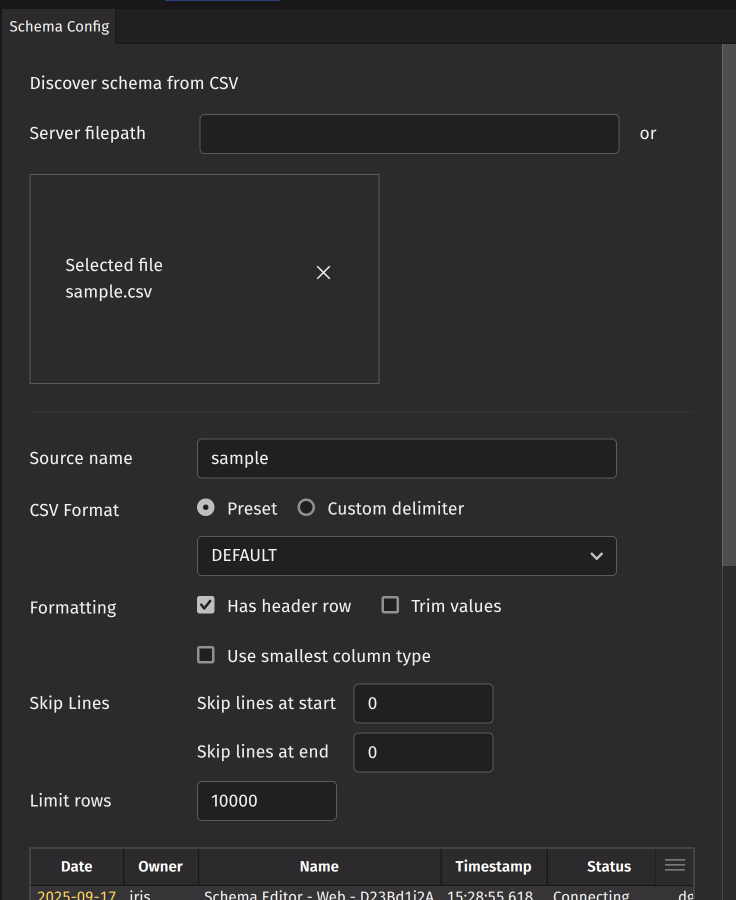
Create from CSV
This option allows you to generate a schema from a CSV file. Select a file on the server by entering the full file path in the Server filepath text box, or choose a local file by clicking Select files... or using drag and drop.
After selecting the file, configure CSV format and parsing options. A preview of the parsed data will appear below.
When the preview appears correct, specify the namespace, table name, and partition column. Click Generate schema to create schema XML that can be edited and deployed.
Create from JDBC
Before using JDBC, ensure the necessary JDBC drivers are available. A system administrator may need to create the directory /usr/illumon/coreplus/custom_lib/latest on the server and copy the required driver JAR file (such as /usr/illumon/latest/java_lib/shadow-mssql-<version>.jar) to that location. If this setup has not been completed, you can specify the full path to the JAR file in the Extra classpaths configuration option before connecting the Schema Editor.
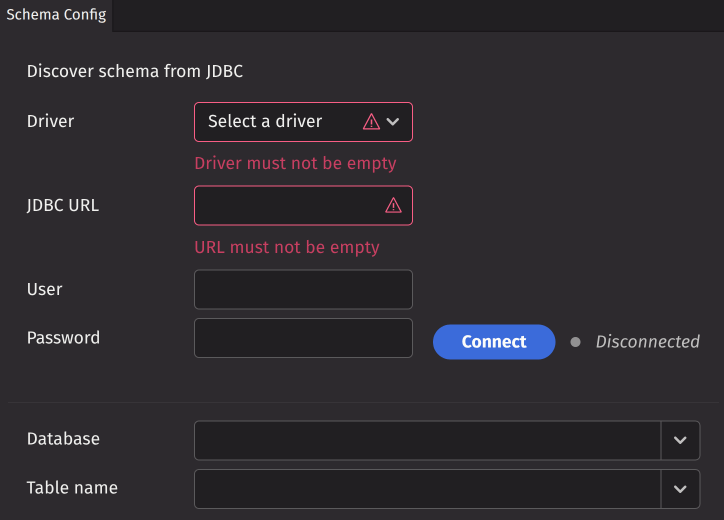
This option allows you to generate a schema from a JDBC connection. To establish the connection, complete the following fields:
- Driver - The JDBC driver for your database system.
- JDBC URL - The connection URL for your JDBC server.
- User - The username for JDBC authentication.
- Password - The password for JDBC authentication.
After filling in these fields, click Connect to establish the JDBC connection. Once connected, you can select a database and table name from the dropdown menus. Click Run SQL to generate a preview table from your SQL query. The schema namespace will default to the selected database name, and the schema table name will default to the selected JDBC table name. You can modify both values as needed.
Choose a type inference method to determine column types:
- Meta only - Infer types from metadata only.
- Data only - Infer types from actual data (may take longer).
- Both - Infer types from both metadata and data (may take longer).
Click Generate schema to create the schema. Depending on the data size, this process may take some time. Once generated, you can edit and deploy the schema as needed.
Create manually
The manual option generates a default, minimal schema XML as a draft. This draft opens in the Schema Config panel and XML preview, allowing you to edit and deploy it as needed.
Edit an existing schema
To edit an existing schema, select it from the Schema Explorer. The schema XML will load in both the Schema Config panel and XML preview. Any modifications you make will create a local draft that persists in your workspace until you either deploy the changes or revert them. Modified schemas are visually indicated by a yellow highlight and display a revert icon.
Bulk operations
The menu in the upper right corner of the Schema Explorer provides options for bulk operations on multiple schemas.
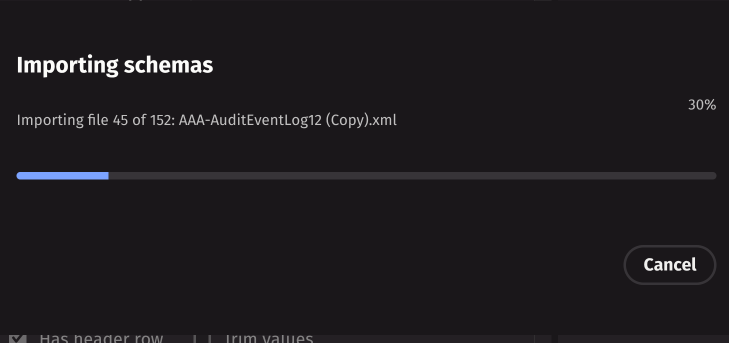
Bulk import
Bulk import allows you to upload multiple local schema XML files to the server. Click Bulk import to open a file selection dialog where you can select multiple files. A progress dialog will display the import status for each file.
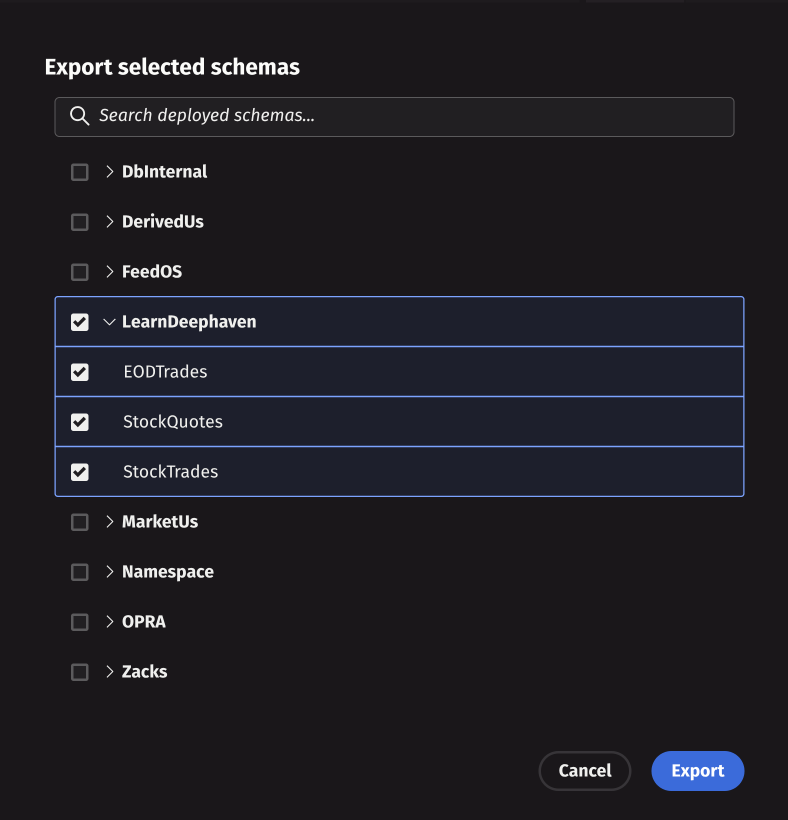
Bulk export
Bulk export allows you to download multiple schemas from the server. Click Bulk export to open a dialog where you can select multiple schemas. After making your selections, click Export to begin the download process. A progress bar will display the download status, and the schemas will be saved as a zip file archive to your local machine.
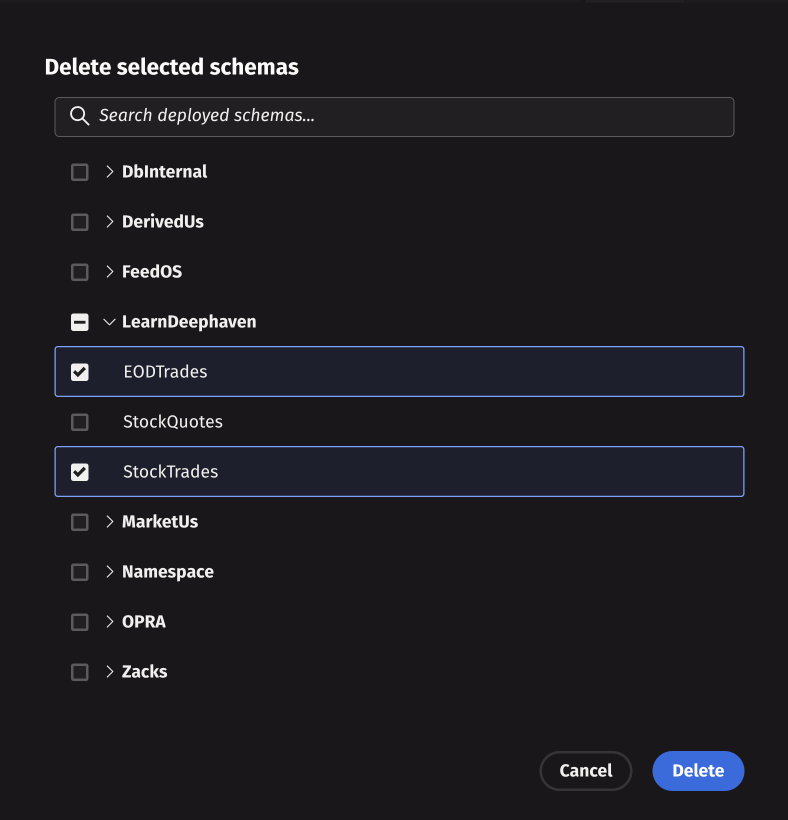
Bulk delete
Bulk delete allows you to remove multiple schemas from the server. Click Bulk delete to open a selection dialog where you can choose multiple schemas for deletion. After making your selections, click Delete to begin the operation. A progress bar will show the deletion status for each schema. Once the operation completes, all selected schemas will be permanently removed from the server.