Podman
This guide provides step-by-step instructions for quickly deploying a Deephaven Enterprise cluster using Podman. Provided you have the prerequisites, you can have a Deephaven Enterprise deployment running on Podman in just a few minutes.
Podman is an open-source container management system that is highly compatible with Docker containers and syntax. The single-user image used in this guide is ideal for testing purposes.
About the Podman deployment
Deephaven's Podman deployment includes:
- Tools for building custom images.
- A script (
start_command.sh) to launch a Podman containerized cluster. - Pre-built images that can be started immediately using the
start_command.shscript.
The Deephaven Podman distribution is supported on Linux x86_64 hosts. At this time, macOS and Windows are not supported. For the supported Linux versions and dependencies, refer to the Supported Versions page.
Whether you build your own or use the pre-built ones, there are two images:
- An image that can be used for the infrastructure node or all-in-one node of a Deephaven cluster.
- An image that can be used to add one or more dedicated query server nodes to the cluster.
The Deephaven Podman deployment stores configuration data and, optionally, other data (such as table data and logs) in volume paths on the Podman host machines.
When the start_command.sh script creates a new pod, the pod runs the Deephaven installation process and then starts Deephaven; upgrading an existing deployment requires the --upgrade flag. The initial startup process may take a few minutes, as it runs the full Deephaven installation.
Because cluster configuration and system data are preserved on the host's filesystem, they survive pod replacement. Data that is not on a mounted volume, such as user tables and logs in this quickstart, is stored inside the container and is lost when the container is removed.
Note
This topic focuses on a single "happy path" deployment configuration for Podman to make the deployment process quick and easy. See the full Deephaven Podman installation guide for more details. The quickstart deployment described here can also be extended using features covered in the full installation guide.
Prerequisites
General prerequisites
For Deephaven Podman deployments in general, you need:
- One or more machines or VMs with Podman version 4.2.0 or later installed (4.5.0 or later is recommended). Run
podman --versionto check the installed version.- The user account that runs Podman must have entries in
/etc/subuidand/etc/subgid, even for the single-user image used in this guide. - Each machine must have at least 32GB of RAM dedicated to running Deephaven on Podman. This is the minimum to reliably run a Deephaven instance and execute some small queries for a single user.
- 64GB or more of RAM dedicated to running Deephaven on Podman is recommended. For production, size each machine according to the installation planning guide.
- The machine(s) should also be resolvable by DNS.
- The user account that runs Podman must have entries in
- The Deephaven Podman distribution package.
- A TLS certificate to use for the installation. To generate a test certificate with the bundled
create_dh_cert.shscript instead, the host needsopenssl,keytool(from a JDK), andpwmake. - A pre-built Deephaven Podman image package. If you want to build your own images, refer to the building Podman images section, and then skip the loading pre-built images step when executing the steps below.
- If you are running on Linux machines with SELinux enabled, you may need
sudorights on the machines to set the necessary SELinux flags.
See also the general Deephaven system requirements.
Quickstart Deephaven Podman deployment
This section presents steps for deploying a single-node Deephaven Podman installation that uses the Envoy reverse proxy so that only one port (the default is 8000) needs to be accessible on the host to connect to the Deephaven Web UI and client APIs.
Note
In this quickstart, you install a single-user system with root permission access within the pod. This may not be suitable for production purposes. See multi-user installation instructions for fuller access control.
Load the pre-built images
Load the pre-built images into your local Podman image repository:
Set up the host
-
Download the Deephaven Podman distribution package and extract it to a working path you have created:
The remaining commands in this guide run from this
deephaven-podman-2026.01.060directory. -
Specify the path to the directory to store configuration information for the Podman instance:
Note
You must have rights to create a directory structure starting with
VOLUME_BASE_DIR. If you use something like/container-test, then you must have rights to create a directory at the root of the filesystem. If you don't have sufficient rights, you might need an administrator to create the root directory for you and give you ownership before you run the next step.Important
start_command.shreadsVOLUME_BASE_DIRfrom the environment to locate the shared configuration and etcd volumes. Run the remaining steps in the same shell, or add the export to your profile. -
Create needed subdirectories of
VOLUME_BASE_DIR: -
Obtain certificates. Either supply your own certificates or generate a test certificate.
To supply your own certificates, copy the certificate files to
"${VOLUME_BASE_DIR:?}/deephaven-tls"as:- Certificate file ->
tls.crt - Private key file ->
tls.key - Issuing certificate file ->
ca.crt
To generate a quickly-bootstrapped certificate for testing or demonstration purposes, use
create_dh_cert.sh.Warning
Do not use
create_dh_cert.shto generate certificates for production.In non-production scenarios, the certificates generated use a self-signed CA certificate, which your local system does not trust. As a result, you receive certificate warnings in the web browser when you connect to the Deephaven Web UI.
Replace
mydeephaven.myorg.comwith the hostname you pass tostart_command.shas-hin Start the pod. - Certificate file ->
-
For Linux hosts where SELinux is in use, configure SELinux to allow the pod to access files in these paths.
Note
Use the
sestatuscommand to check whether SELinux is enabled on a Linux machine. Ifsestatusis not recognized, SELinux is not installed on the system.For more information about SELinux and Podman, including troubleshooting "Permission Denied" errors, see Troubleshooting SELinux in Podman.
Start the pod
start_command.sh uses the dig utility to resolve the IPv4 address from the URL name of the Deephaven server (passed as -h). This fails on systems where dig is not installed. As an alternative to installing dig, set the POD_IP environment variable before calling start_command.sh:
From the directory where start_command.sh has been unpacked, start the pod with the following command. Replace mydeephaven.myorg.com with the URL name of your Deephaven server:
Where the arguments are:
-e 8000- connect and forward host port 8000 to the pod's Envoy service.-h <URL name of the DH server>- the name by which you connect to the server, which is the same as the name in the Web certificate, such asmydeephaven.myorg.com.-t infra- the type of image to run,infrain this case.-T "$VOLUME_BASE_DIR/deephaven-tls/"- path to the TLS certificate files.-c "$VOLUME_BASE_DIR/deephaven-tls/ca.crt"refers to the path to the CA certificate used to sign the TLS certificate. This flag is required on every invocation ofstart_command.shwhen your certificate was issued by a private or corporate CA. This includes the certificate generated bycreate_dh_cert.shin step 4, unless you built a custom image that already embeds that CA. If your certificate was issued by a publicly trusted CA, you can omit this flag.-d- delete any existing pod(s) running for this container name.-n dh-infra- the container name, and the base name to use for the main pod (dh-infra-podin this case).-s- single node Envoy instance, so, only forward-eport into the container.-I $VOLUME_BASE_DIR/db-intraday/- mount thedb-intradayhost directory to/db/Intradayin the container for persistent storage of intraday data.-H $VOLUME_BASE_DIR/db-systems/- mount thedb-systemshost directory to/db/Systemsin the container for persistent storage of historical data.
Note
If running without Envoy, skip passing both the -e and -s arguments.
Monitor the startup process
Immediately after executing start_command.sh, use the following command to view the details of the startup process. This example uses dh-infra as the container name; if you used a different value for -n above, use that value here as well.
This shows a stream of log messages as the pod runs its startup process. The startup scripts complete the installation of Deephaven and do some initial configuration. The process typically takes about 5 minutes before the Deephaven installation is ready to be used. It can take longer if the log volume holds many old log files.
If something goes wrong, this log is also the best place to check for details of the failure. If the Deephaven installation step itself fails, the container stays up for 10 minutes so you can inspect it; other failures stop the container immediately.
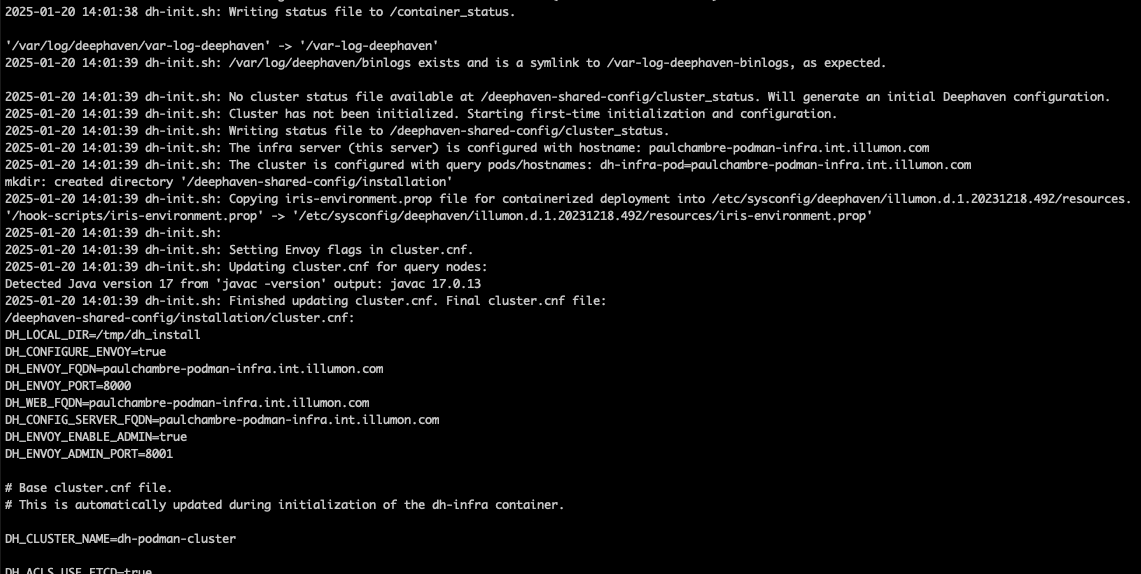
Note
podman logs also works on a container that has already stopped. If the container exited before you started following its logs, run podman logs dh-infra without -f to see what it logged.
A failed first start can leave the shared configuration partly initialized. Re-running start_command.sh then fails immediately with Cluster initialization already started but not complete!. To retry, first reset the shared state.
Access a shell in the pod
Much of Deephaven's configuration requires a shell session in the pod, which is also useful for troubleshooting. Once the pod is running, use the following command to connect to a shell session in the dh-infra container. If you used a different container name when running start_command.sh, use that name here instead of dh-infra:
Set the admin password and install sample data
When a Podman deployment is first initialized, there is one built-in Deephaven user account — iris — and its password is not set unless you exported IRIS_ACCT_PASSWORD before running start_command.sh. Before you can log in to Deephaven, set a password for the iris account with the dhconfig acl user set-password command:
The command prompts you to enter a new password for the iris account.
Note
There is no second confirmation of the password. If you are unsure that you typed it correctly, re-run the command to reset it.
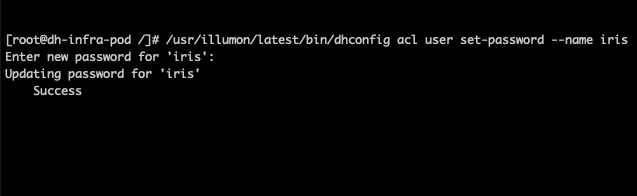
While in the command shell, you can also install sample data in the LearnDeephaven namespace. This namespace and its tables are often used in Deephaven documentation examples.
To exit the shell session, run exit.
Log in to the Web UI
You can now log in to the Deephaven Web UI at:
The typical port used for the cluster is 8000, so the URL is something like https://mydeephaven.myorg.com:8000/iriside.
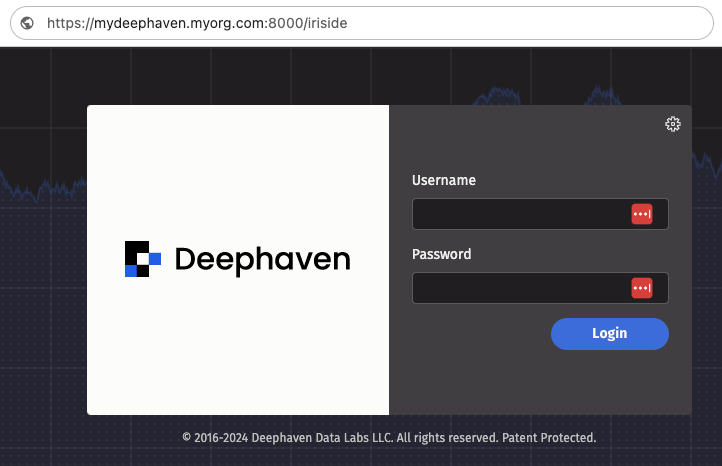
Start a worker and run a query
After logging in, you should see a dialog to create a Code Studio. If you do not, click the + New tab and select New Code Studio from the Advanced drop-down.
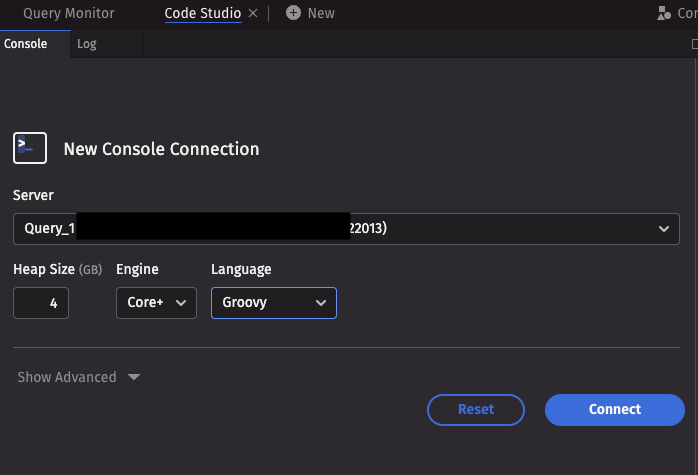
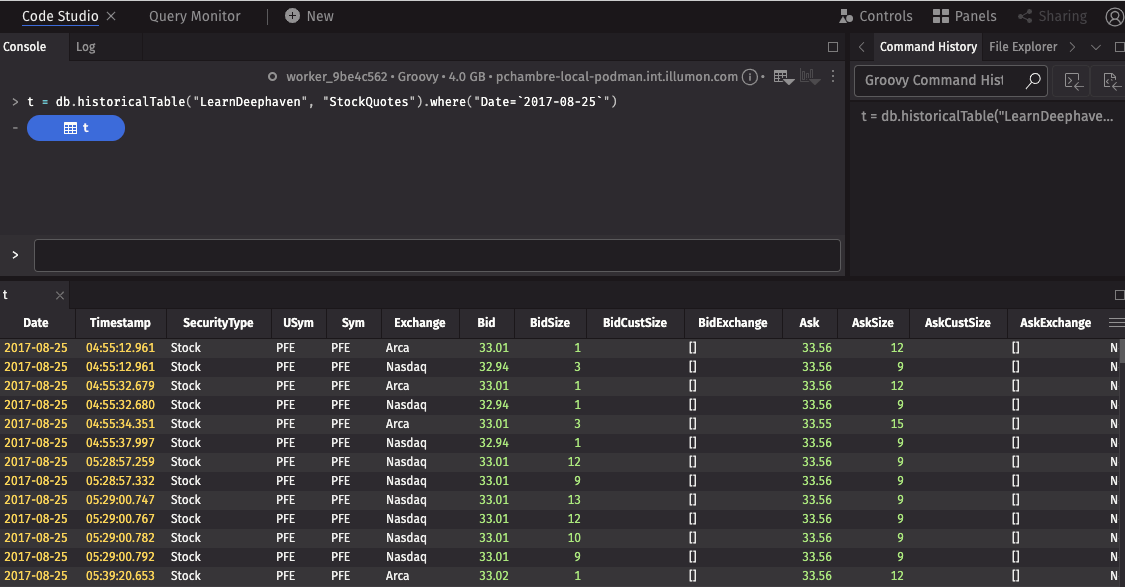
Options are available for Legacy or Core+ workers, as well as for Groovy or Python languages for query scripts. If you have installed the LearnDeephaven sample data, launch a Core+ worker for either Groovy or Python so you can try this test query.
Once the worker has been initialized, enter this line to run a simple query and view stock quote data from the sample data set:
Stop, restart, or remove the pod
These commands act on the pod, whose name is the -n value followed by -pod — dh-infra-pod in this guide. If you used a different container name when running start_command.sh, adjust the pod name to match.
Use podman pod stop to shut down the pod, giving it 90 seconds to shut down before aggressively killing the processes. 90 seconds is generally sufficient time for a clean shutdown:
Use podman pod start to restart a pod that has been stopped with podman pod stop. Do not re-run start_command.sh to restart a working cluster:
Use podman pod rm to delete a pod that has already been stopped, along with its containers. This frees up space the pod and its internal storage were using. This does not remove the VOLUME_BASE_DIR directory structure or imported Deephaven Podman image files.
Caution
Deleting the pod also deletes any user table data and logs. This simple example deployment does not include mounted user table data or log volumes, so they are stored inside the container and are deleted when the container is deleted. See the main Deephaven Podman documentation for details on how to mount additional volumes and how to export content from a pod.
If the system is not usable after the host was rebooted without stopping the pod, see System not usable after ungraceful shutdown.
If you need to reinitialize the pod, re-run start_command.sh with the --upgrade flag and the same arguments you used originally, including -c. This preserves configuration and data in system intraday and historical tables, but not user tables or logs stored inside the container.