Install and run Deephaven with pip
pip is the most popular package manager for Python. Like with other Python packages, you can use it to install Deephaven.
Note
pip-installed Deephaven is not recommended for production applications. For other installation options more suited for production, see:
- Docker quickstart: Run Deephaven from Docker
- Build from source: Build Deephaven from source code
- Production application: Run the production application (build artifacts)
Supported operating systems
Deephaven is only supported on:
- Linux
- MacOS
- Windows 10 or 11 (requires WSL 2 (Windows Subsystem for Linux v2))
Prerequisites
pip-installed Deephaven requires the following package versions:
| Package | Recommended Version | Required Version |
|---|---|---|
| java | latest LTS | >= 17 |
| python | latest LTS | >= 3.9 |
Once the prerequisite packages have been installed, you must also set your JAVA_HOME environment variable appropriately.
Once you've completed these steps, you can install Deephaven with pip:
Note
Deephaven recommends the use of virtual environments when installing Python packages.
Start a Deephaven server
There are two ways to start a Deephaven server after installing it with pip. You can start it from Python (either a script or an interactive session) or from the command line using the Deephaven CLI. The Deephaven CLI is just a wrapper around the Python API, so both methods are equivalent in functionality.
From Python
Start Deephaven from Python with the following code:
If no pre-shared key is specified, the server generates a random one when started. You can instead specify the key as another JVM argument:
You can also enable anonymous authentication, which allows you to connect to the server without a pre-shared key:
Note
Anonymous authentication provides no application security.
From the command line
When Deephaven is installed with pip, it comes with a command line interface (CLI). The CLI allows you to start Deephaven servers without instantiating a Python script or using the Python interpreter.
The following command shows a basic usage of the Deephaven CLI:
There are a number of available options:
--help: Show a help message and exit.server: Start a Deephaven server. Additional options include:--host TEXT: The host on which to start the server. Default islocalhost.--port INTEGER: The port on which to start the server. Default is 10000.--jvm-args TEXT: Additional JVM arguments to pass to the server. For example,-Xmx4gto allocate 4GB of memory,--browser/--no-browser: Whether or not to open a browser automatically. Default is--browser, which automatically opens your default browser when launching Deephaven.--extra-classpath TEXT: Additional classpath entries to add to the server's classpath.--help: Show a help message about theservercommand and exit.
For example, the following command sets the pre-shared key to PythonR0cks!:
The following command starts a server with anonymous authentication:
M2 Macs
If you're trying to use pip-installed Deephaven on an M2 MacBook, you must add the argument "-Dprocess.info.system-info.enabled=false" to the jvm_args list, as in:
Example scripts
This section contains a couple of scripts that demonstrate how to use Deephaven with pip.
Caution
You must start the Deephaven server before importing any Deephaven packages or performing any Deephaven operations. If you import Deephaven packages before starting the server, you will encounter errors.
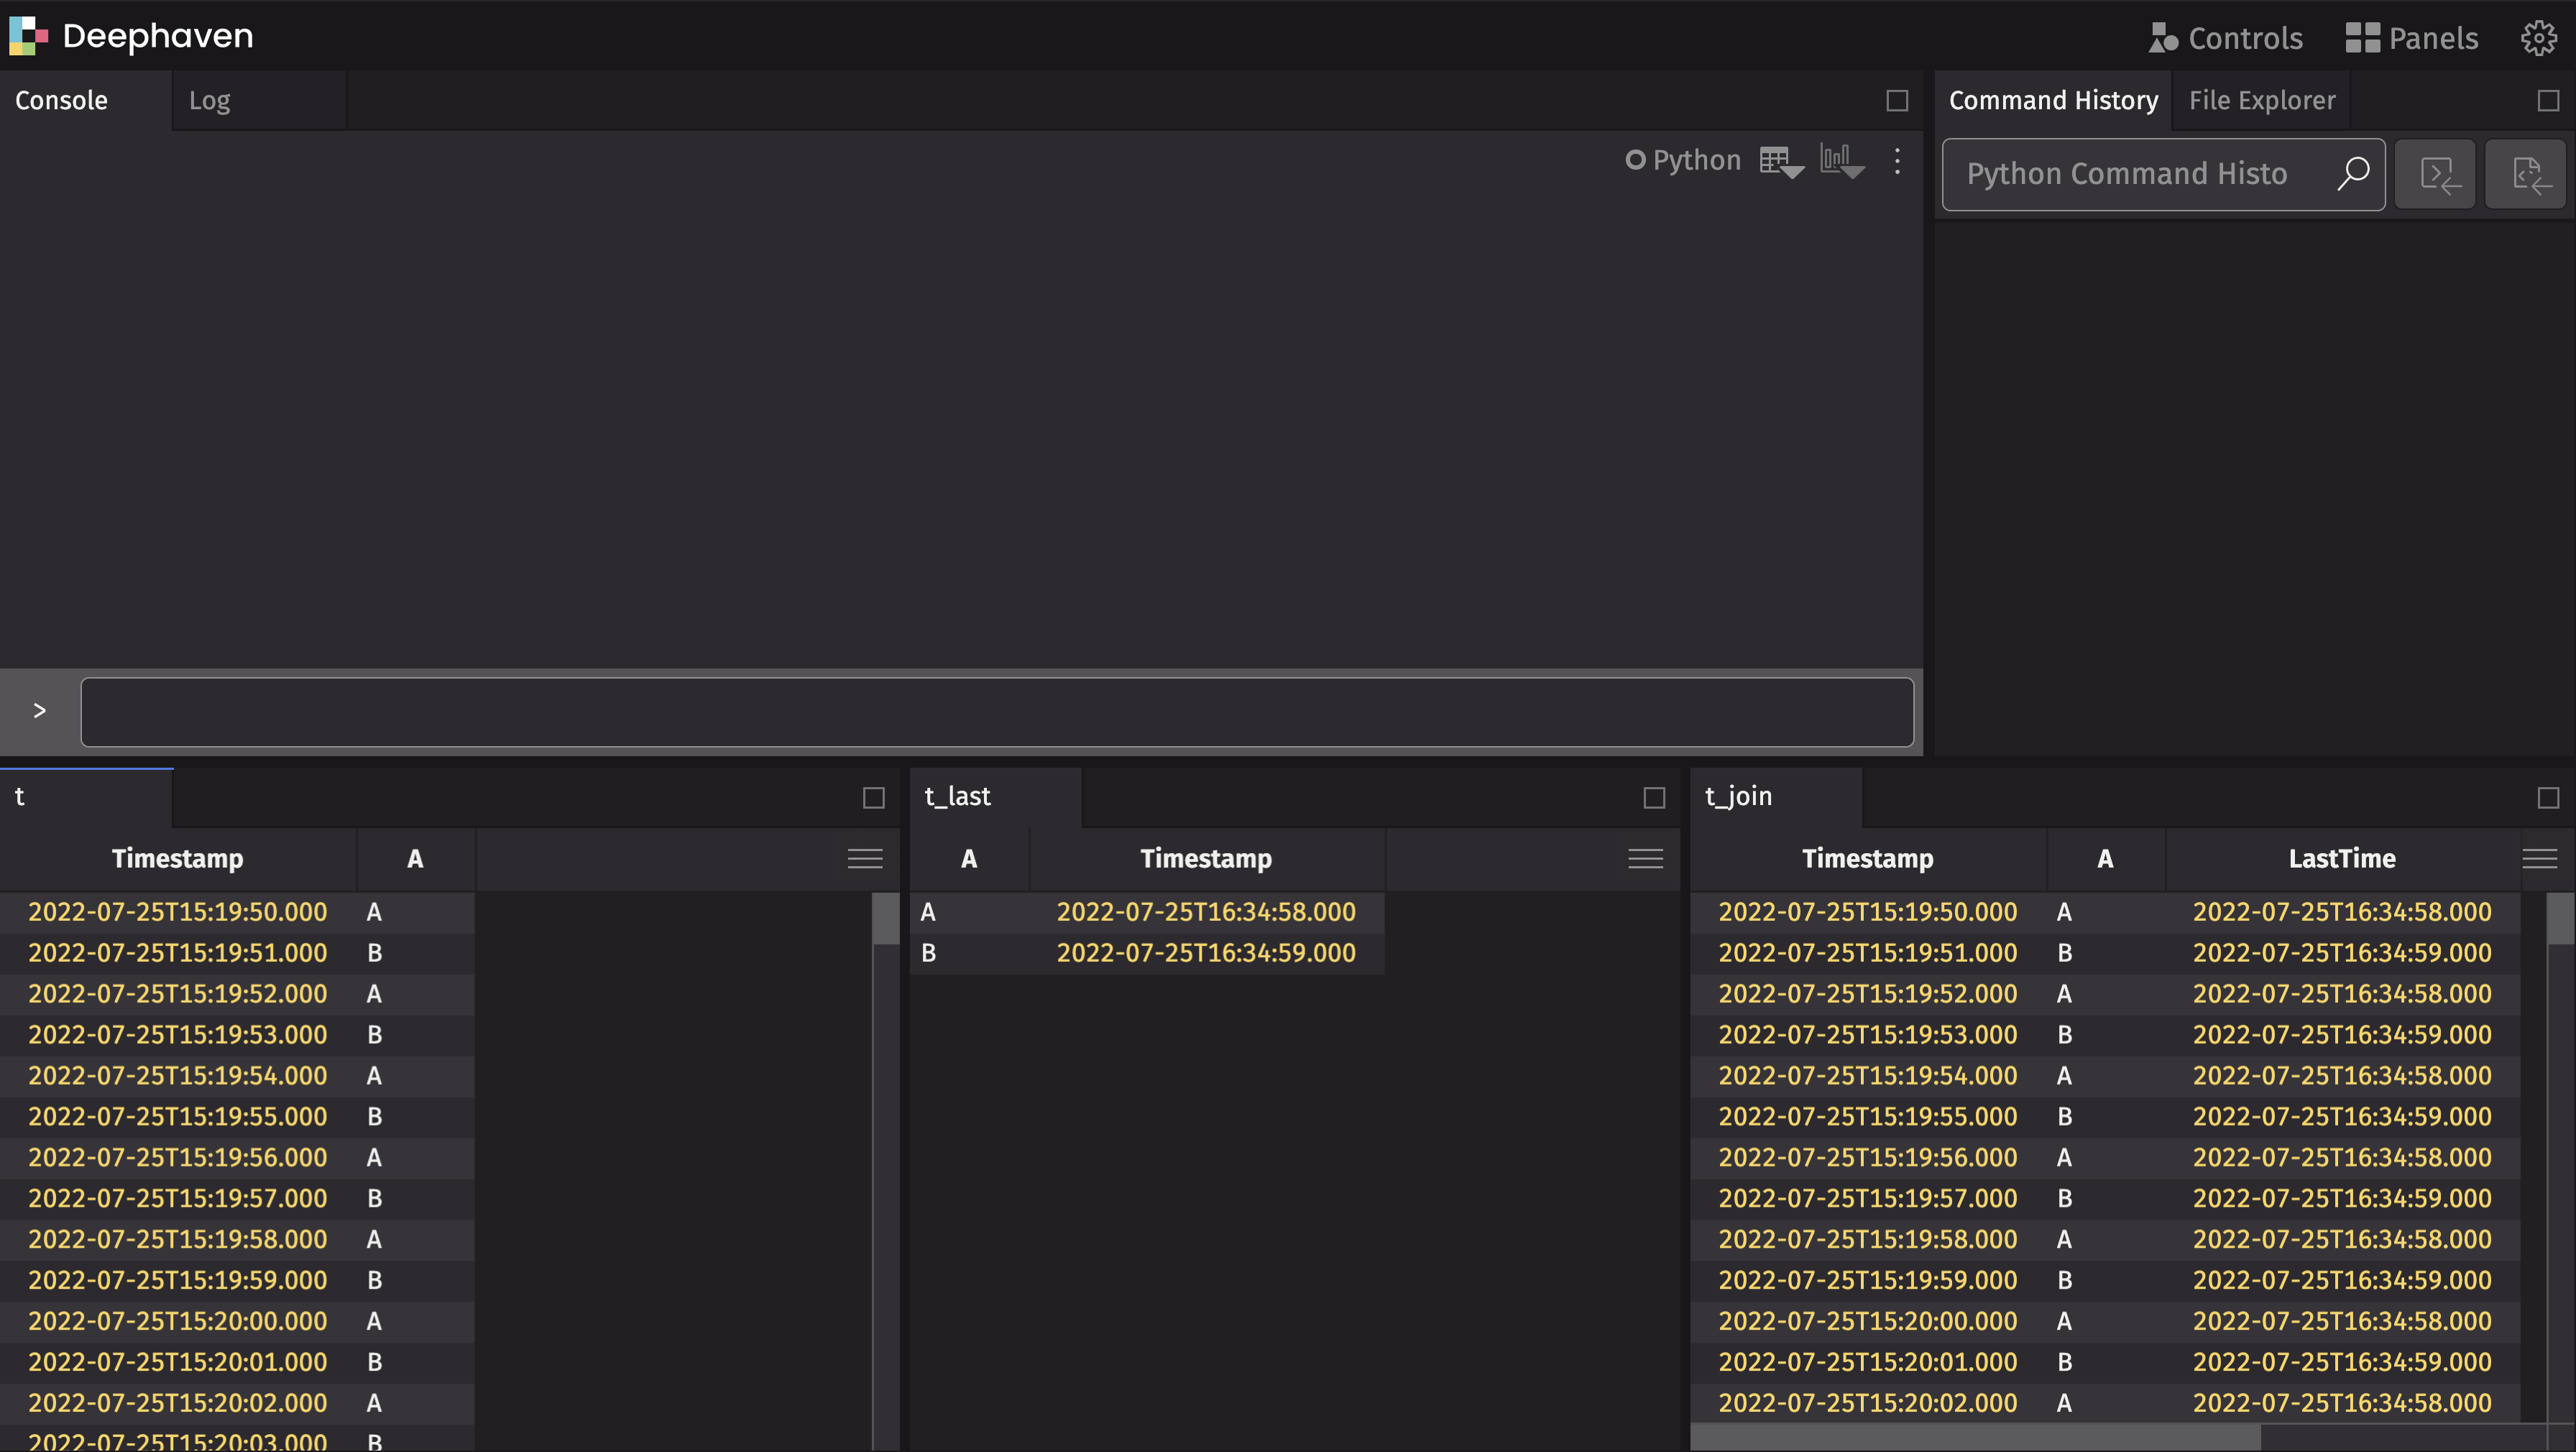
This script creates three streaming tables. The first table (t) steadily increases in size, the second table (t_last) contains the most recent timestamp for each label, and the third table (t_join) joins the most recent timestamp onto the first table.
When running Python scripts from the command line, it's recommended to do so in interactive mode so the Python session stays up and running. This ensures the Deephaven server does not stop when the script finishes executing:

This next script creates a left table with employee data and a right table with department data. It then joins them on the DeptID column: