Python client session
This guide covers client sessions for Core+ workers via the Python client. Through a session manager, you can create temporary workers, connect to Persistent Queries (PQs), and more.
The Deephaven Enterprise Python client can be run both remotely and from a running Deephaven server. When run from an external machine (remotely), clients connect to a Deephaven server to interact with it. When run from a Deephaven server, the client is commonly used to create workers, connect to PQs, communicate with other workers, manage PQs, and more.
This guide assumes you've already installed the Python client. The client comes installed on all Deephaven installations that have Python. For an overview of installing the client, see Installation.
Create a session manager
Note
If you are running the client from a Deephaven server, you can create a session manager with no connection parameters.
Sessions are managed by a SessionManager. A session manager can be instantiated in two ways: directly and via a configuration file.
Directly
Every Deephaven installation exposes a connection.json file, which contains the information necessary to authenticate your machine with the server. This file is found at:
https://<server_name>:8000/iris/connection.jsonon servers with an Envoy service.https://<server_name>:8123/iris/connection.jsonon servers without an Envoy service.
For instance, if your server has Envoy and is named deephaven-host, the following code block will connect to it:
from deephaven_enterprise.client.session_manager import SessionManager

connection_json = "deephaven-host:8000/iris/connection.json"

session_mgr = SessionManager(url=connection_json)
Via a configuration file
A session can also be instantiated via a custom connection.json file. The file itself must set the following parameters:
auth_hostauth_portcontroller_hostcontroller_port
This file allows you to set many additional configuration parameters. The JSON connection configuration guide provides more details.
Authentication
Once connected, you must authenticate with the server. You can do this with the same username and password you'd use to log in directly:
session_mgr.password(user="username", password="password")
Alternatively, you can authenticate with SAML:
session_mgr.private_key("path/to/private/keyfile")
Note
An SSL: CERTIFICATE_VERIFY_FAILED exception when connecting can typically be resolved by installing the default root certificates from certifi.
pip install certifi
/Applications/Python/Install\ Certificates.command
Usage
Once authenticated, the session manager can:
- Create a temporary worker.
- Connect to a PQ.
- Create a controller client.
- Create an authentication client.
Create a worker
To create a new worker, call connect_to_new_worker. The following code block connects to a new worker with a heap size of 4 GB.
session = session_mgr.connect_to_new_worker(name=None, heap_size_gb=4.0)

Note
Naming a worker is not required. If no name is given, the worker's name is based on the time it was created.
A slew of additional parameters can be set. Some of the most common include:
name: The name of the server to connect to. If not given, the first available server is used.extra_jvm_args: Extra JVM arguments when creating the worker.extra_environment_vars: Extra environment variables when creating the worker.
The connect_to_new_worker method returns a DndSession, which allows you to interact with the worker. Refer to the API documentation for more information on optional parameters.
Connect to a PQ
A session manager can also connect to an existing Persistent Query (PQ). The PQ must be running to connect to it. To connect to a running PQ, call connect_to_persistent_query. This method can take the name of the PQ to connect to:
session = session_mgr.connect_to_persistent_query(name="My_PQ")
The method can also take the PQ's serial number:
session = session_mgr.connect_to_persistent_query(serial=12345)
This method returns a DndSession, which allows you to interact with the PQ. You can also specify a dictionary of additional arguments to pass to the session when connecting to a PQ. For more information, see the API documentation.
Create a controller client
Session managers can create controller clients that connect to the PQ controller. Controller clients allow you to:
- Subscribe to the state of PQs.
- Create new PQs.
- Modify, manage, and delete existing PQs.
Controller clients are outside the scope of this guide. For more information, see the Pydoc.
Create an authentication client
An authentication client connects to a Deephaven authentication server. The authentication client can be used to:
- Authenticate with the server similarly to how a session manager authenticates.
- Produce tokens for use with other Deephaven services.
- Upload keys to the server.
Authentication clients are an advanced topic and are outside the scope of this guide. For more information, see the Pydoc.
Core+ session
Any time you connect to either a running PQ or a new worker, you create a DndSession. This is a wrapper around the Deephaven Community Core Python client API that builds on its capabilities to provide additional necessary functionality for working with Deephaven Enterprise.
Like the Community Python client API, the Enterprise client API allows you to interact with tables in a worker. For instance, you can open any table that exists in the global scope on the server, and work with it in the client.
my_table = session.open_table("my_table")

print(my_table.to_arrow())
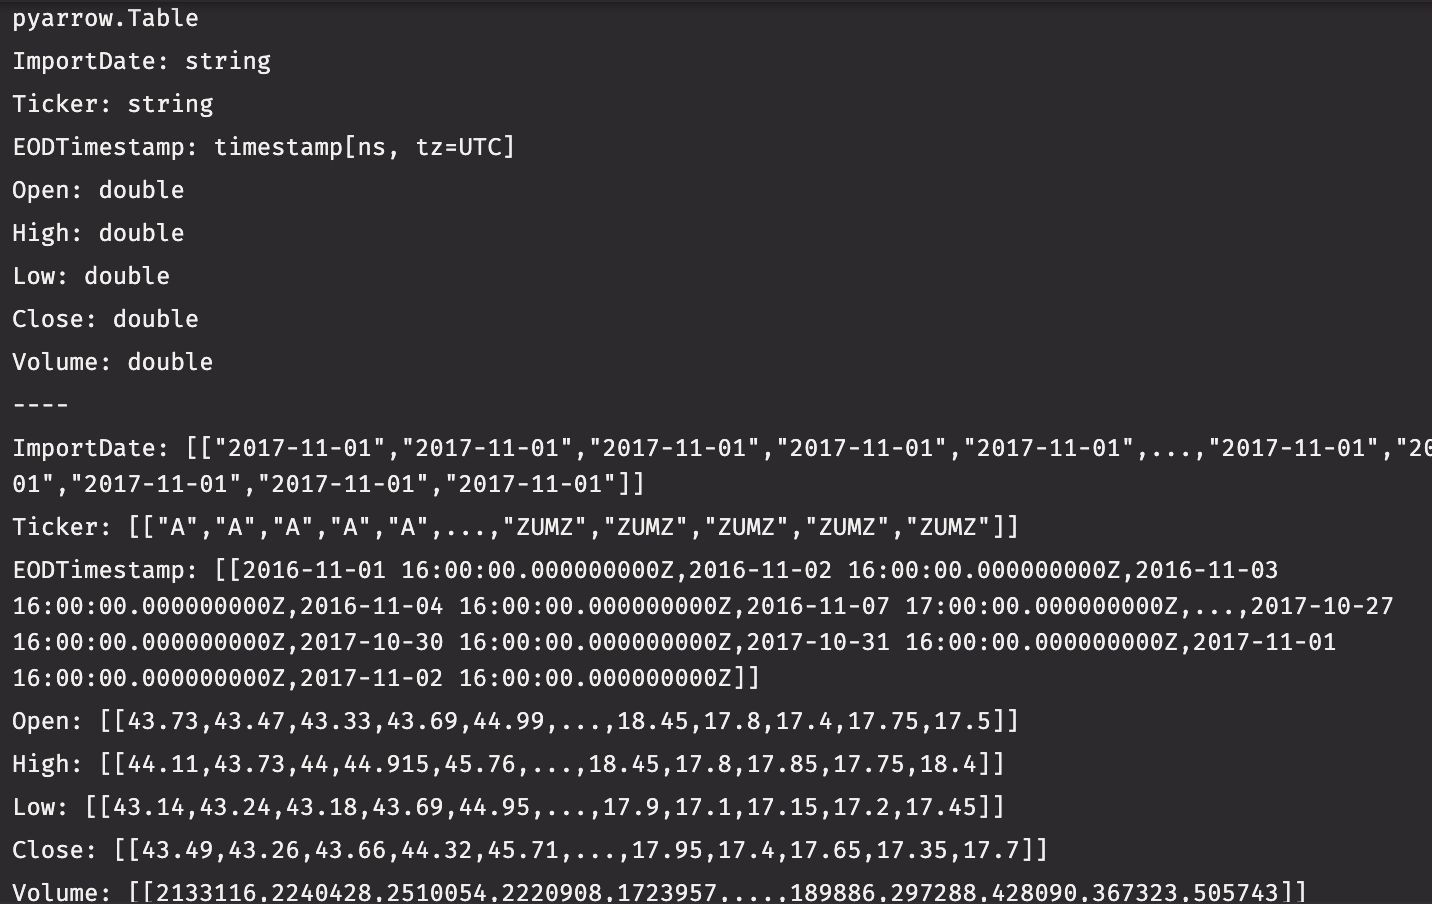
You can also fetch static and live catalog tables from the server:
eod_trades = session.historical_table(
    namespace="LearnDeephaven", table_name="EODTrades"
)

print(eod_trades.to_arrow())
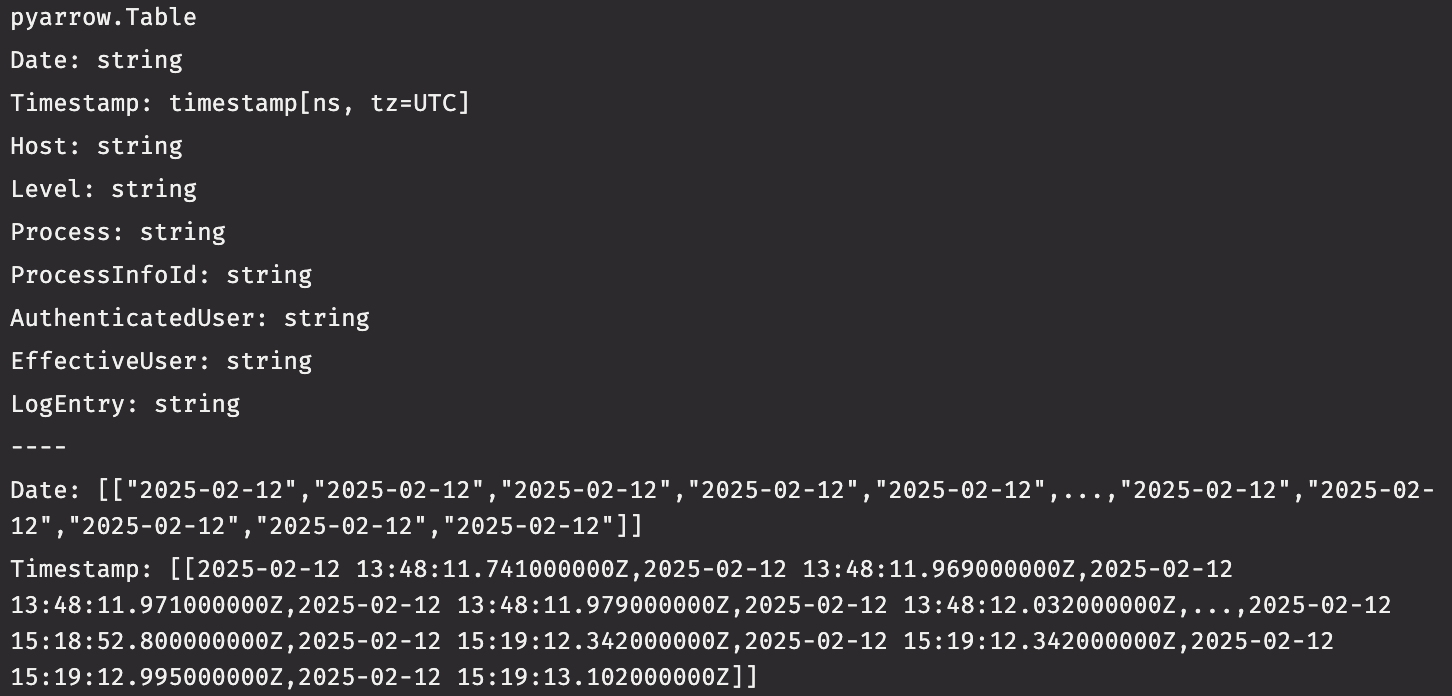
pel = session.live_table(namespace="DbInternal", table_name="ProcessEventLog")

print(pel.to_arrow())
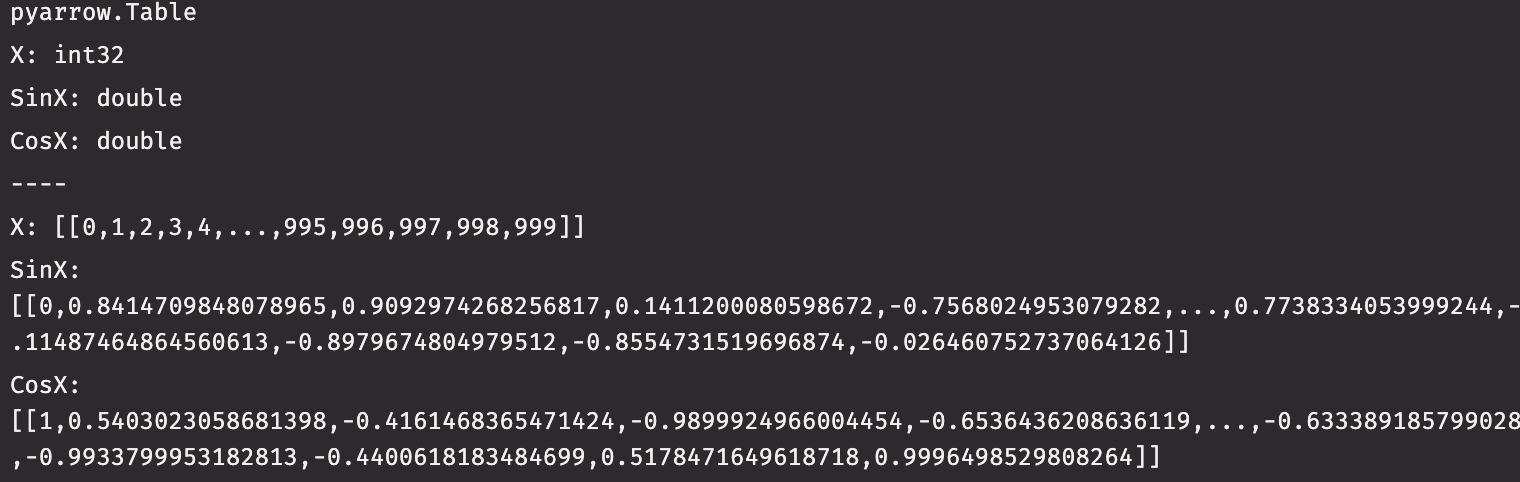
Creating tables is also easy. Here, the empty_table and time_table methods create tables in the worker. Intermediate tables are passed to the update method, which again creates tables on the server with new columns Letter and X. The results are assigned to local variables that reference the server-side tables.
static_table = session.empty_table(100).update(
    ["Letter = (i % 2 == 0) ? `A` : `B`", "X = randomInt(0, 100)"]
)
ticking_table = session.time_table("PT1s").update(
    ["Letter = (i % 2 == 0) ? `A` : `B`", "X = randomInt(0, 100)"]
)
The tables static_table and ticking_table are not yet accessible via the UI or other script calls on the worker itself. To make them accessible, the tables must be bound to variables in the worker's global scope via bind_table:
session.bind_table(name="client_static_table", table=static_table)
session.bind_table(name="client_ticking_table", table=ticking_table)
Typical use cases require multitudes of operations to be applied to client tables. In these cases, it's wise to use the query method to create a Query object. This object defines one or more operations to be applied to a given table. When the query is submitted, it batches all method calls into a single request. This avoids the overhead of multiple round trips when applying operations one at a time.
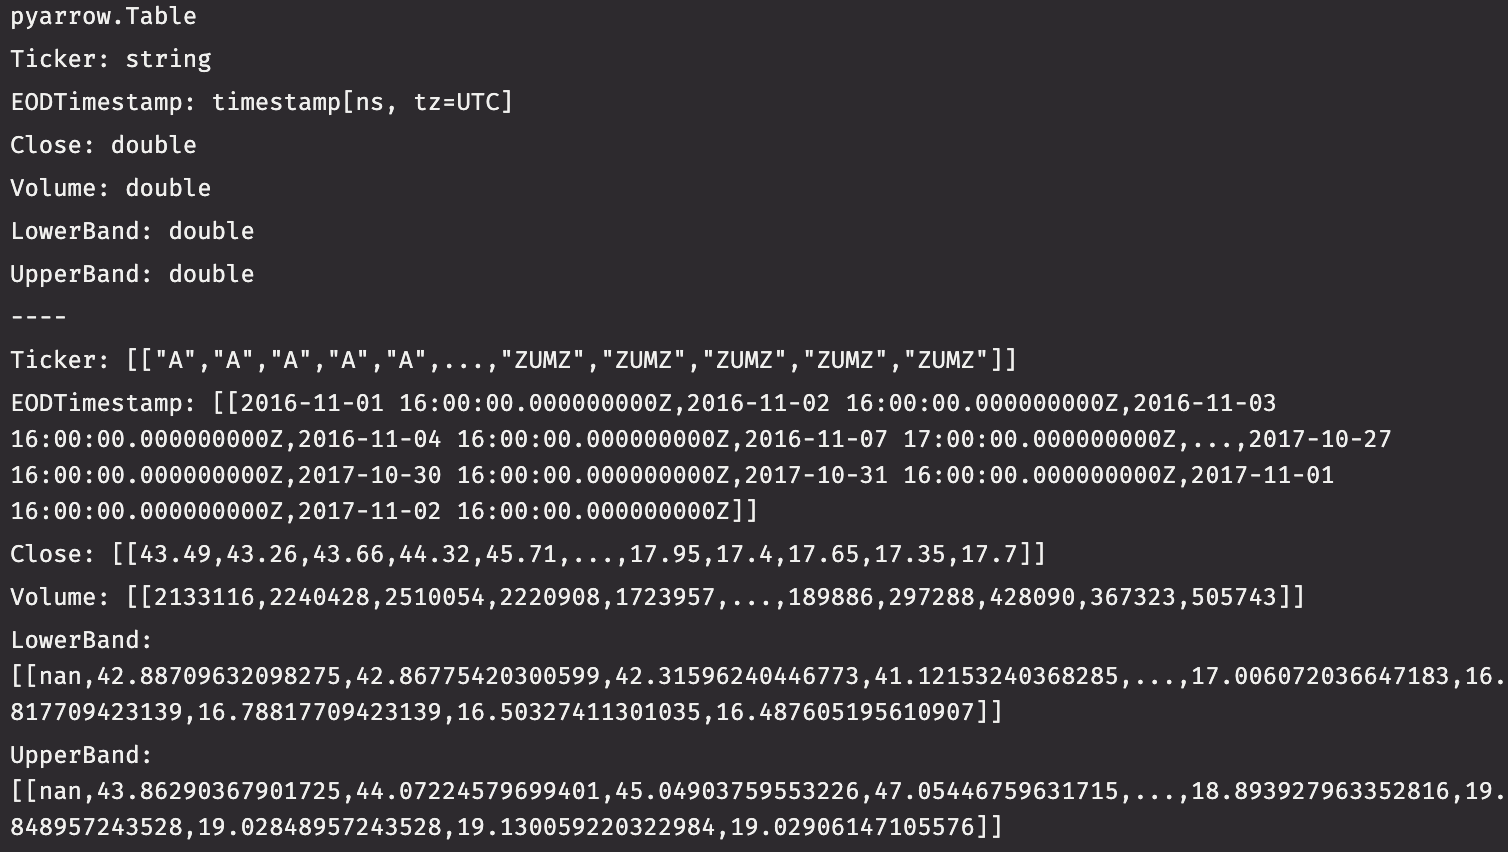
The following query batches together the operations to create simple Bollinger bands (moving averages) for the closing price of every ticker in the eod_trades table. All operations are sent to the server in a single request:
from pydeephaven.updateby import rolling_avg_time, rolling_std_time

lookback = "PT168H"

bollinger_ops = [
    rolling_avg_time(ts_col="EODTimestamp", cols="AvgClose=Close", rev_time=lookback),
    rolling_std_time(ts_col="EODTimestamp", cols="StdClose=Close", rev_time=lookback),
]

my_query = session.query(eod_trades)

my_query.view(["Ticker", "EODTimestamp", "Close", "Volume"])
my_query.update_by(ops=bollinger_ops, by="Ticker")
my_query.update_view(
    [
        "LowerBand = AvgClose - 3 * StdClose",
        "UpperBand = AvgClose + 3 * StdClose",
    ]
)
my_query.drop_columns(["AvgClose", "StdClose"])
eod_trades_bollinger = my_query.exec()

print(eod_trades_bollinger.to_arrow())
See the DndSession Pydoc and the Community client Pydoc for a full list of operations available in a session.