Core+ Python Client in Jupyter
Deephaven Enterprise Core+ with Jupyter allows you to use Deephaven and view tables and plots directly in Jupyter notebooks. To connect Enterprise Core+ and Jupyter, use the Core+ Python client from Jupyter to connect to a running Deephaven server.
Installation
Installing and running the Deephaven Python client in conjunction with Jupyter is a simple process. You will need to:
- Install Jupyter
- Install the Deephaven client wheel file in your Jupyter virtual environment
Install Jupyter
Note
We recommend using a Python virtual environment to decouple and isolate Python installs and associated packages.
Deephaven can operate in JupyterLab or Jupyter Notebook - the choice is yours! Both are installed with pip:
Locate and install the Deephaven client wheel file
Every Deephaven server hosts the Python client wheel file that you must install in your Jupyter virtual environment to connect to the server from Jupyter. Find the wheel at /usr/illumon/coreplus/latest/py/wheel/, with a name of the form deephaven_coreplus_client-<version_labels>-py3-none-any-whl.
To find the wheel file on the server you want to connect to, SSH to the server:
Then, navigate to the wheel file location:
Secure copy the file to your machine:
Install the Deephaven client wheel file in your Jupyter virtual environment
Now that you have the correct wheel file for your Deephaven Core+ client, you can install it in your Jupyter virtual environment:
Start Jupyter
You're ready to get up and running! Start Jupyter in your virtual environment:
JupyterLab automatically launches a new tab in your web browser. You can access it at "http://localhost:8888", which will redirect you to your JupyterLab's homepage.
Usage
The Python client's session manager and other objects work identically as outside JupyterLab, but the deephaven-ipywidgets library provides the DeephavenWidget function that displays the same responsive table grid as is available in the Deephaven Web UI. Most functionality, like sorting, filtering, and organizing columns is available. However, dashboarding features like linked tables require the Deephaven web UI.
Regardless of what you want to do with Deephaven in Jupyter, the first step is to connect to a worker.
Connect to a Deephaven worker
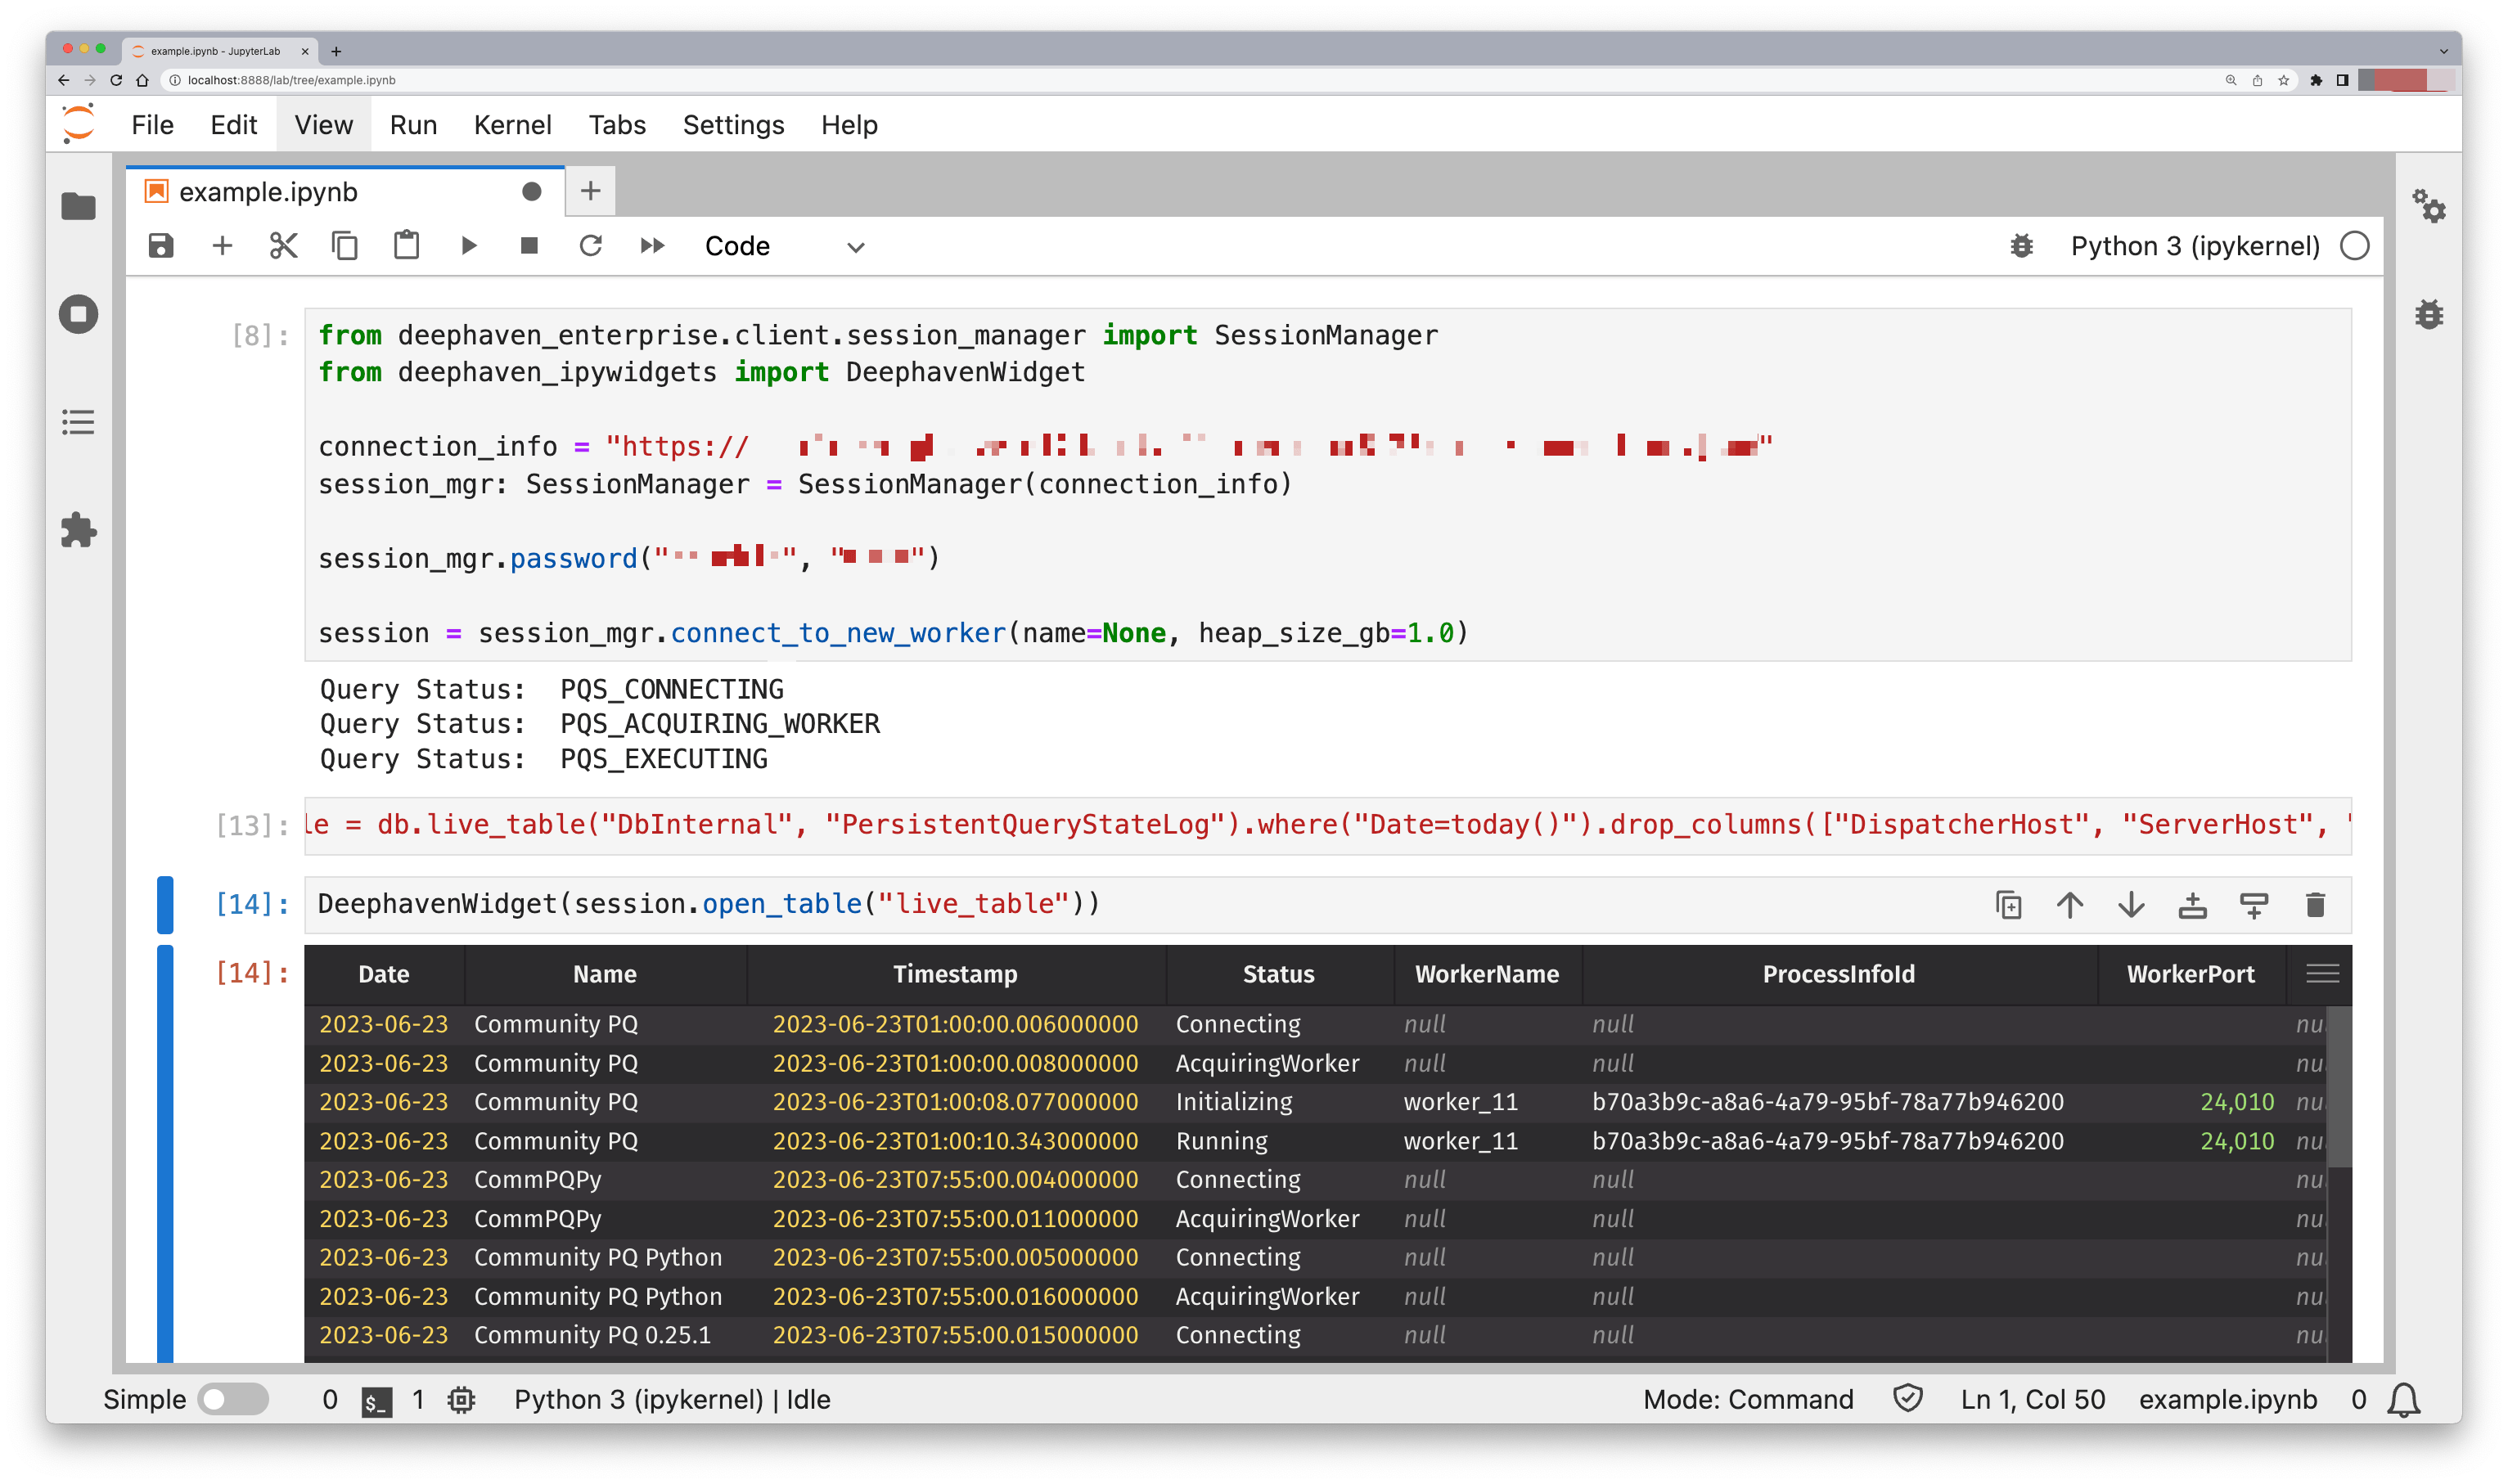
To connect to Deephaven from Jupyter, you need to create a SessionManager object and connect to the server. The SessionManager object is the primary interface for interacting with Deephaven from Jupyter. Open a new notebook and run:
You're connected! Now you can run scripts on the server, fetch tables from the connected worker or from Persistent Queries, and create new tables - and of course, display all of the above in the notebook. See the Python client guide for more information on what the Python client can do.
Run a script
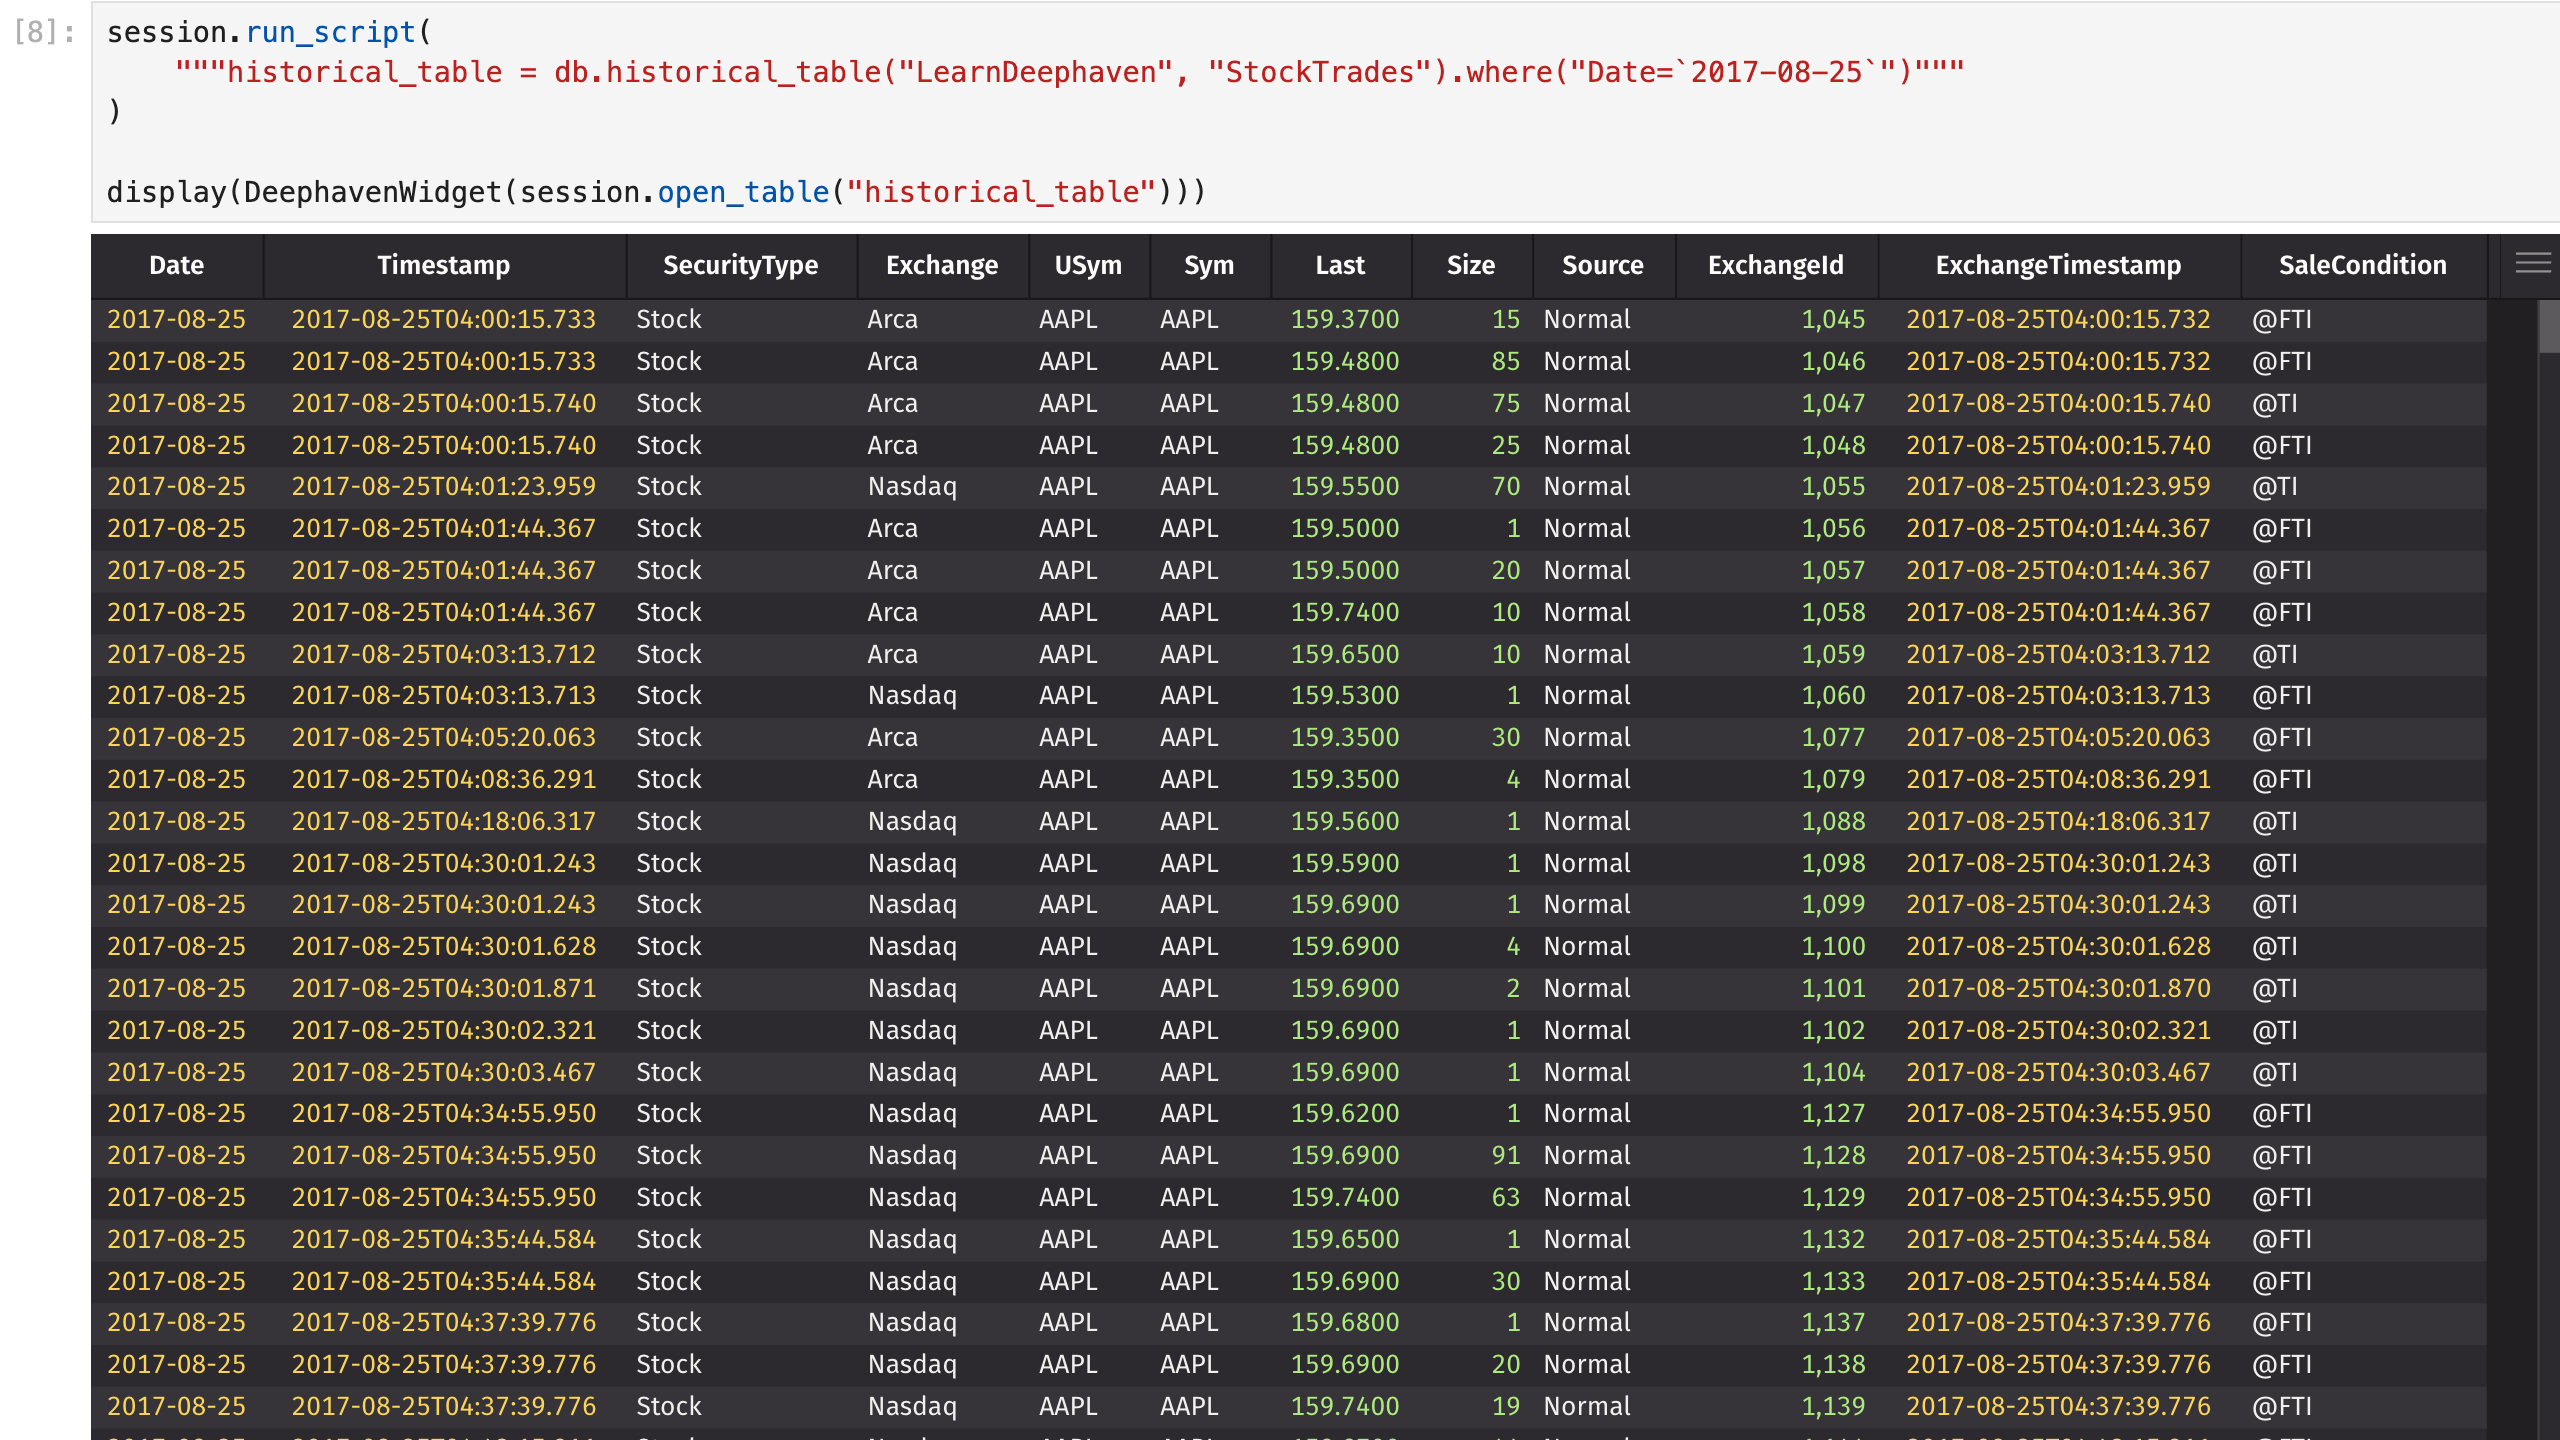
You can use the SessionManager's run_script method to execute Deephaven Core+ scripts on the server. Then, use display to show the results in the notebook. For example, to display a historical table from the LearnDeephaven database:
Finally, you can close the connection to the server when you're done:
Caution
Running session.close() in the same cell as creating the widget will prevent you from seeing the table, as the widget requires the worker to be running to display results.
Executing the script as several cells produces a result like the following:
Fetch a table from a namespace
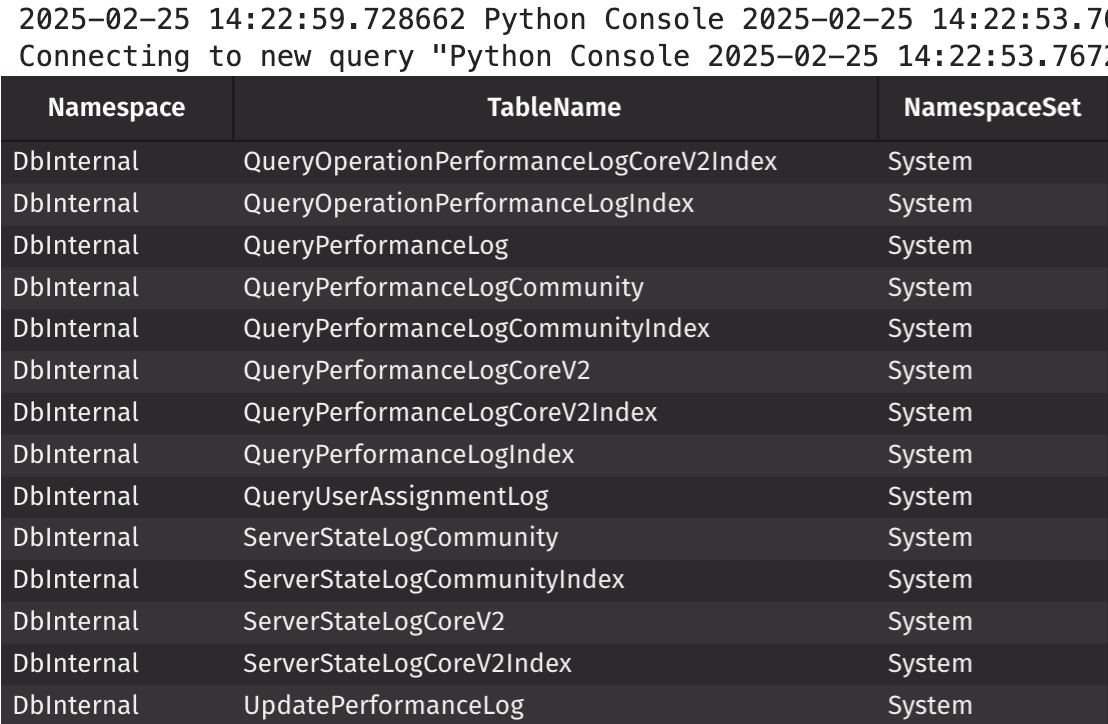
You can use the SessionManager's catalog method to list all of your connected worker's accessible namespaces and tables:
You can use historical_table or live_table to fetch a table from the namespace. For example, to fetch StockTrades from the LearnDeephaven namespace:

Create and manipulate tables
You can create empty tables and time tables with the SessionManager's empty_table and time_table methods, and use all of the Deephaven methods you are familiar with to manipulate data:
Connect to a Persistent Query
A SessionManager can fetch a Persistent Query via the connect_to_persistent_query method. You can then use open_table to open tables: