Customize the basic installation
Core+ custom libraries
Core+ workers use Java JARs to find customer-provided code. There are several ways to provide Core+ workers with custom Java libraries.
- The "Extra Classpaths" field from a console or Persistent Query configuration specifies arbitrary locations. It can contain multiple paths but each JAR must be specified exactly (no wildcards are allowed). This is useful for resources that are specific to a single console or query.
- Each Core+ WorkerKind configuration uses a property to define a specific location added to the classpath - all JARs in this location will be available to Core+ workers. For example the default Core+ worker kind uses the following definition:
- The default directory
/usr/illumon/coreplus/latest/custom_lib/exists in every Core+ installation and Java libraries here are avilable to Core+ workers. This is useful for overrides but is overwritten with each upgrade, so JARs placed here must be reinstalled after each upgrade.
Install multiple versions of Core+
You can install multiple versions of Core+ to take advantage of newer Core+ Engine improvements. You can do this by extracting the package next to any others in the /usr/illumon/coreplus folder and then adding some additional configuration to the iris-environment.prop file. You may also reuse the same installation directories for multiple WorkerKinds, but with different Python virtual environments or custom libraries for distinct applications.
There are four properties that, together, define a runnable version:
The DeephavenCommunity part of the property defines a class of worker with the same name. You can copy these properties and change DeephavenCommunity to something else, for example CorePlusBeta, then change the path and title properties to define the installation. For example, the following set of properties will define a new worker kind for a hypothetical Community version of 0.30.0dev3:
Note: If you are installing Python, follow the steps above, creating a new venv directory for the Core+ version being installed, if it differs from the existing one.
To modify the configuration, edit iris-environment.prop:
Important
You must restart the Query Server, Merge Server and Web API Service on all nodes on which you install the package. Also, you must refresh your browser without caching.
Once you refresh your browser instance, you will see the new instances in the Engine dropdown menu:
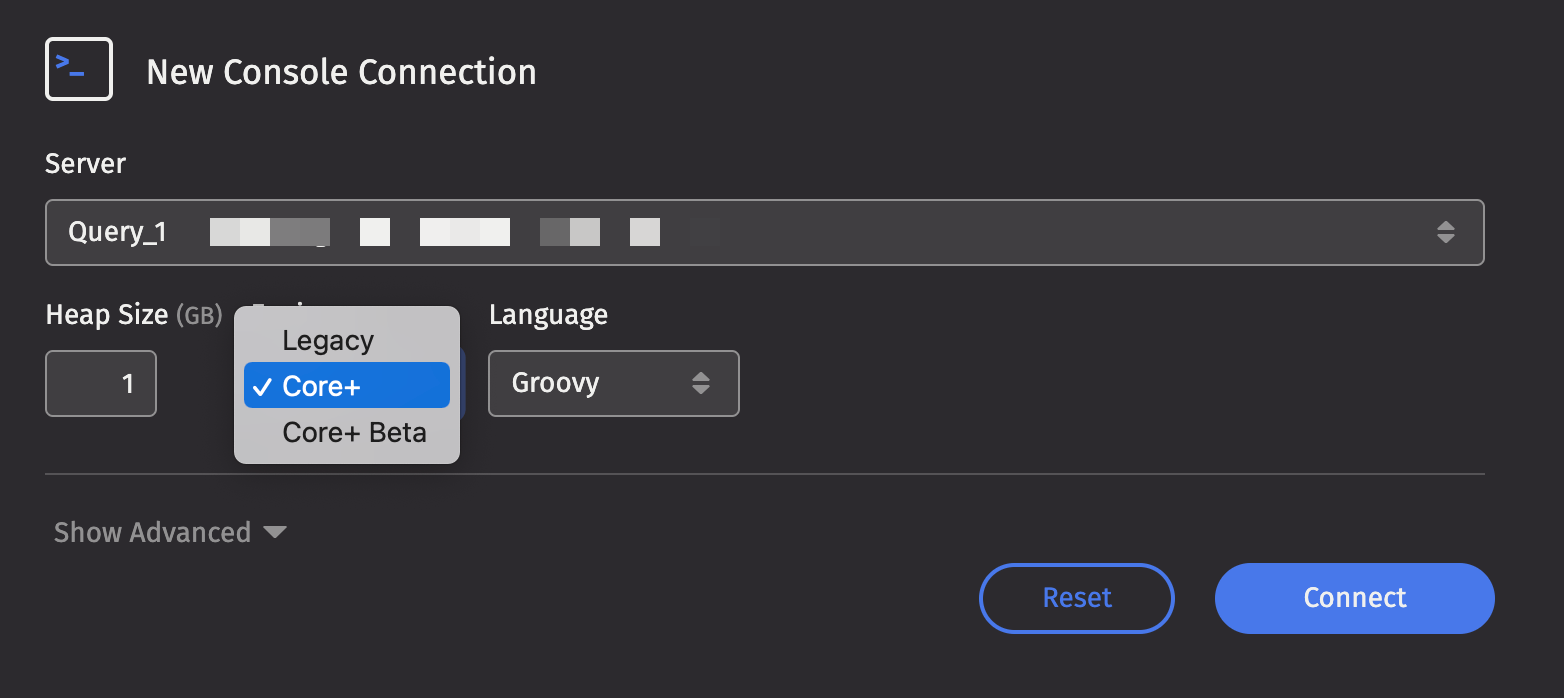
When selecting the engine (Legacy, Core+, or Core+ Beta) in a Code Studio, a property controls the display order for each worker kind. Lower values are displayed first by the Code Studio drop-down. The Legacy engine is hardcoded to 100. Core+ workers default to 200, but in the default v1.20230511 (Vermilion) and later iris-environment.prop, they are set to 50 with the property WorkerKind.DeephavenCommunity.displayOrder. As a result, new installations display Core+ first, but installations initially created with releases before Vermilion display Legacy first.
In the following example, the "Core+ Beta" worker is displayed after a "Core+" worker with display order 50 but before the "Enterprise" worker with display order 100.
Install custom Python virtual environments
It's common to install custom Python virtual environments for the Core+ worker, as the default virtual environment is not suitable for all use cases. You can install custom virtual environments with either pip or conda. For instructions on installing custom Python virtual environments in Core+ workers, see Install custom Python virtual environments.
Custom libraries
You can provide custom libraries to the additional Core+ version by using the customLib property for the installation's worker class. For example:
This can be useful to define several different kinds of workers, with distinct custom libraries that depend on the worker's role. By defining several worker kinds, it is easy to switch between them, and for administrators to change the libraries without requiring additional per-worker configuration by the user.
Install JavaScript Plugins
Community JavaScript plugins can be installed in Core+ workers.
-
Create a
Dockerfilecontaining the following: -
Update the list of package specs passed to
./pack-plugins.shbased on the plugins you want to install. The script usesnpm packunder the hood and should support any valid <package-spec>. Typical specs would be a package name + version (e.g.,@deephaven/js-plugin-matplotlib@0.4.0) or a local file path to a non-published package. See the npm docs for additional documentation.
Note
Local file paths require volume mounts in order to be available to the Docker container.
Caution
This replaces the default JS plugins that are typically installed, so you must include those if you want to keep them. To see the existing list of installed plugins, you can run cat /usr/illumon/coreplus/latest/js-plugins/manifest.json on the server hosting the DHE installation.
-
Build the image:
-
Run the container:
This should create a
build/js-pluginsfolder on your host machine in the directory containing yourDockerfile. -
Copy the
build/js-pluginsdirectory to a tmp directory on the server running Enterprise: -
You can now delete the
build/js-pluginsfolder on your host machine, as you will not need it anymore. -
On the server, copy the
js-pluginsdirectory into the Core+ install: