Core+ Java Flight SQL JDBC
Flight SQL is a protocol on top of Arrow Flight that exposes SQL-like capabilities. Deephaven Core+ workers provide a built-in Flight SQL server that makes tables in the global query scope available as named tables. These tables can be accessed and queried through the default Flight SQL catalog using standard SQL queries.
Note
SELECT queries are supported; INSERT, UPDATE, and DELETE queries are not currently supported.
While Flight SQL may be an easy jumping-off point, the Flight SQL APIs are not Live Dataframe APIs. If you need to receive real-time updates, the best option is a Deephaven-native client, such as the Deephaven Core+ Java client.
In Deephaven Community Core, you can connect directly to the Flight SQL server using most standard Flight SQL clients, including the Flight SQL JDBC Driver. For detailed instructions, refer to the Community Flight SQL guide.
For Deephaven Core+, connecting to a worker via JDBC requires the proprietary Deephaven Enterprise Flight SQL JDBC Driver, which supports Core+'s enhanced authentication and session management features. Standard Flight SQL JDBC drivers are not compatible with Core+.
Prerequisites
This guide assumes:
- You are familiar with SQL and JDBC to use the
Deephaven Enterprise Flight SQL JDBC Driverwith JDBC-based database tools such as DBeaver and JetBrains DataGrip. - You are familiar with Java and Gradle (or another build tool such as Maven) to use the
Deephaven Enterprise Flight SQL JDBC Driverprogrammatically.
You must have the following to use the Deephaven Enterprise Flight SQL JDBC Driver:
- Access to a running Deephaven Core+ instance with Flight SQL enabled (Grizzly version 1.20240517.491 or later).
- JDK 17 or newer installed.
- Gradle 7.3 or newer installed.
Use with JDBC-based database tools
The Deephaven Enterprise Flight SQL JDBC Driver can be used with JDBC-based database tools such as DBeaver and JetBrains DataGrip.
Note: The steps below use macOS paths and screenshots, but the process is similar on Windows and Linux. Adjust file locations and UI navigation as needed for your operating system.
Note: The example connection details (
host,port,pqName,user,password) shown below are placeholders. Be sure to replace them with the actual values for your Deephaven Core+ environment.
DBeaver
-
Edit the
dbeaver.iniconfiguration file (on macOS,/Applications/DBeaver.app/Contents/Eclipse/dbeaver.ini) and add the following lines to the end of the file: -
Start
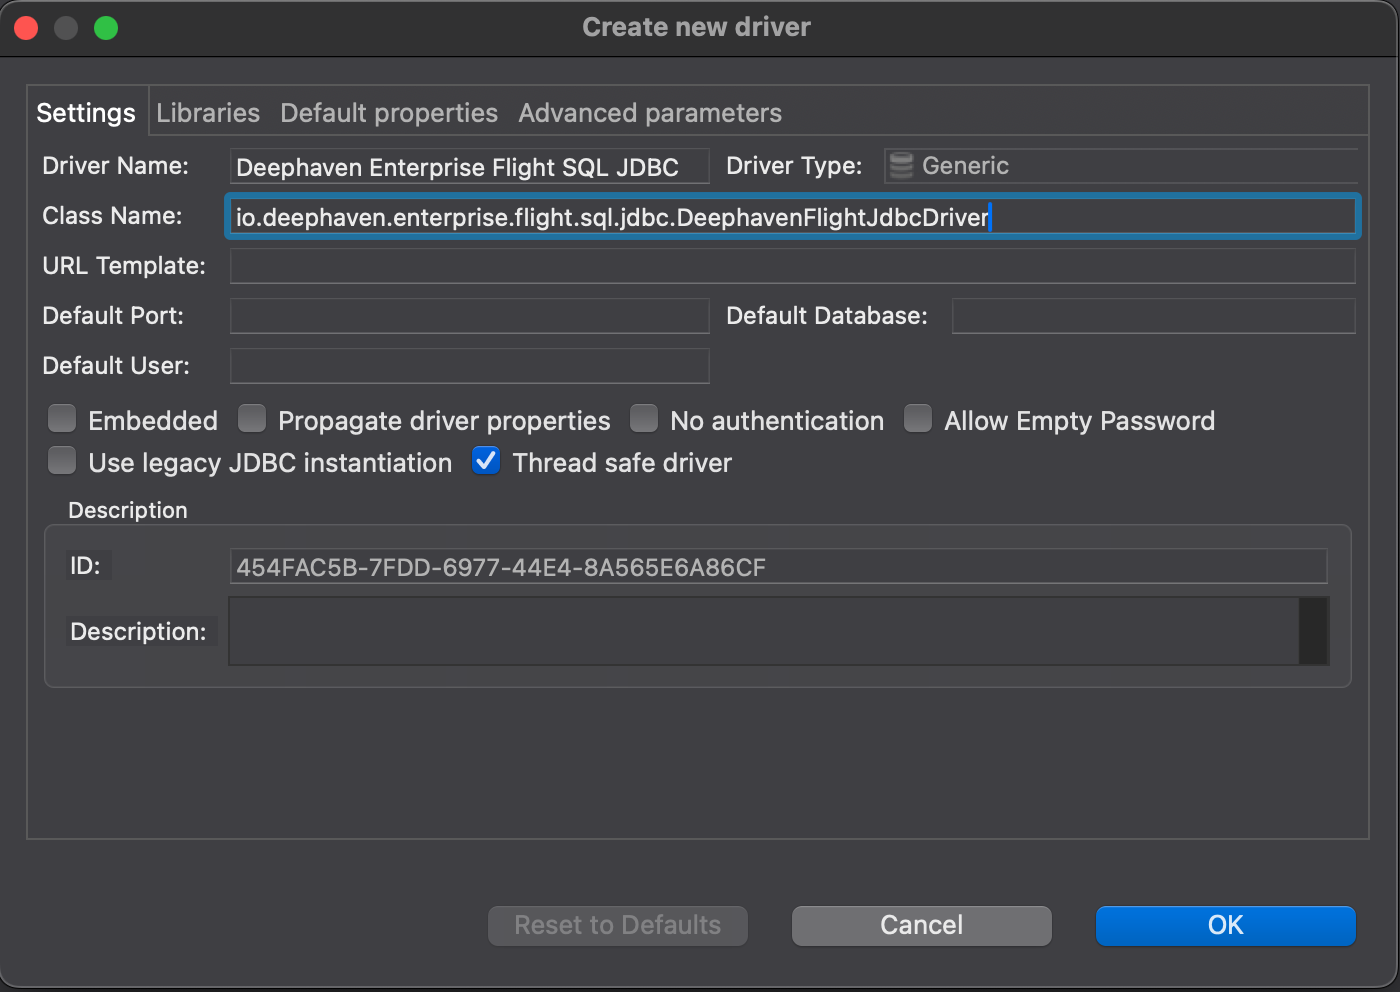
DBeaver, then go to Database > Driver Manager > New to create a custom driver.In the settings tab, fill in the following fields:
Driver Name: Deephaven Enterprise Flight SQL JDBCClass Name: io.deephaven.enterprise.flight.sql.jdbc.DeephavenFlightJdbcDriver
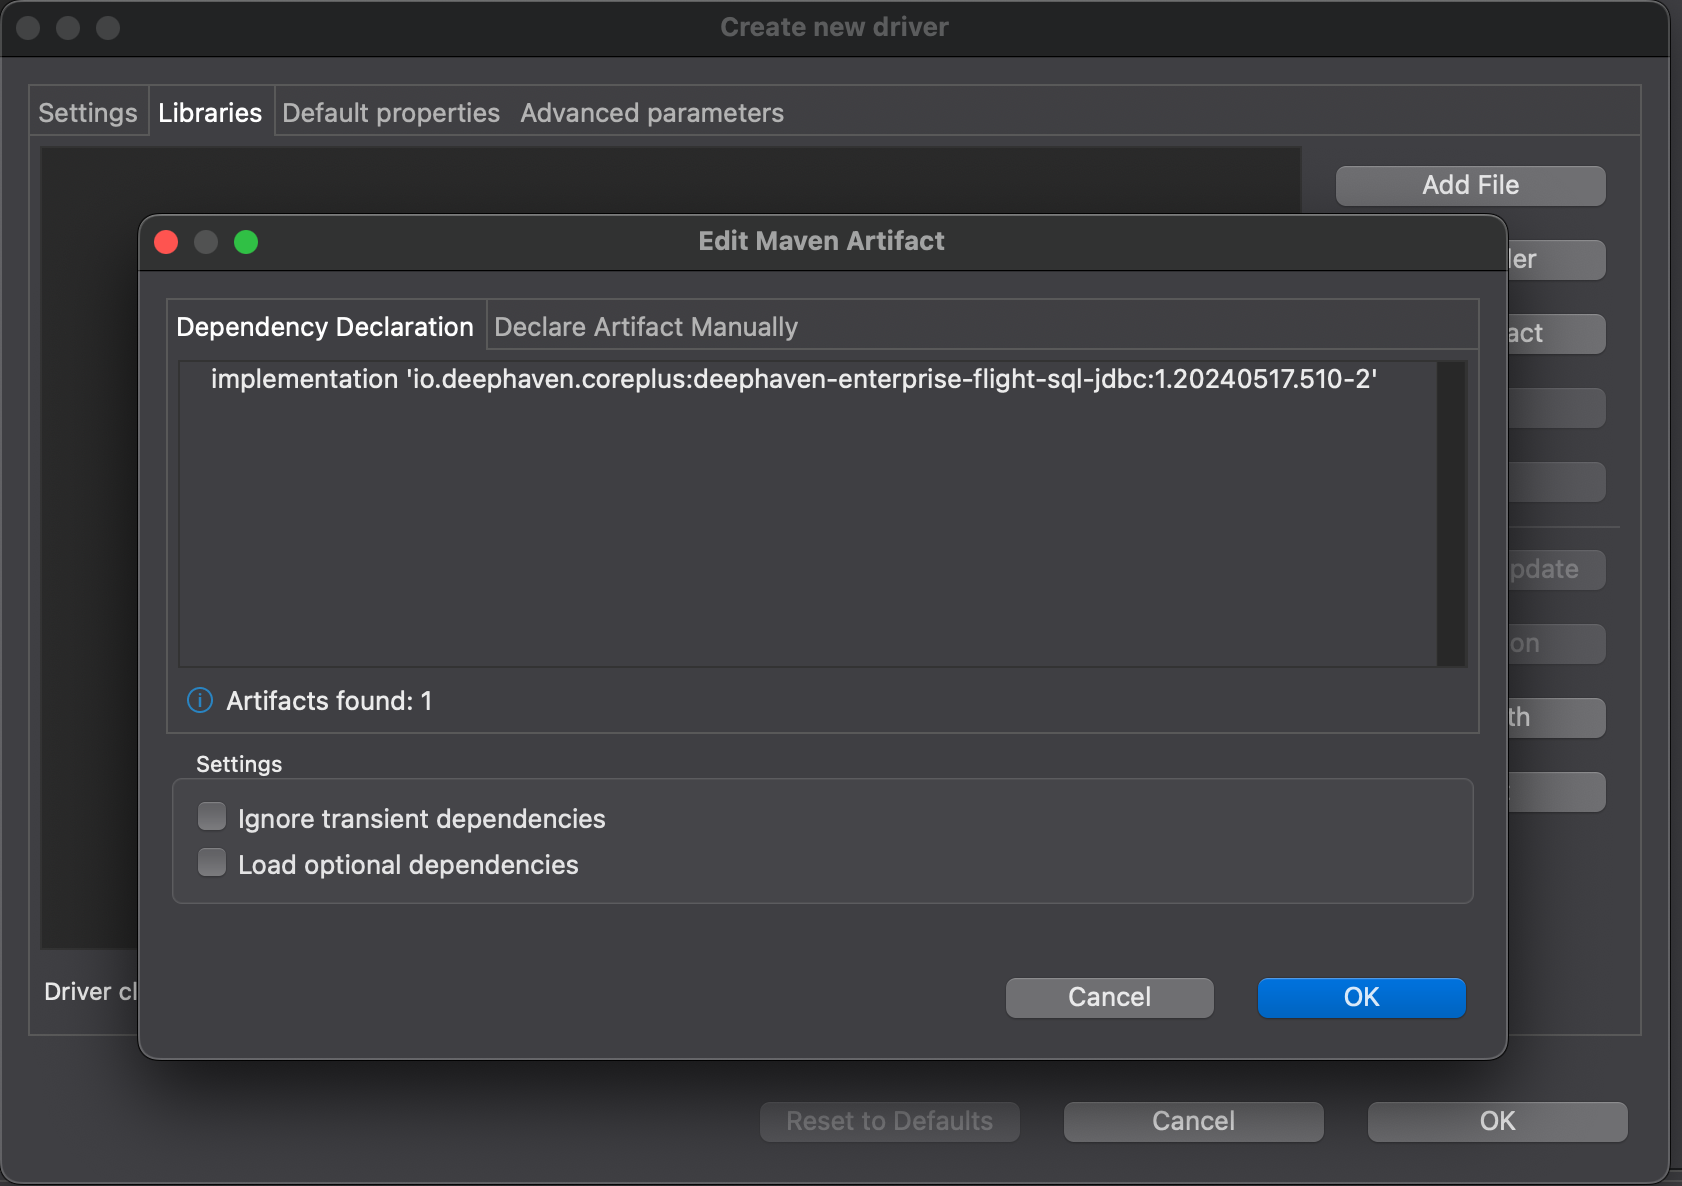
In the Libraries tab, click on the Add Artifact button, and then add the following line in the Dependency Declaration tab:
Note: Choose the driver version that matches your Deephaven Core+ instance to ensure compatibility.
Hit Ok.
-
In the Database Navigator panel:
- Right-click and select Create -> Connection.
- Select the Deephaven Enterprise Flight SQL JDBC driver from the available drivers.
- Fill in the full connection URL (this is required because the
PQ nameis not one of the standard parameters); e.g.:
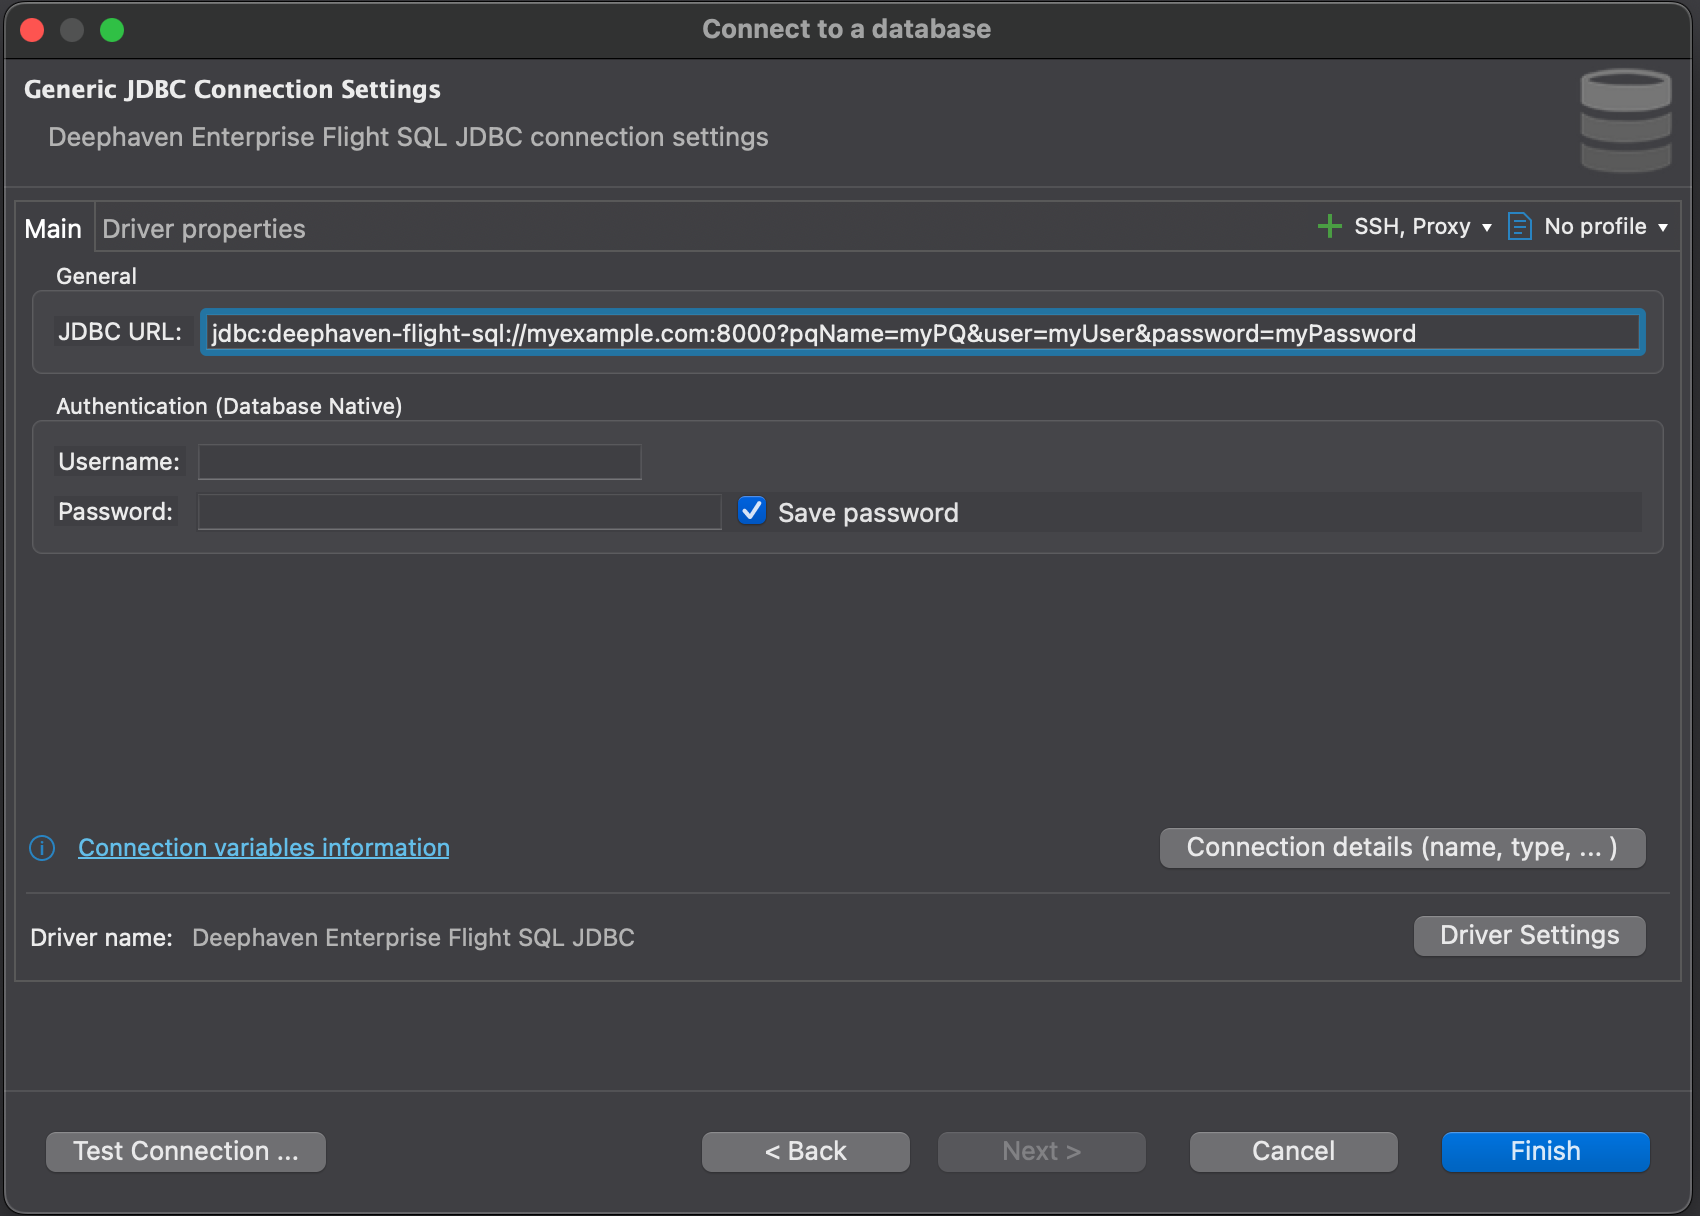
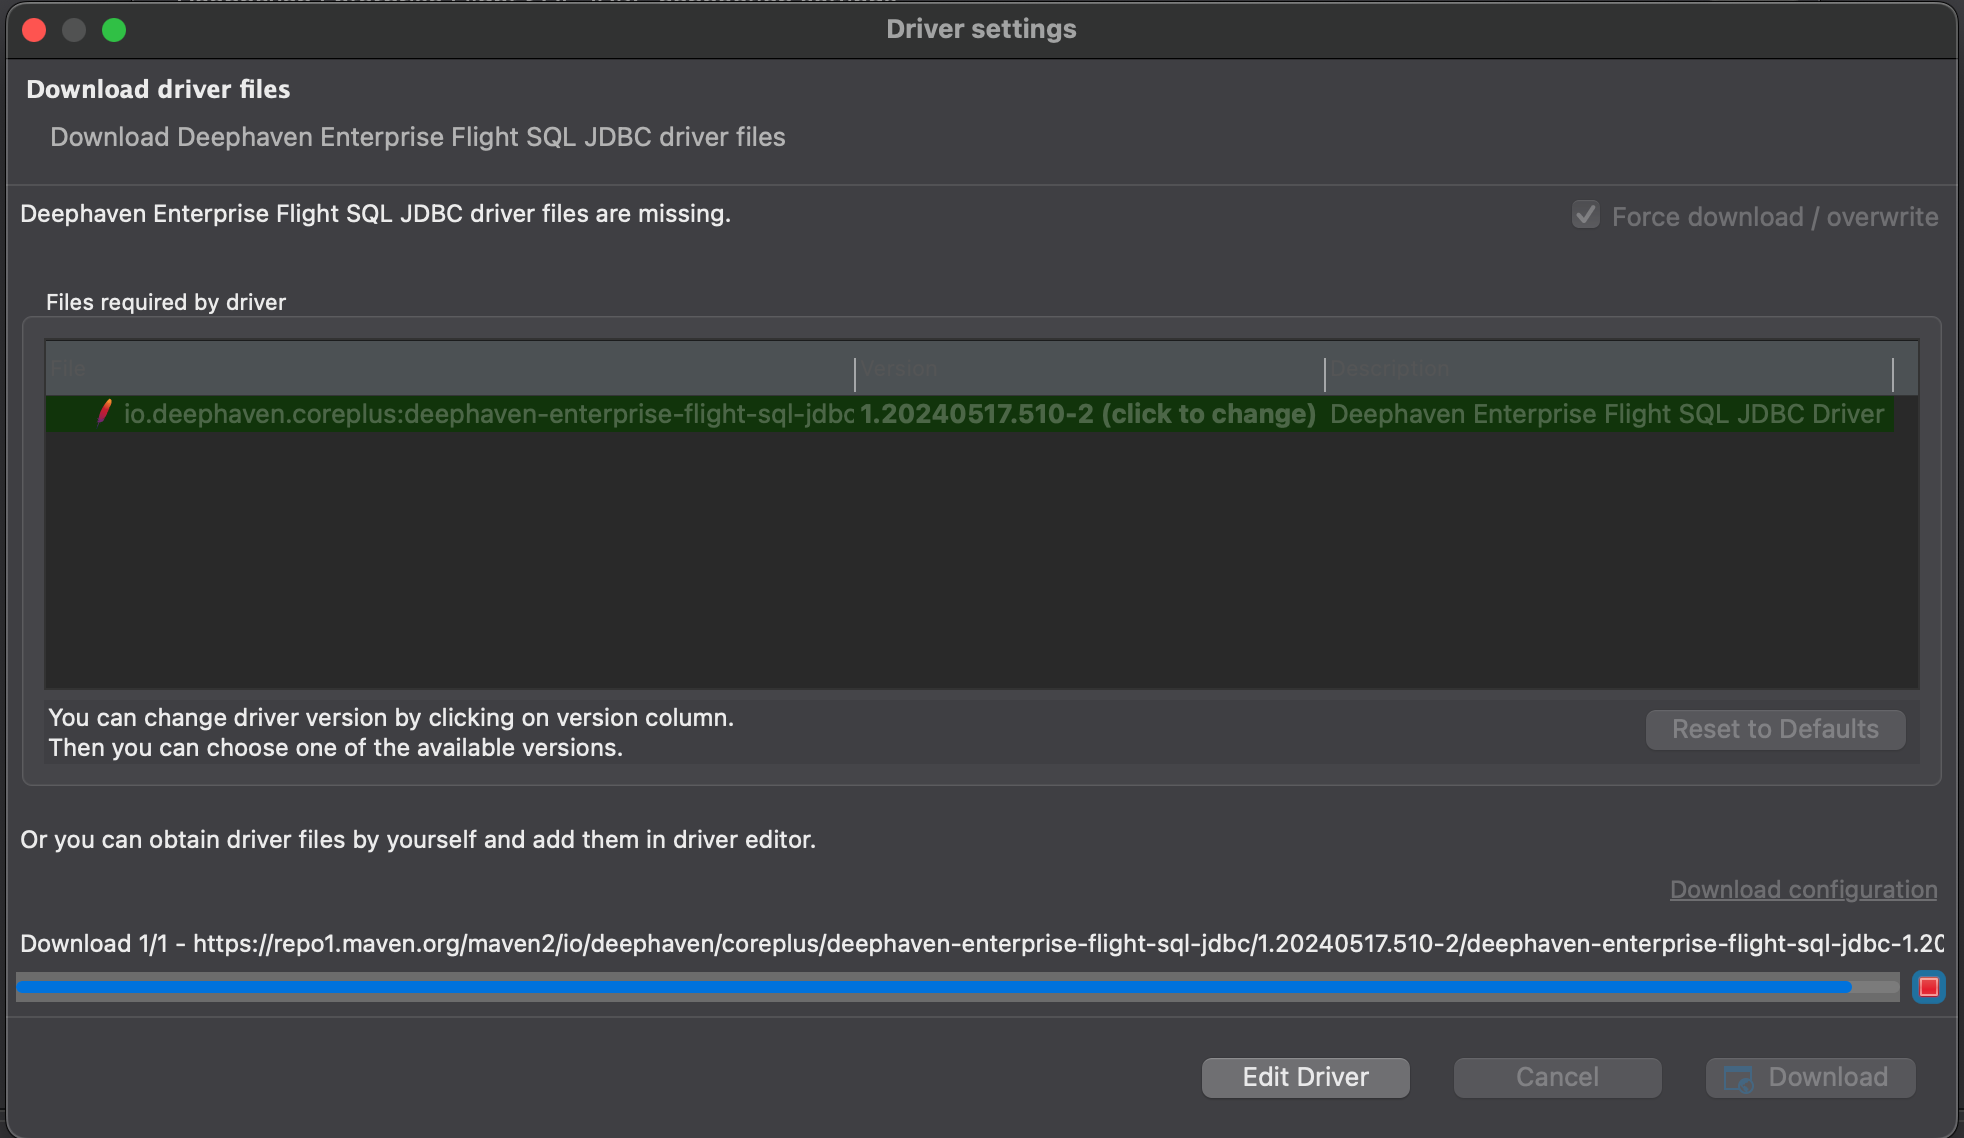
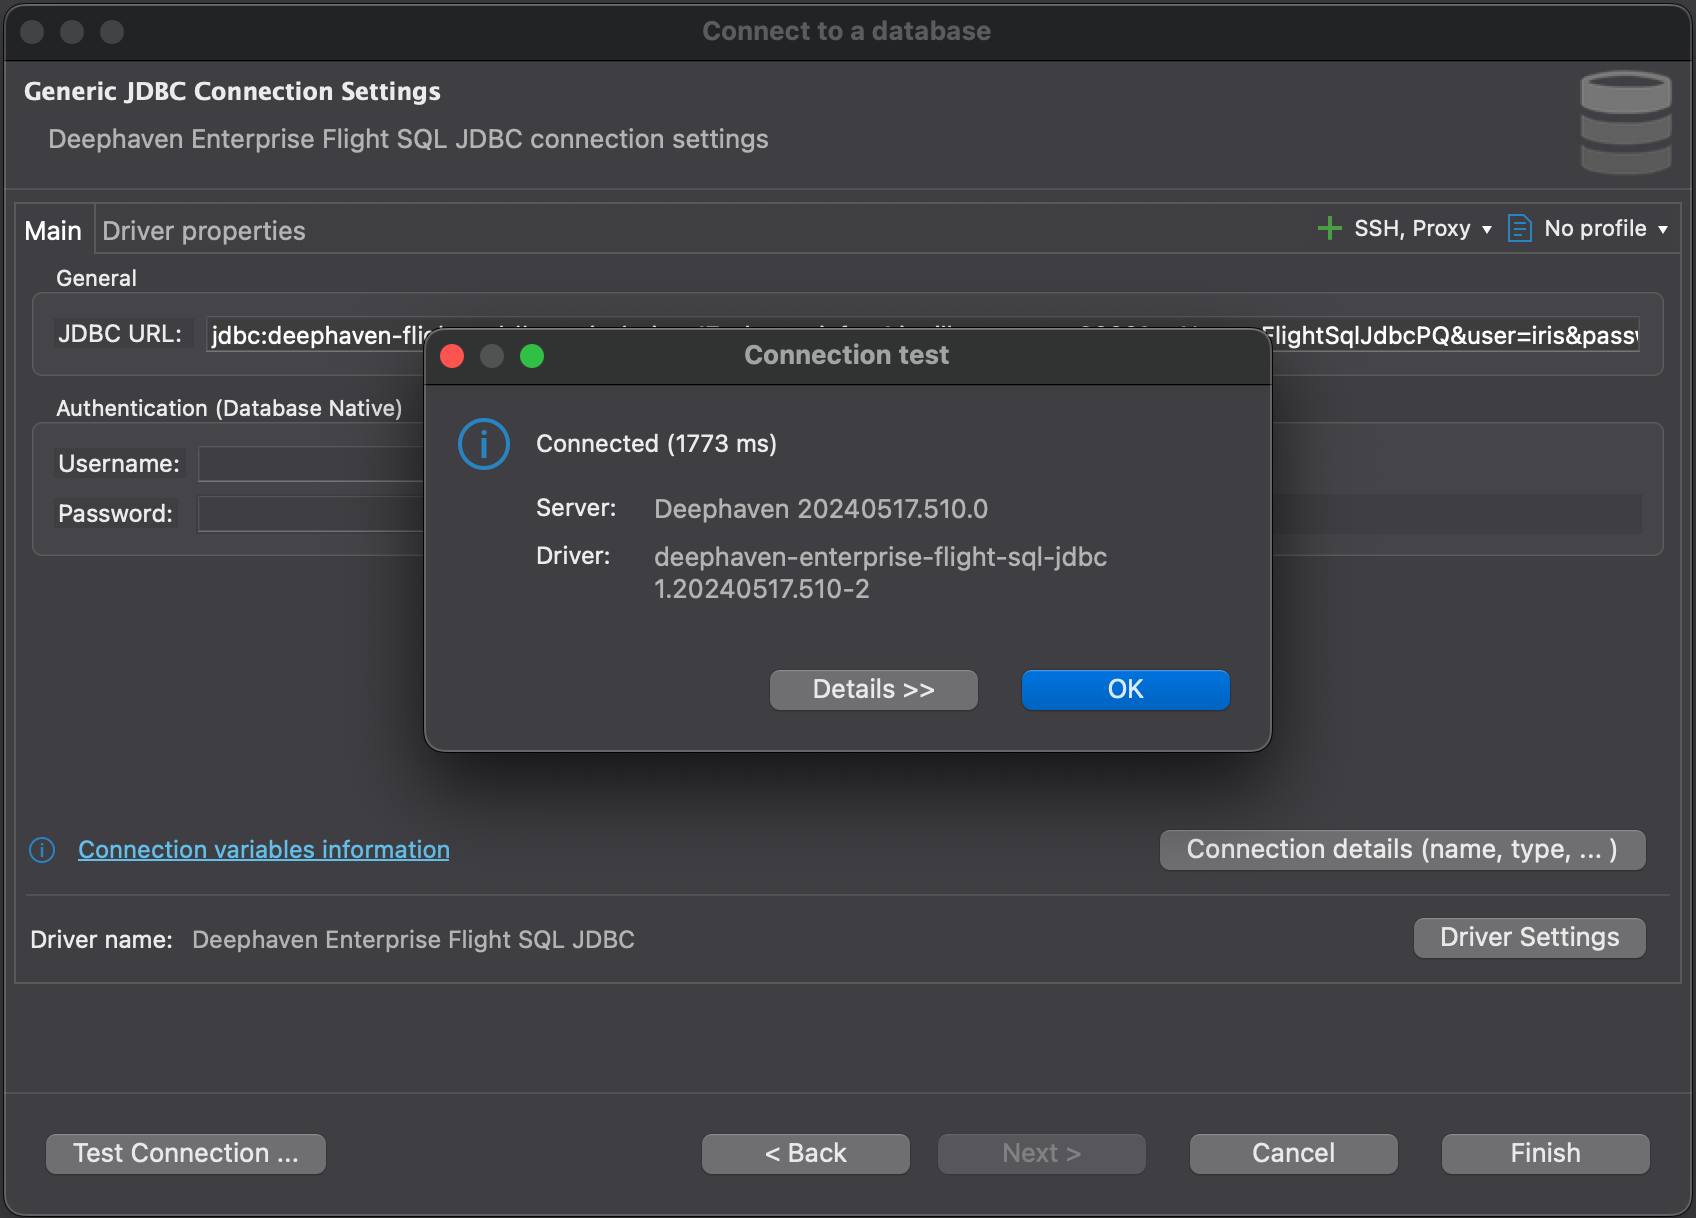
- Click the Test Connection ... button in the bottom-left corner. When the Download pop-up window appears, check the Force download/overwrite box in the top-right corner and then click the Download button to download the driver JAR from Maven first. The second screenshot below shows a successful test.
-
Back in the Database Navigator panel, click on the saved Database Connection. Now you can connect to the Deephaven Enterprise server PQ and look at the available tables.
JetBrains DataGrip
-
Download the driver JAR from Maven Central Repository.
-
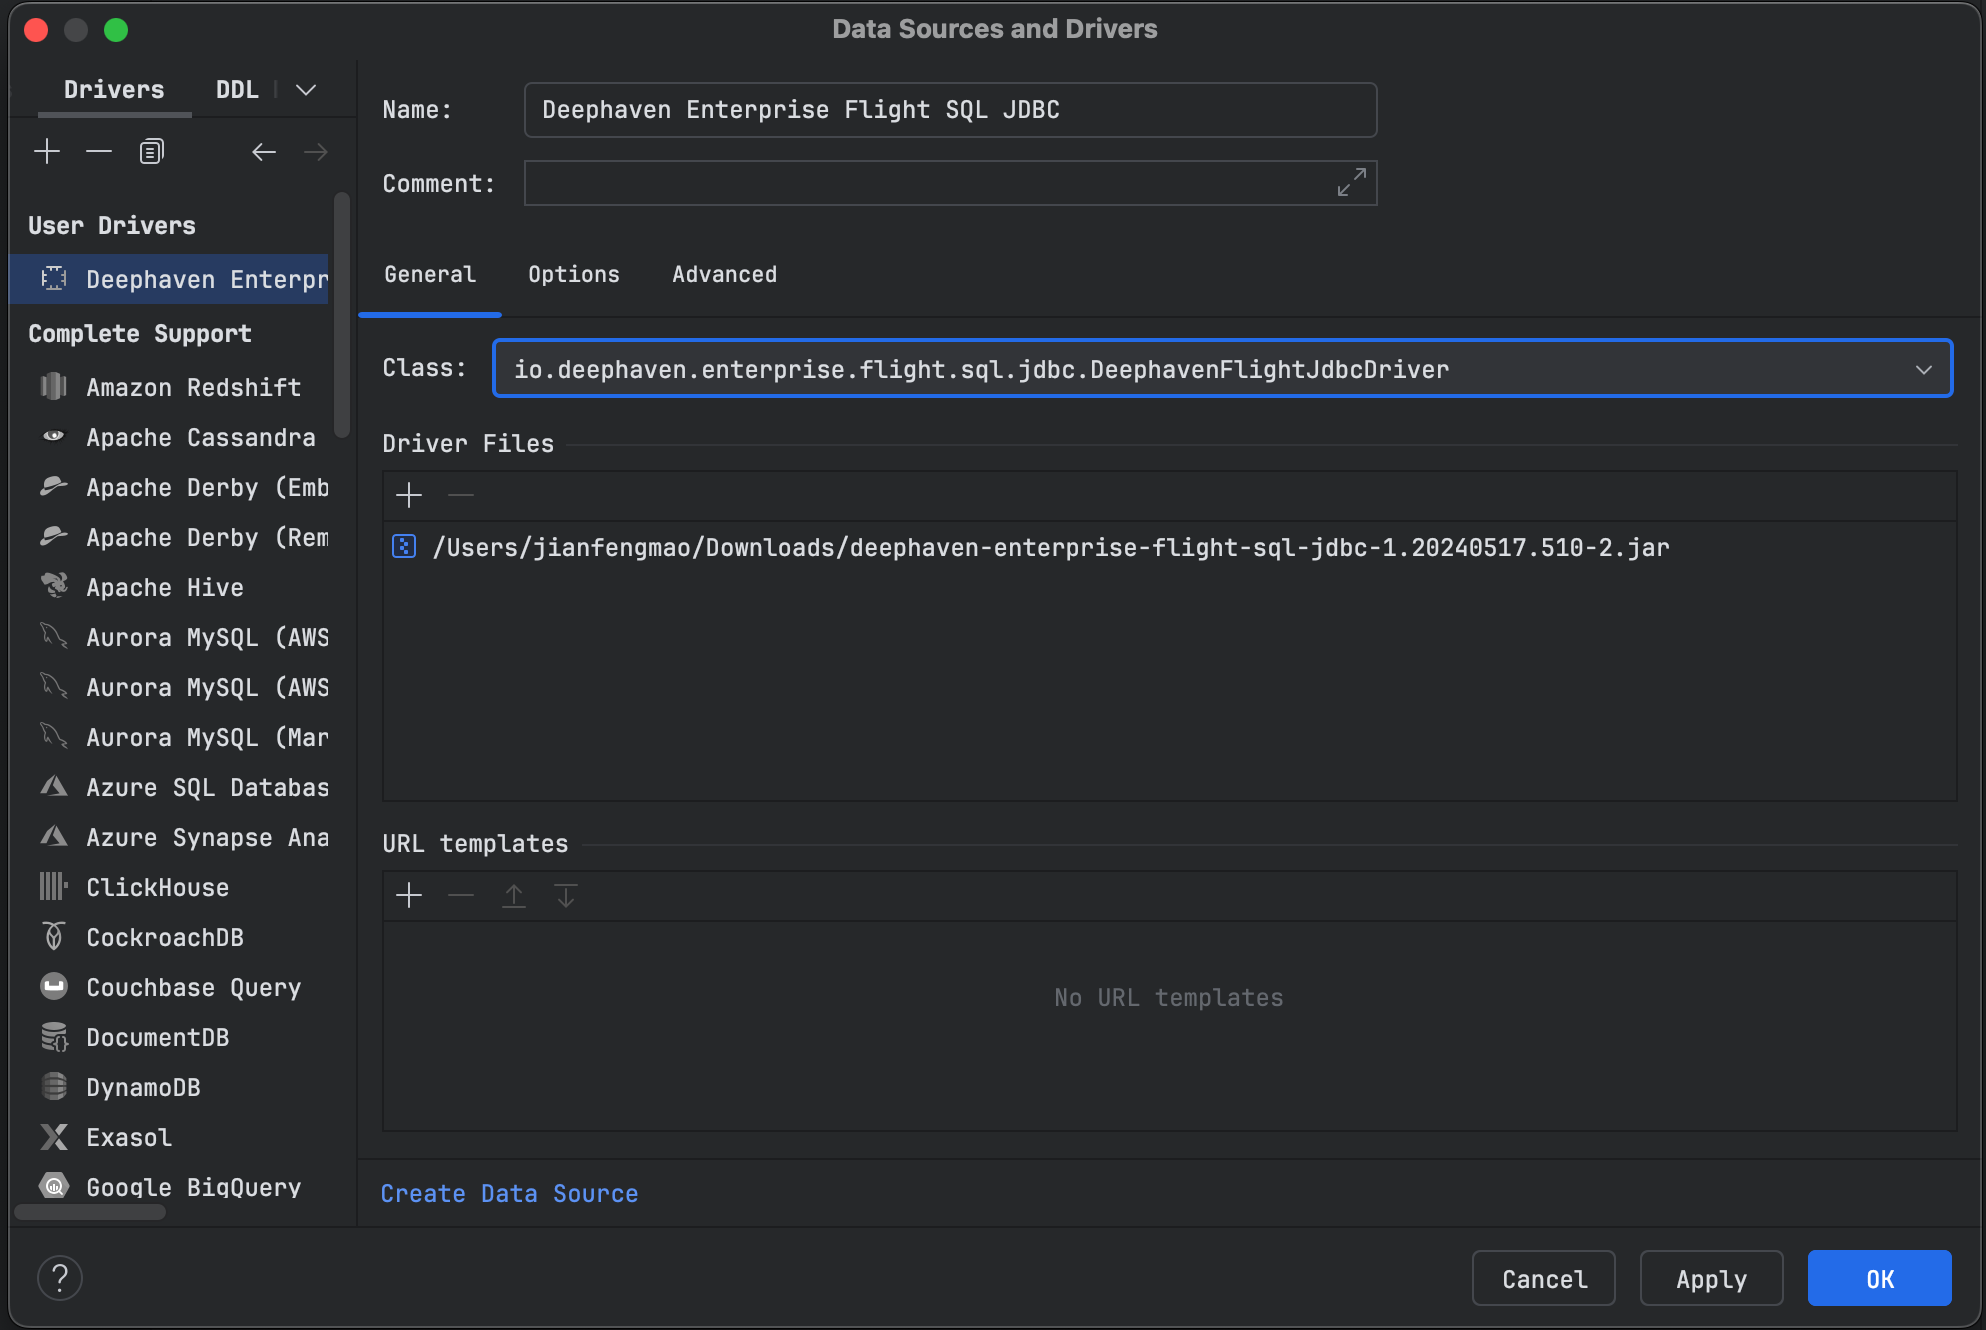
Create a
DataGripproject, then in the Database Explorer panel, click on the + icon and select Driver to create aUser Driver, then fill in the following fields:- Name: Deephaven Enterprise Flight SQL JDBC.
- In the Driver Files section, click on the + icon to add the driver JAR downloaded from previous step.
- In the Class dropdown, select
io.deephaven.enterprise.flight.sql.jdbc.DeephavenFlightJdbcDriver. - Click on Create Data Source to switch to the Data Sources tab.
-
In the General tab, make sure the Connection type is set to URL only. Then in the URL field, fill in the full connection URL (this is required because the
PQ nameisn't one of the standard parameters), e.g.: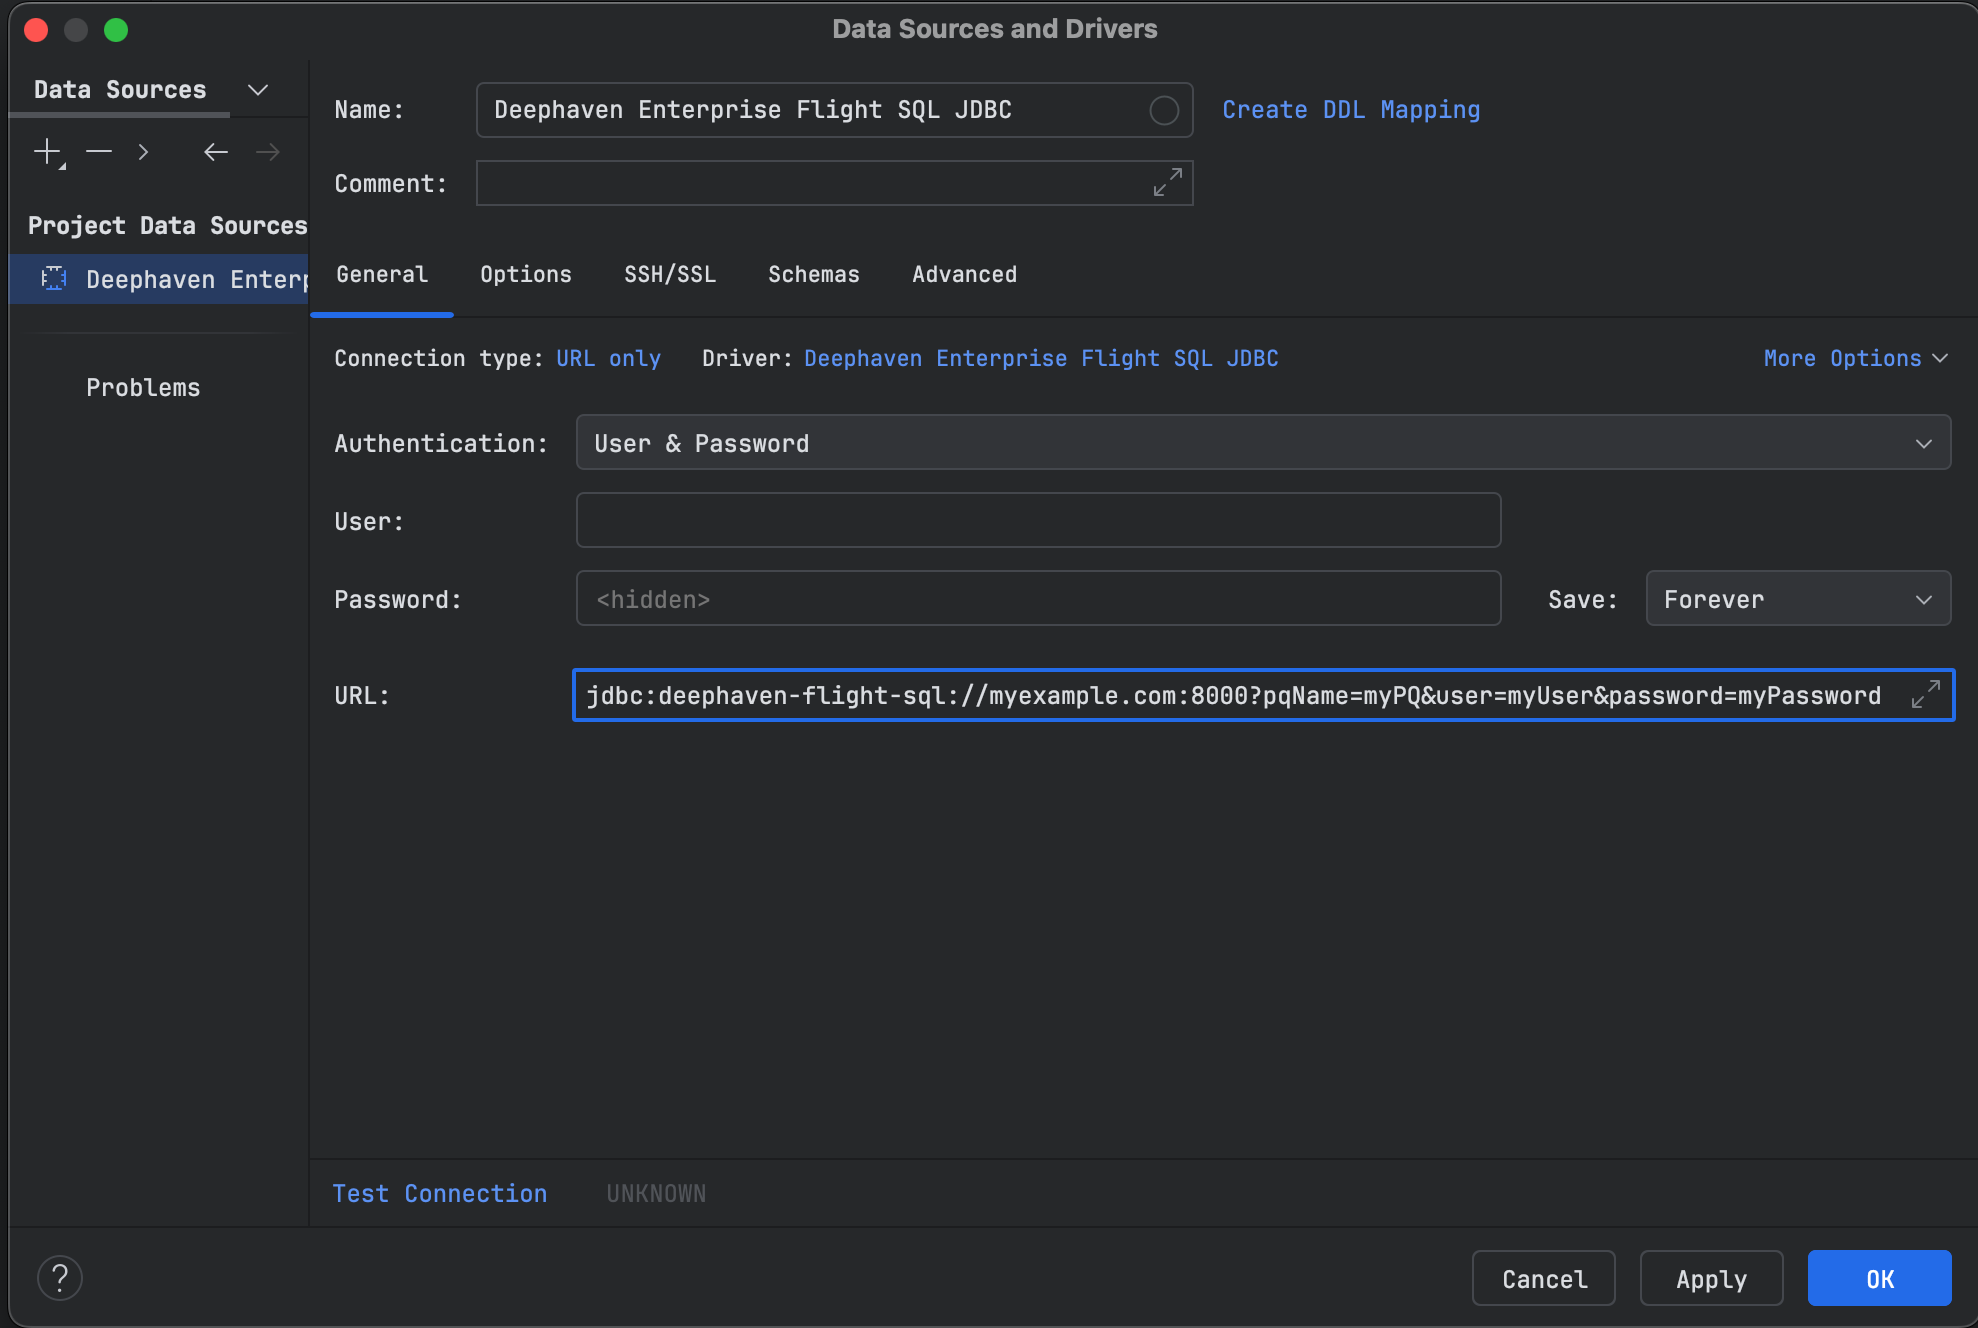
-
Click on the Advanced tab, then in the VM options field, add the following line to enable the necessary module access:
Then click on the Expert options dropdown and uncheck the Isolate class path option. Click on the Test Connection button to test the connection to the Deephaven Enterprise server. Click on OK to save the data source.

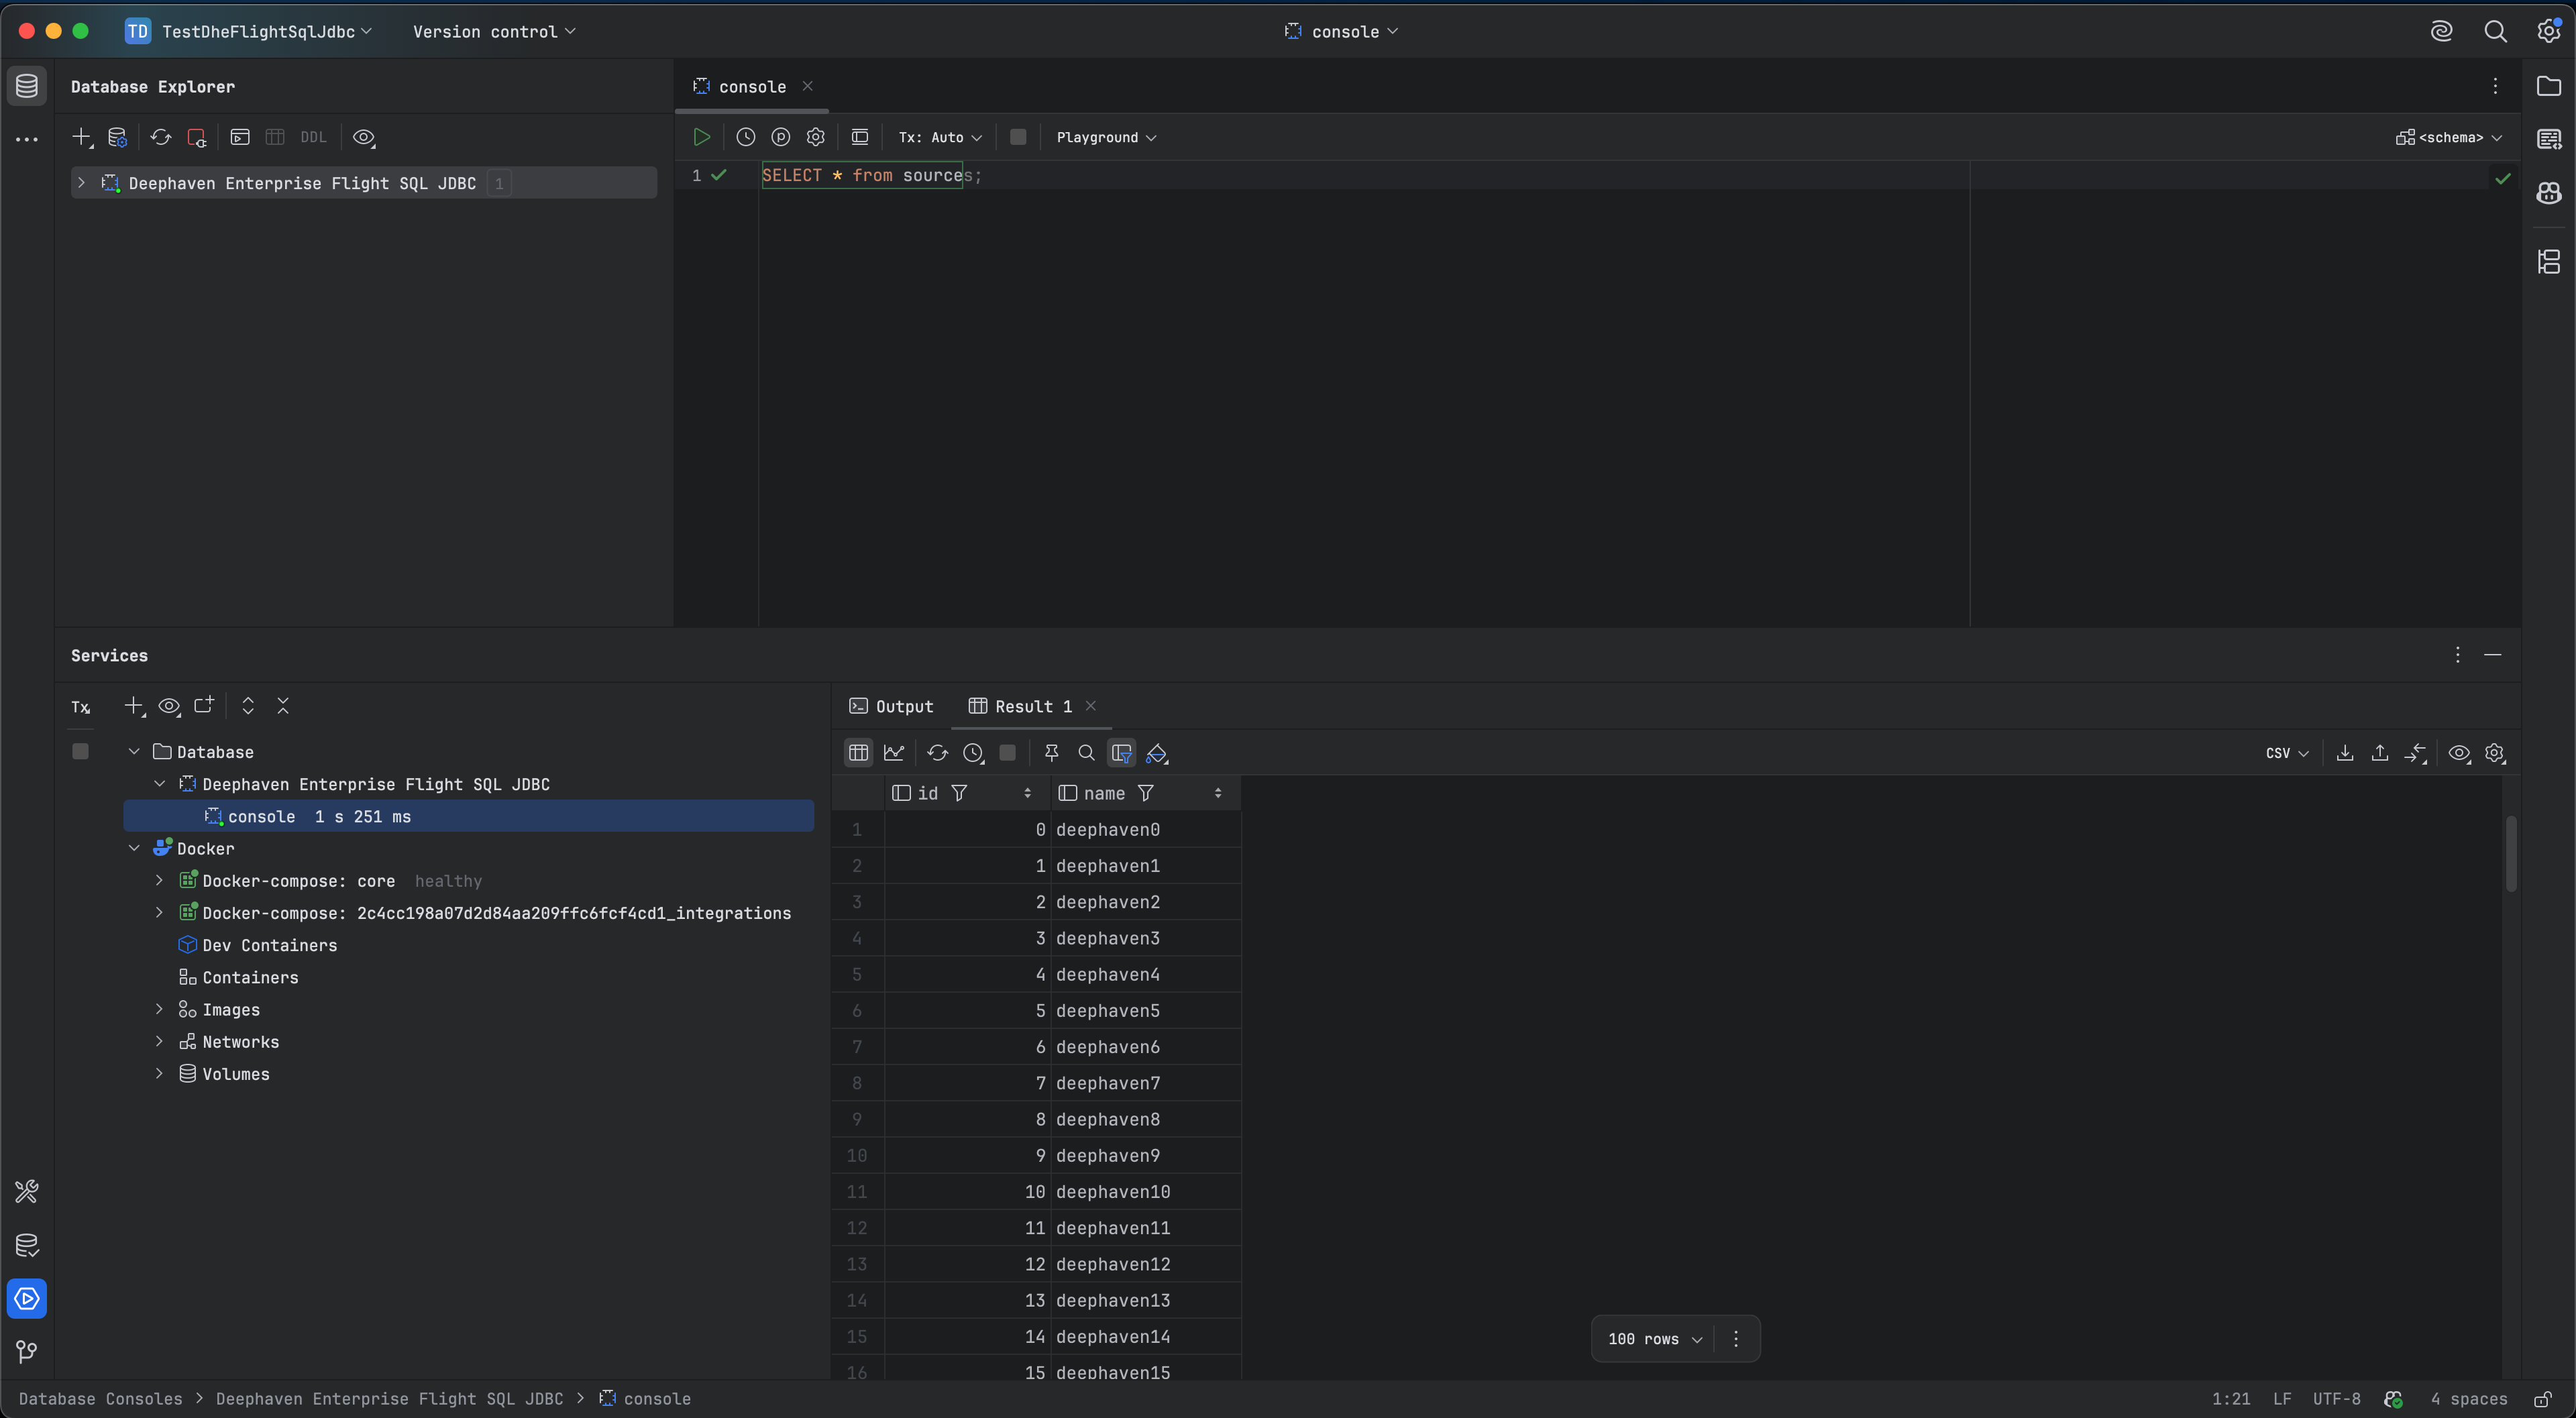
- In the
consolewindow, you should be able to run SQL queries against theDeephaven Enterprise serverPQ and look at the available tables.
Use programmatically
To use the Deephaven Enterprise Flight SQL JDBC Driver in your Java application, add it as a runtime dependency and configure your connection URL appropriately.
The source code for the example is available in a ZIP archive.
Add runtime dependency in build.gradle
For example:
JDBC connection URL format
If authenticating with a key file, use:
Replace host, port, yourPQName, yourUser, yourPassword, and yourKeyFile with values specific to your Deephaven Core+ environment.
For example: