Develop a query in VS Code (Python)
The Deephaven VS Code extension is a powerful tool for developing server-side Deephaven queries in Python or Groovy directly from Microsoft Visual Studio Code (VS Code). It provides an alternative to the Deephaven IDE for users who prefer to do their development in VS Code, or who want to do development in a local IDE rather than a browser. The Deephaven VS Code extension allows the usage of VS Code's many features and other extensions for query development such as GitHub Copilot.
Install the Deephaven VS Code Extension
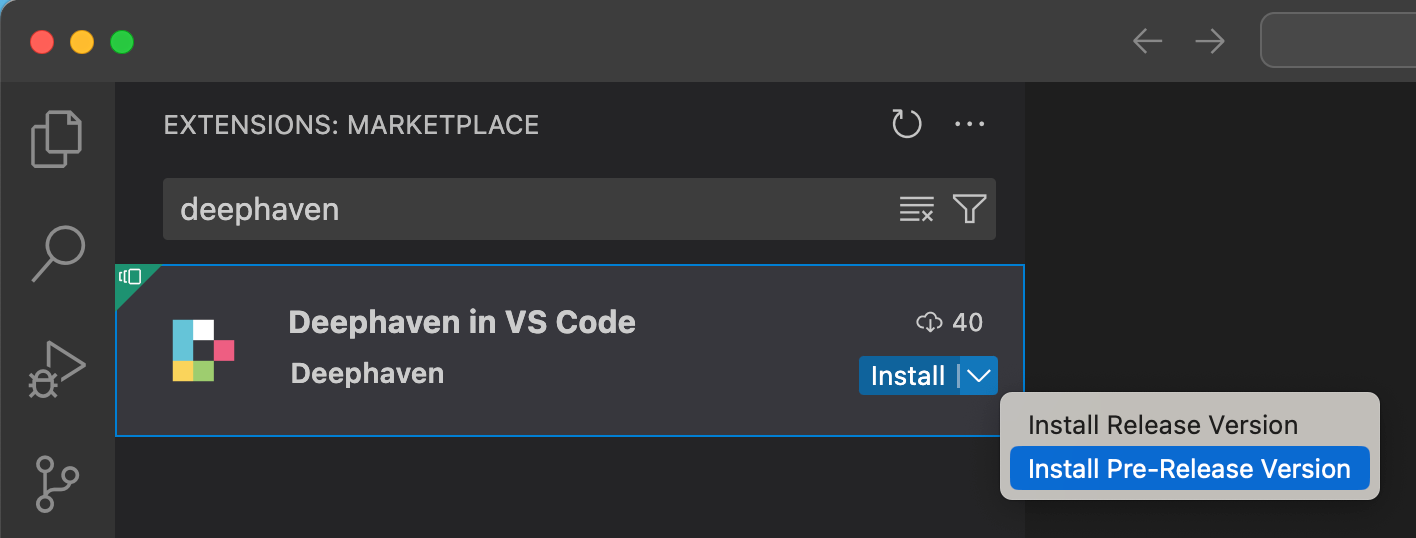
The Deephaven VS Code extension can be installed from the VS Code Marketplace or from the extension browser inside of VS Code. The extension is currently pre-release, so you'll need to install it as such.
Once installed, there will be a new Deephaven icon in the Activity bar (the sidebar containing navigation icons).
Clicking the Deephaven icon opens a new panel containing details of configured Deephaven servers. By default, the extension is configured to connect to a single Community server hosted at http:localhost:10000. Enterprise servers can be configured via the deephaven.enterpriseServers setting in VS Code user or workspace settings. To open one of the VS Code settings.json files:
-
Open the Command Palette by clicking
cmd/ctrl + shift + p. -
Type
settingsand select Preferences: Open User Settings (JSON) or Preferences: Open Workspace Settings (JSON). Change user settings to apply to all workspaces, and workspace settings to apply to the current workspace only.
-
Add the following entry to the
settings.jsonfile (change the URL and port to that of your Deephaven installation; the default port is8123for a server without Envoy and8000for a server with Envoy):
Note
Some VS Code bugs cause flakiness with the run button. VS Code v90 introduced an optional workbench.editor.alwaysShowEditorActions setting. Setting this to true improves the experience. Namely, the run button will not disappear when running commands or selecting its dropdown. See https://github.com/deephaven/vscode-deephaven/issues/1 for more details.
Workspace setup
Before using the Deephaven VS Code extension, you must configure VS Code for Python usage. See Getting Started with Python in VS Code. It is recommended to configure a virtual Python environment within your VS Code workspace (see Create a virtual environment). If you have already configured a virtual environment, you can then install Deephaven pip packages in the venv.
To ensure your local environment matches your server, query the versions of packages you want to install. You can do this in a Code Studio in the Deephaven IDE using a script like the following:
Using this information, you can create a requirements.txt to install the same packages locally. For example, here's a minimal requirements.txt file that enables IntelliSense for common Deephaven packages:
See Workspace setup for more details, including auto-generating a requirements.txt file from the server.
Develop a Query
-
Open a workspace in VS Code that has been configured as described in the Workspace setup section.
-
Activate the
Deephavenview by clicking the Deephaven icon in theactivity bar.
-
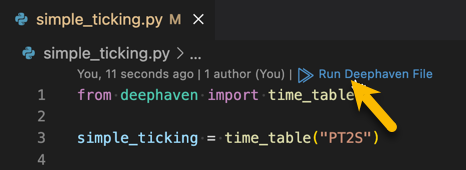
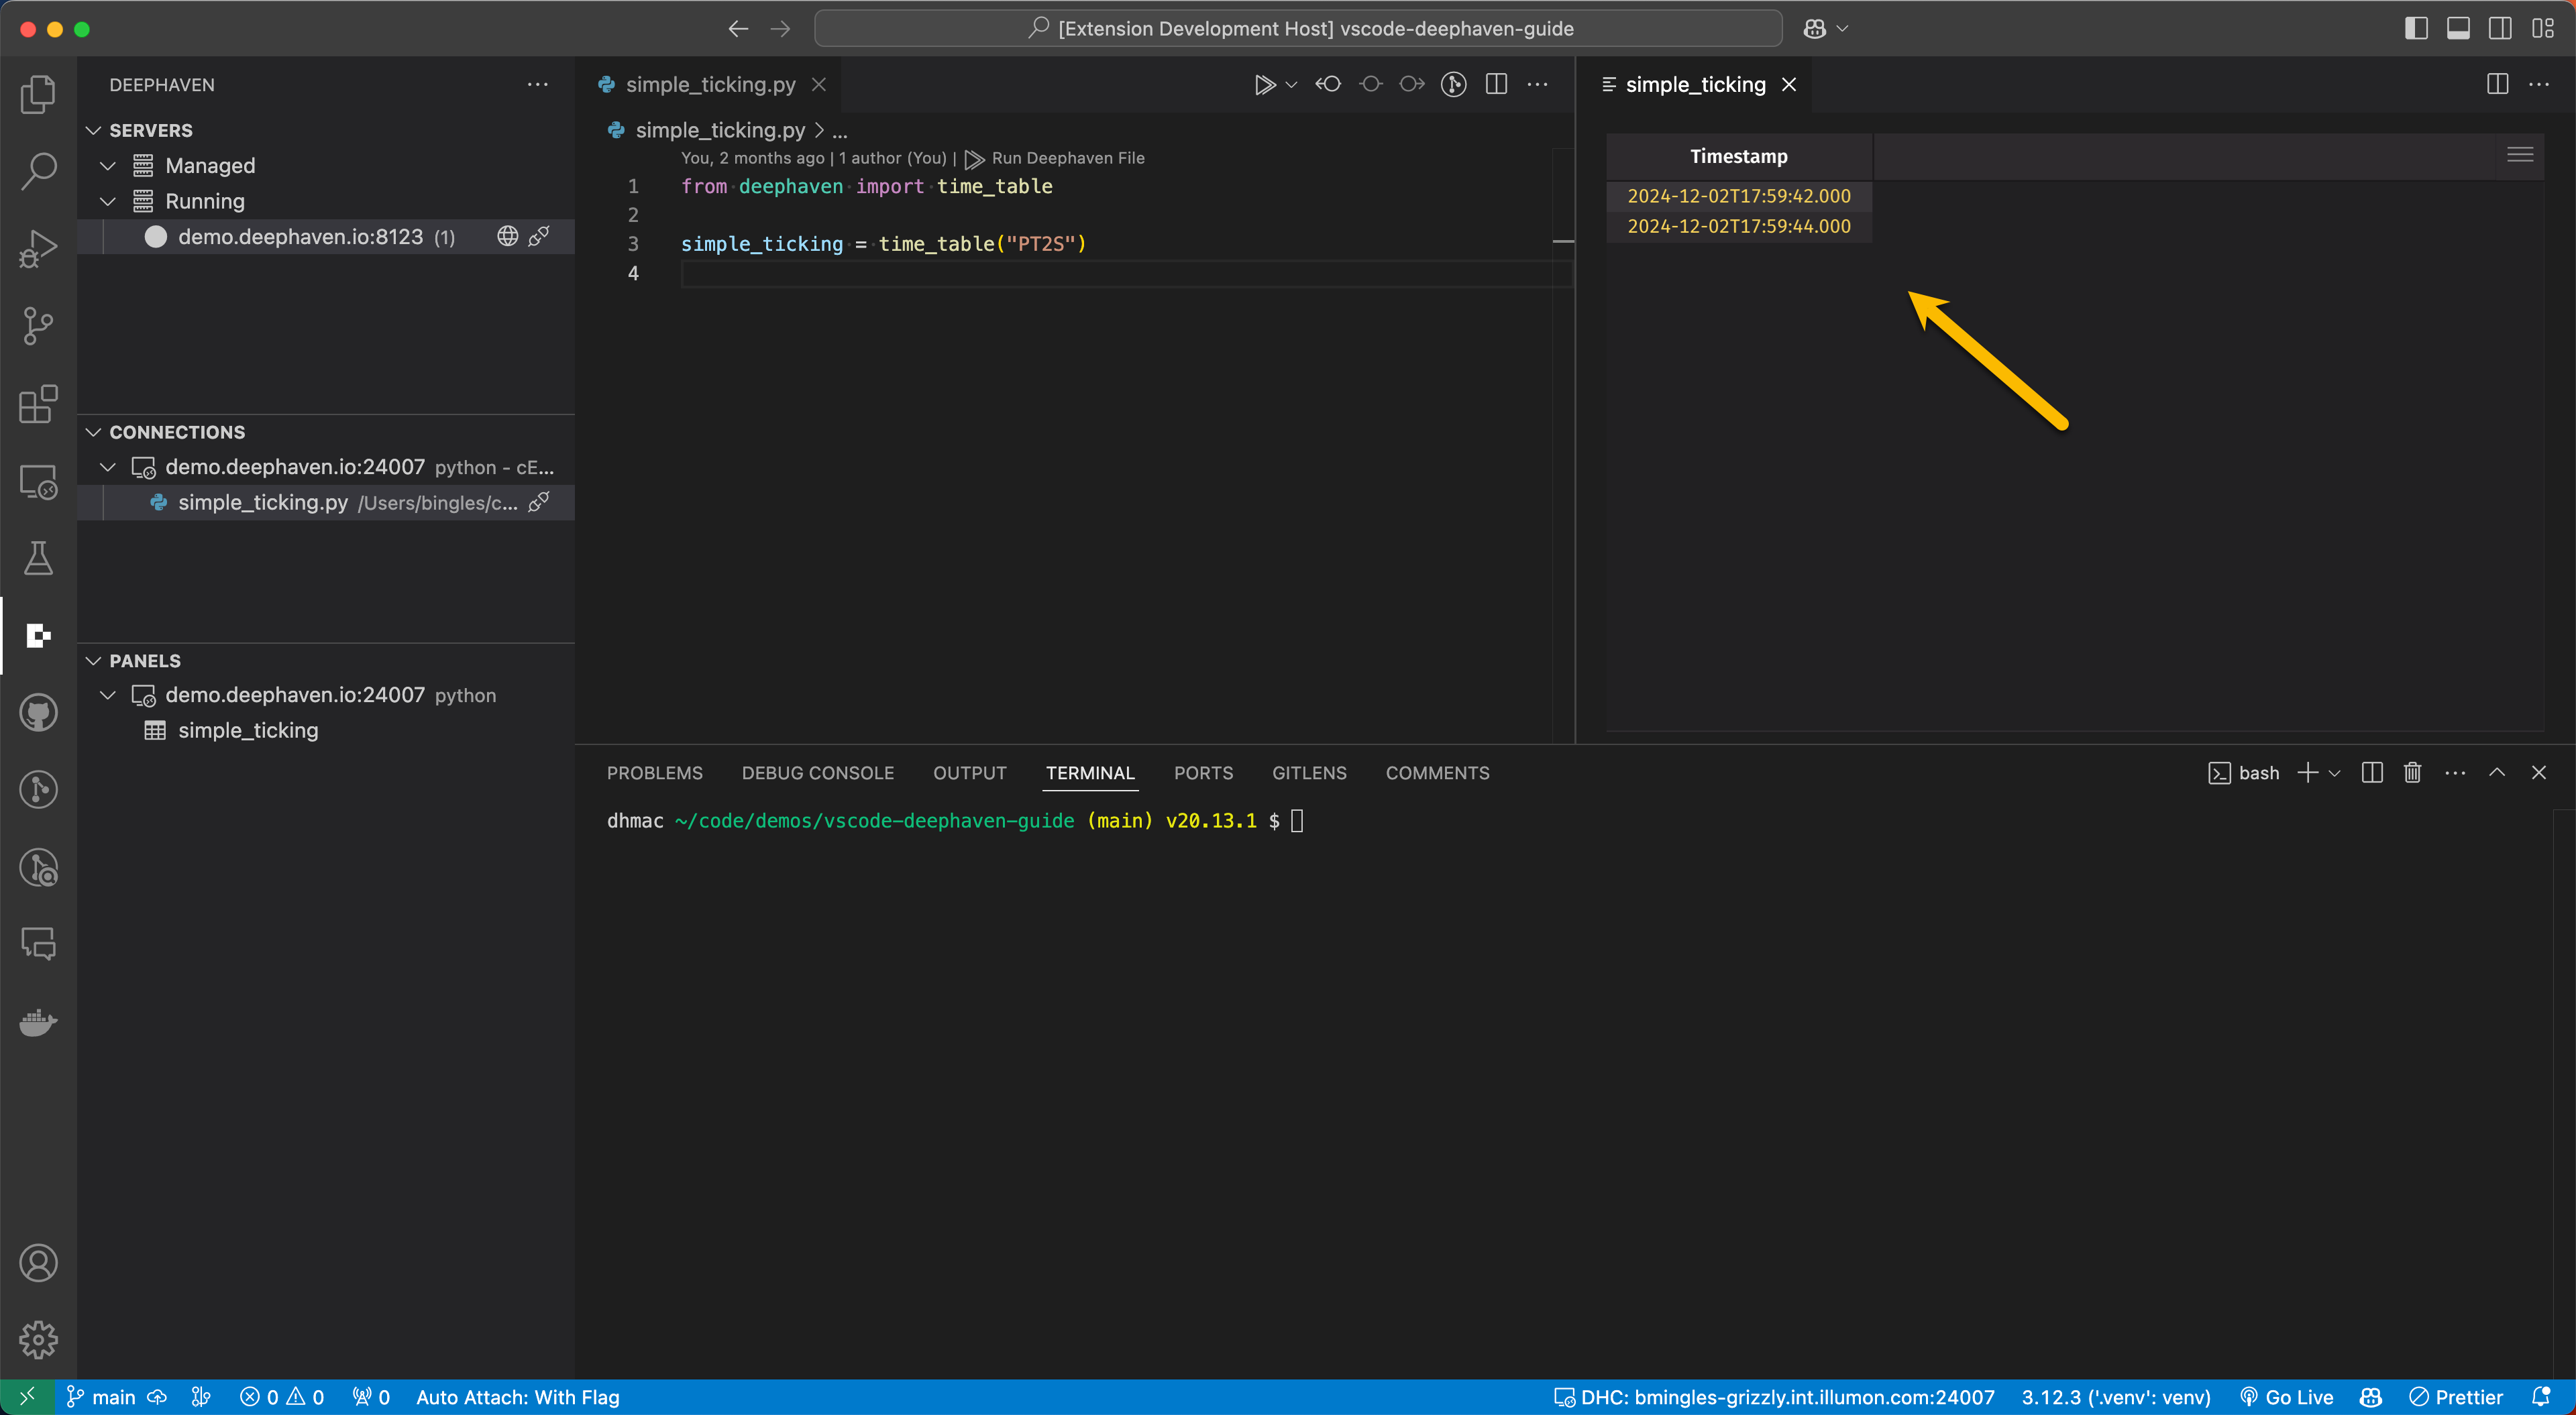
Create a new script in the workspace named
simple_ticking.py, and paste the following code into it: -
Run the script by clicking the Run Deephaven File action at the top of the file:
-
Provide credentials when prompted for login.
-
You should see a ticking table in a new panel!
-
If you open a Query Monitor tab in the Deephaven IDE, you should see an
Interactive Consolequery for the VS Code connection.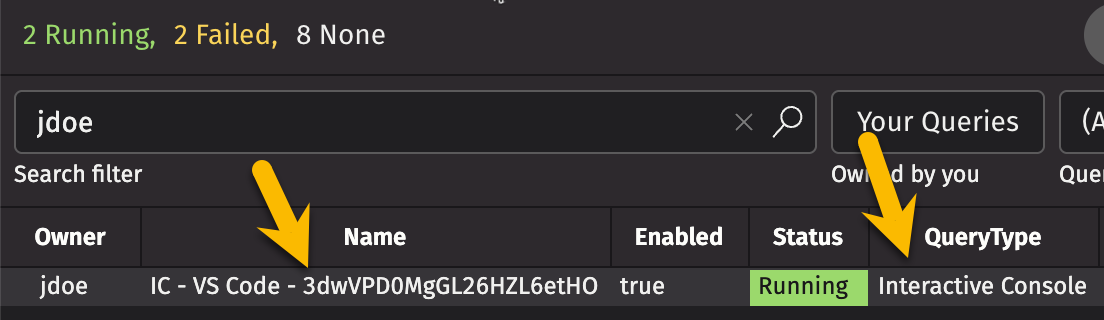
The id in the
Namecolumn will match the id in the connection in VS Code.
Make a PQ
Once you have a working query in VS Code, you can make it a Persistent Query (PQ) in the Deephaven IDE. Queries run from VS Code will only persist within the active session. Making a PQ will allow it to persist in between sessions.
To create a new PQ, in the Query Monitor tab:
-
Click the New button.
-
Click the Script tab in the query details panel.
-
Change the runtime dropdown to Python.
-
Copy / paste your query from VS Code into the code area of the Script tab:
-
Click the Save button.
View the PQ
After saving the new query, it appears in the Query Monitor, and its status changes to Running once the query successfully starts.
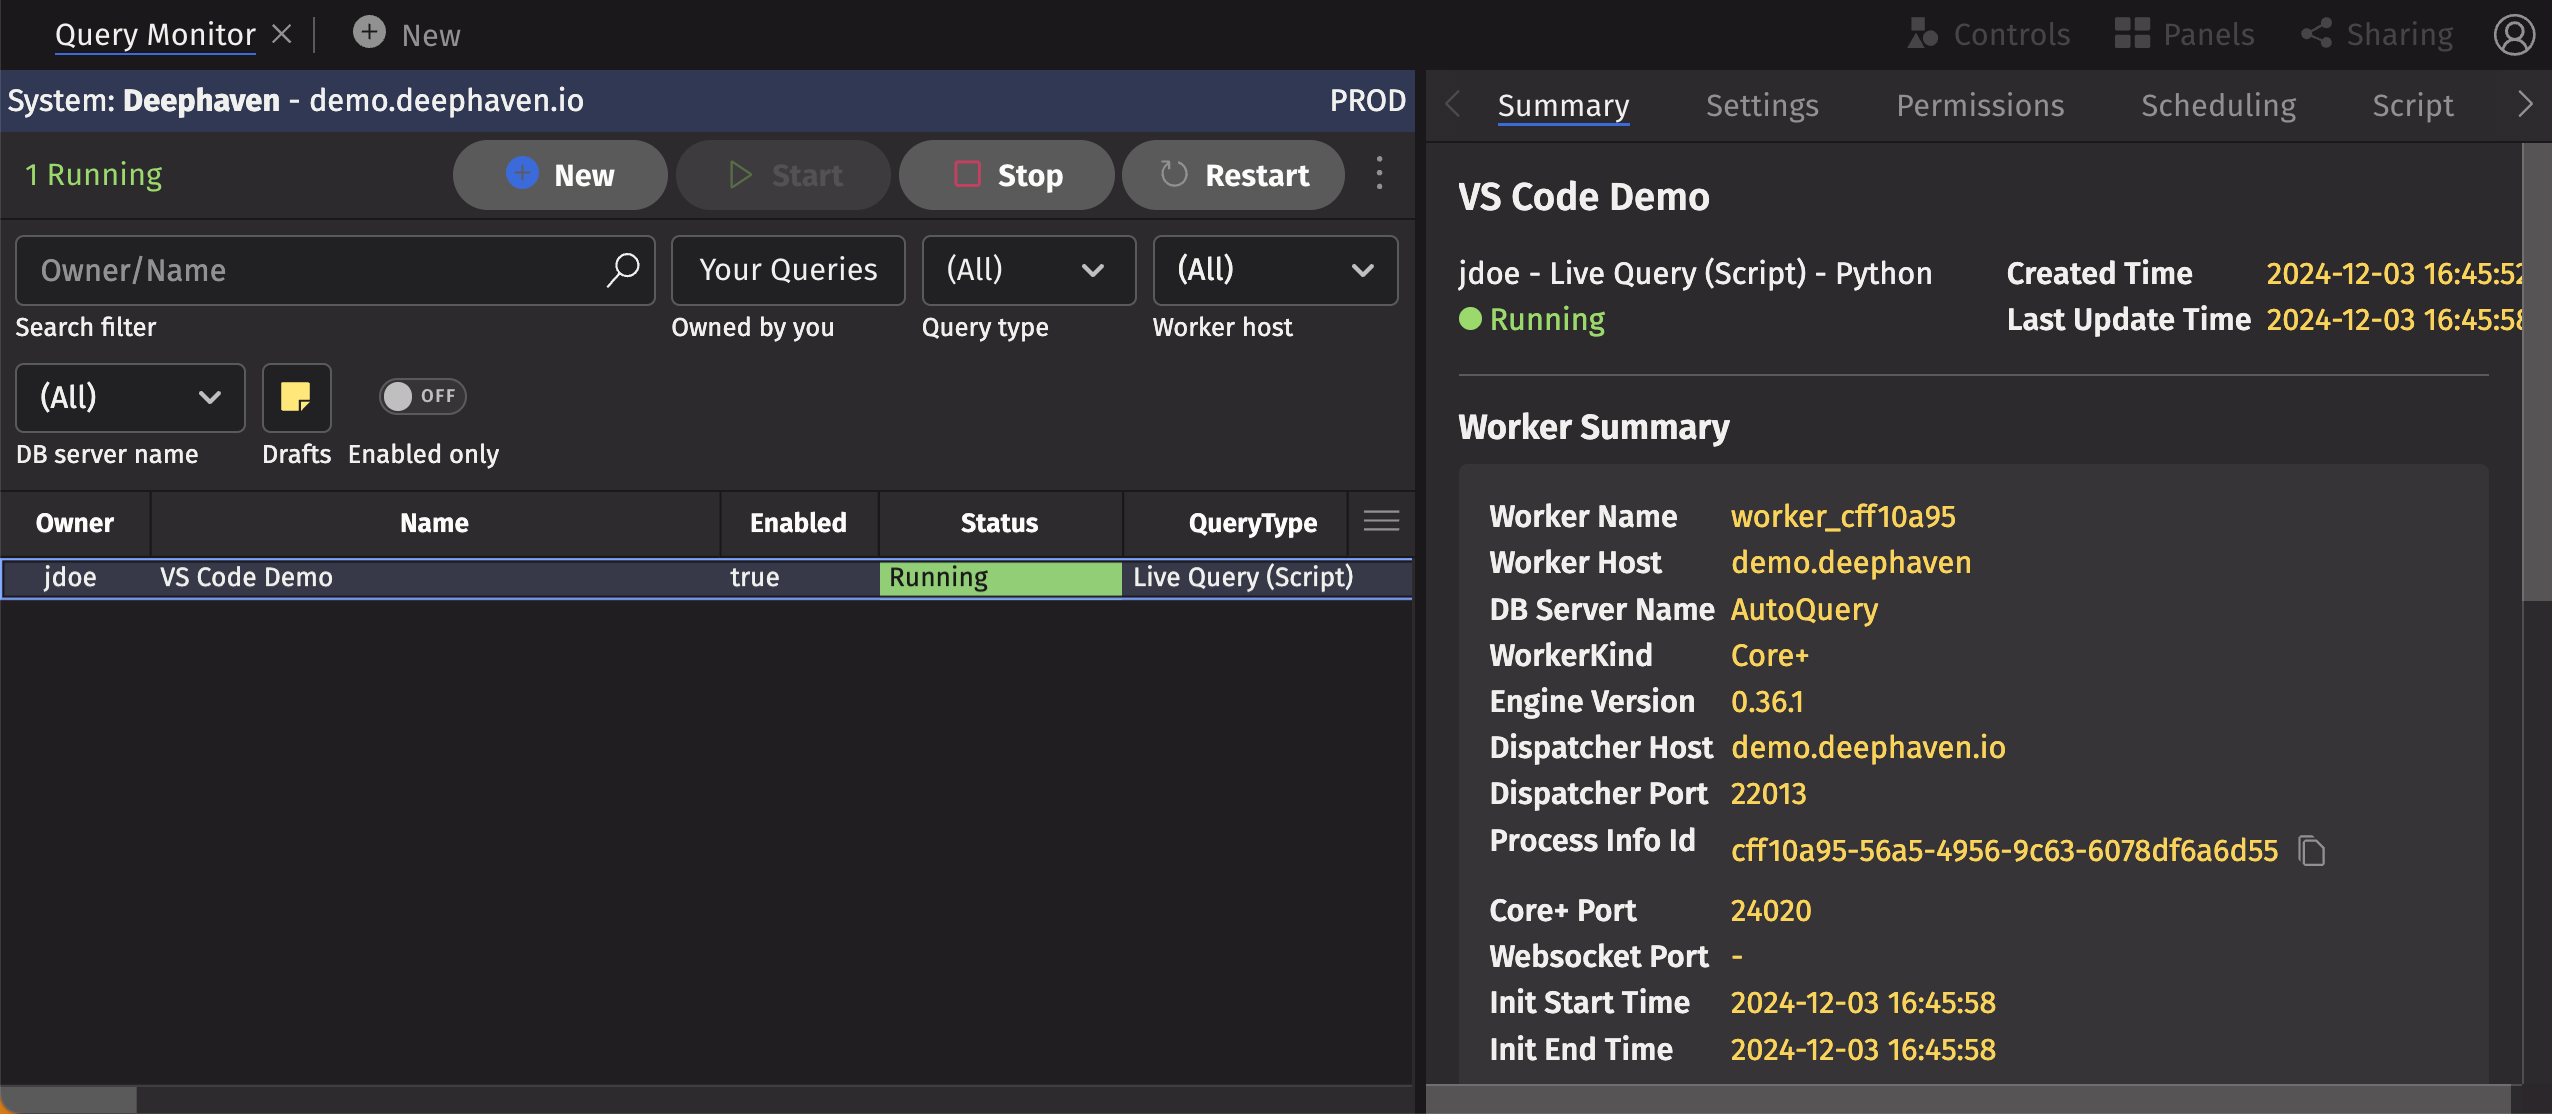
Once your PQ is running, you can access the simple_ticking table from the Panels menu.