Permissions
Deephaven features a robust permissions system, called an Access Control List (ACL), that allows administrators to control users' access to data, queries, dashboards, and system functionality. Non-administrator users can only share their own Persistent Queries (PQs) and access PQs that have been shared with them, unless they are a member of a special group or are manually given extra permissions.
Most permissions are managed through the Access Control List (ACL) editor, which allows administrators to create and manage permissions for both users and groups of users. Permissions for individual PQs can also be managed through the Query Monitor.
The ACL Editor
The Web UI's ACL editor is the easiest way to configure permissions. Administrators and other users with the correct permissions can create a new ACL editor by clicking New at the top of the Deephaven IDE, and then selecting the ACL Editor from the Advanced tab:

You can find a full guide to the ACL editor in the system administration guide.
Contact your system administrator to adjust your permissions level if necessary.
Persistent Query access control
You can manually configure permissions to individual PQs in order for specific users to see the tables and plots used to build the dashboards shared with them. You can do so in the Permissions tab in the Query Monitor:
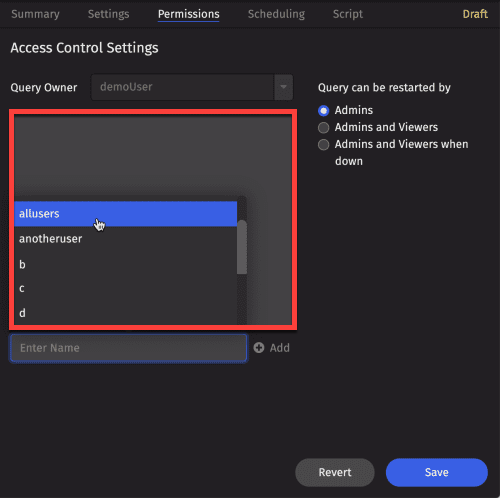
The box outlined in yellow lists additional users with access to that query. You can add an individual user or a user group. Make your selection from the drop-down menu, then click Add. For example, the allusers group is being selected above. Then, assign Viewer or Admin privileges using the drop-down next to the name:

As the name implies, a Viewer can view the name of the query and its associated tables and plots in the Deephaven Panels menu, but they cannot see the query code or start/stop the query unless Admin permission is granted.
Note
Operate As
Users with the appropriate permissions can operate as any other user using the Operate As option on the initial login page:
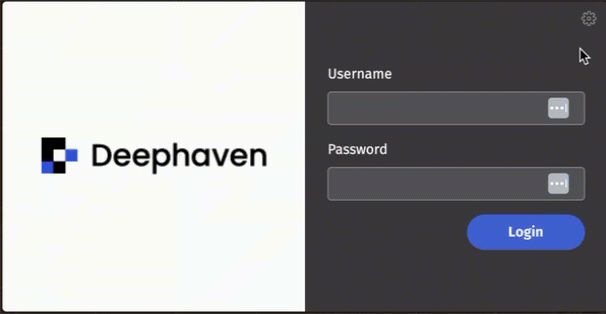
After entering the username of the user to operate as, in addition to your own credentials, you will be effectively logged in as the other user. You can see the other user's workspace, including Code Studios and Dashboards. Note that changes made to the other user's workspace will persist when that user logs in.
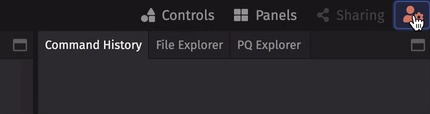
The user Settings icon will become orange when operating as another user.
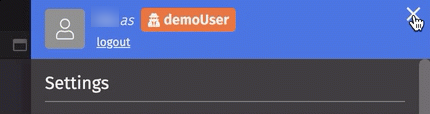
In addition, opening the user Settings menu will show "userName as operateAsUser".
Note
Operate-as permissions are usually defined in the superusers.txt file, and cannot be changed through the ACL editor. Refer to the System Adminstration Guide for further details.