IAP Integration
Cloud Identity-Aware Proxy (IAP) is a Google Cloud service that adds an additional layer of security to your applications running on Google Cloud. IAP uses Google Cloud Identity and Access Management (IAM) to authenticate users and then uses role-based access control (RBAC) to determine what resources users have access to.
Integrating Deephaven with IAP provides several benefits:
- Enhanced Security: Centralized authentication for all traffic to your Deephaven instance
- Fine-grained Access Control: Ability to control access at the user or group level
- Google Account Integration: Leveraging existing Google Workspace accounts for authentication
- Zero Trust Model: Security independent of network location or VPN status
This guide walks through the process of integrating Deephaven, deployed to Google Kubernetes Engine (GKE), with Google Cloud IAP.
Google Cloud IAP Setup
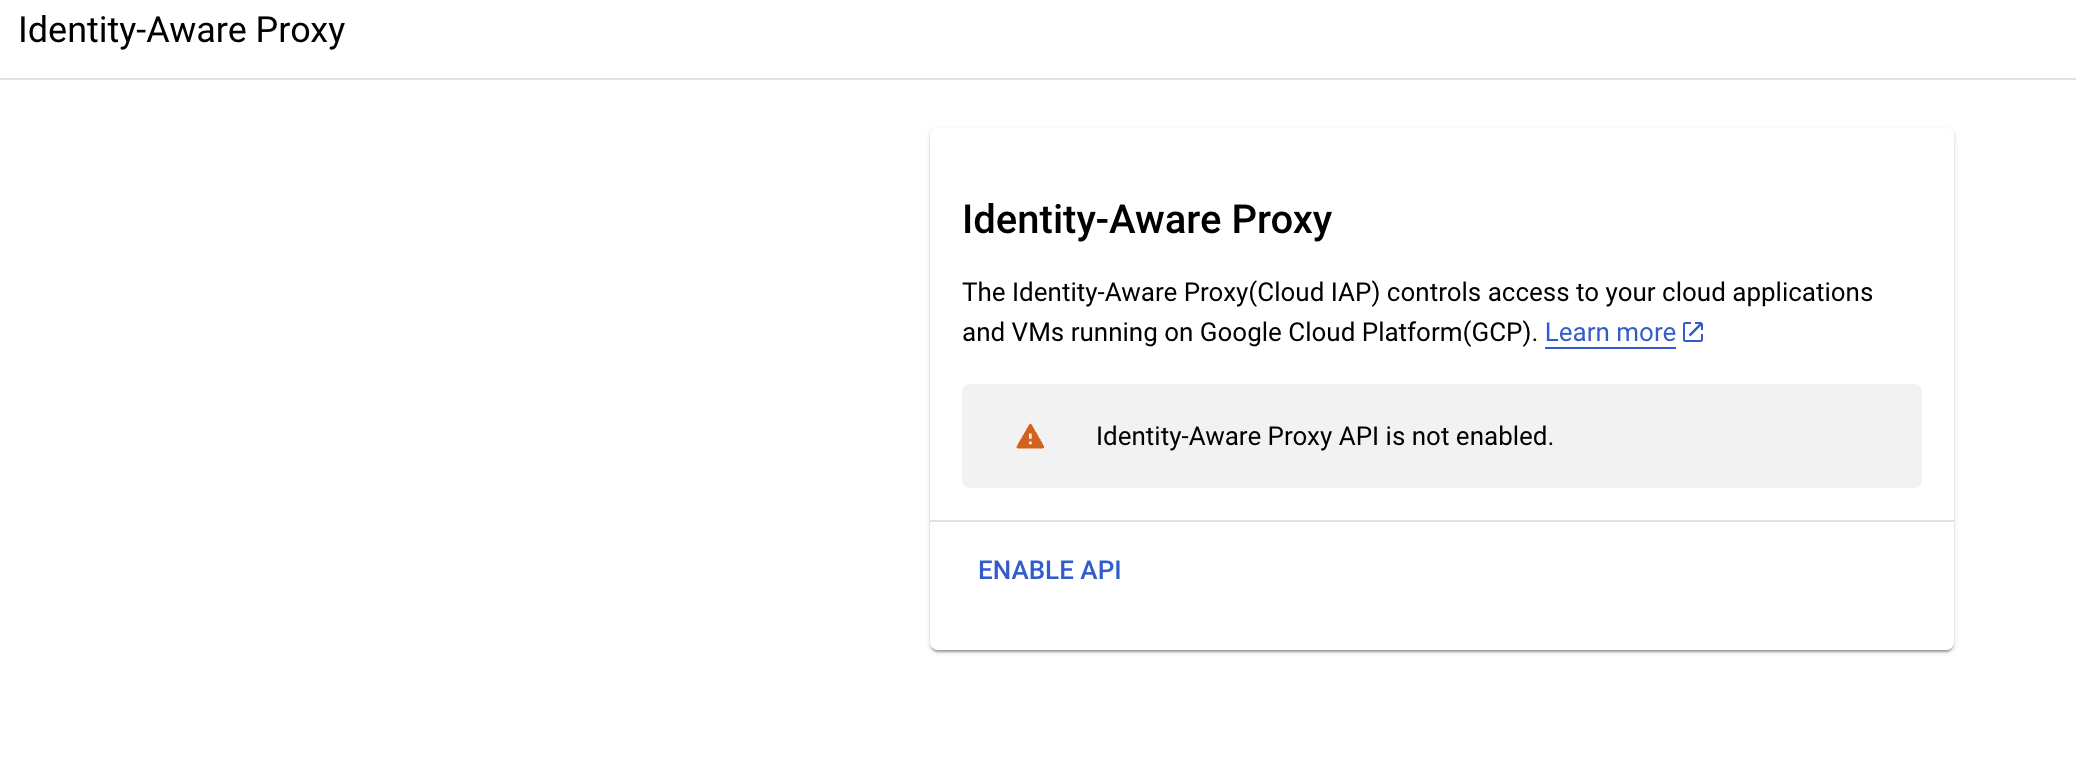
1. Enable IAP API and Configure OAuth
-
Enable IAP API for the project Navigate to Identity-Aware Proxy in Google Cloud Console or search "IAP" in the GCE console bar to access the page to enable IAP for your current project.
-
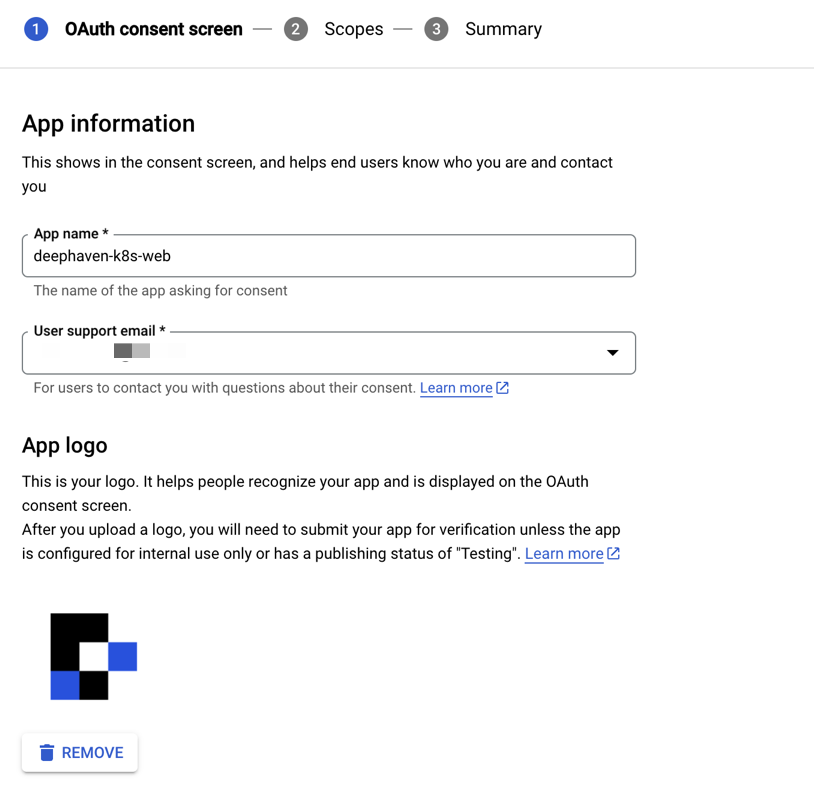
Configure the OAuth Consent Screen Once IAP is enabled, you will be prompted to configure the OAuth Consent Screen.
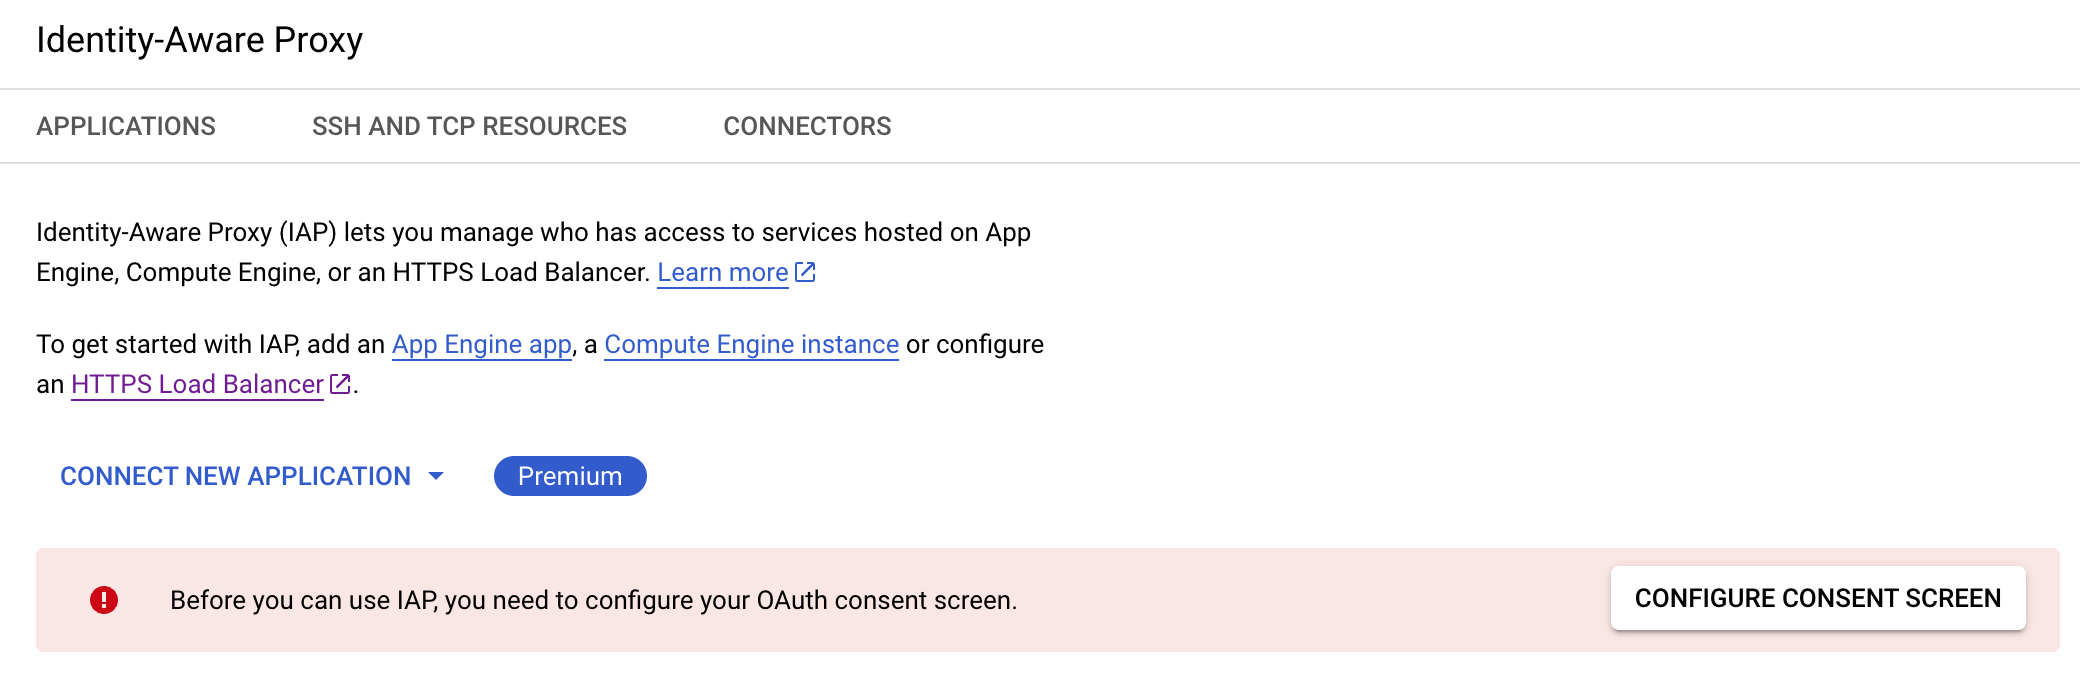
- Use User Type "Internal" for organization-restricted access
- Fill in the authorized domain (typically your organization's domain)
-
Create OAuth 2.0 Client ID In API's & Services > Credentials, configure an OAuth 2.0 Client ID, which will generate a client ID and client secret. These credentials will be used to authenticate your application with IAP.
Kubernetes Configuration
2. Configure Kubernetes Secrets and Ingress
-
Create OAuth secret in Kubernetes Store the OAuth client ID and secret in a Kubernetes secret. This allows your application to authenticate with IAP:
This command creates a Kubernetes secret named
oauth-client-secretcontaining the OAuth credentials. -
Create SSL certificate secret For secure HTTPS connections, create a TLS secret for your domain:
This creates a Kubernetes TLS secret named
my-ingress-tls-secretusing your domain's certificate and key file. Replacemydomain.name.crtandmydomain.name.keywith your actual certificate and key files. -
Create Kubernetes ingress resource Set up an ingress load balancer that connects to your TLS secret and routes traffic to Deephaven's Envoy service:
This ingress configuration:
- Uses the Google Cloud ingress controller (
gceclass) - References a static IP named
my-iap-ingress(create this in GCP first if needed) - Configures TLS using the secret we created earlier
- Routes all traffic to the Deephaven Envoy service
- Uses the Google Cloud ingress controller (
-
Create IAP backend configuration Create a BackendConfig resource to enable IAP for your backend service:
This BackendConfig:
- Enables IAP for the backend service
- References the OAuth client secret we created earlier
- Should be in the same namespace as your Deephaven deployment
-
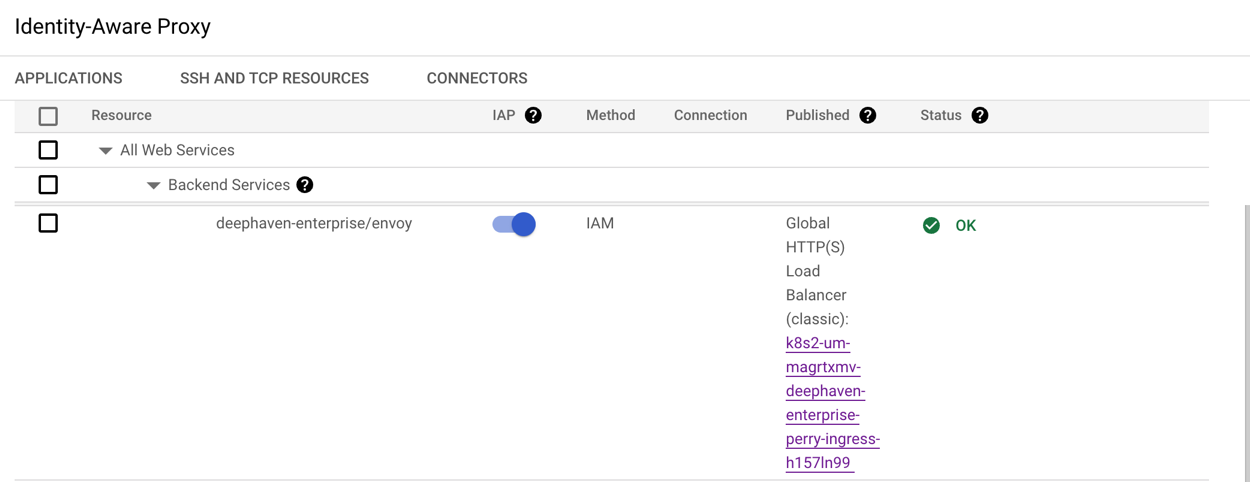
Apply configurations Apply the ingress and backend config YAML files:
After applying these configurations, you should see the backend service in the IAP page ("deephaven-enterprise/envoy" in the example).
3. Configure Access and Timeouts
-
Grant user access to IAP-protected service Allow specific users or groups to access your IAP-protected application:
This command:
- Grants the specified user (
user1@mydomain.name) access to your IAP-protected service - Assigns the IAP Web Resource Accessor role to the user
- Can be repeated for additional users or groups (use
group:prefix for groups)
- Grants the specified user (
-
Increase backend service timeout Deephaven workers need more time to initialize than the default GCP timeout allows:
This increases the timeout from the default 30 seconds to 660 seconds (11 minutes), giving Deephaven workers sufficient time to initialize and report to the Envoy service.
Known Issues and Caveats:
The Envoy URL must match Google URL
The port of the frontend Google load balancer must match the port used by the Envoy layer. Normally, we expose our Envoy port directly, but with IAP, there is an additional load balancer in front. When the final layer runs on a different port than the Envoy layer, the worker URLs try to connect to a port that triggers a different origin / lack of IAP cookies and fails. By forcing both the external and internal load balancer to run on port 443, the socket URLs are same-origin, and the system can connect.
The project should have iris property
Set this property in iris-environment.prop to enable our CORS filter. This allows IAP to intercept the request and authenticate you:
Note that if the final load balancer is served on a given port, you MUST include this port (as well as the https:// protocol) in the allowed origin property.
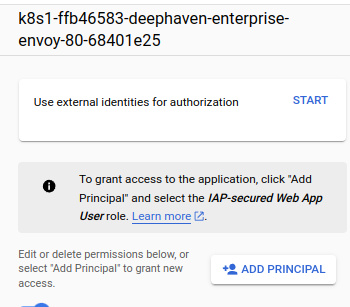
Users must be explicitly granted permission to access IAP resources
As per https://cloud.google.com/iap/docs/enabling-kubernetes-howto#iap-access, we must add an IAM principal allowing users to access IAP-protected resources. The necessary permission is "Cloud IAP > IAP-secured Web App User". To add:
- Click on the IAP application you want.
- In the right-hand side menu, click Add Prinicipal This allows you to add a user for a specific IAP application rather than all IAP applications (which is what you get when granting through regular IAM permissions).
The Google backend must have correct oauth clientId/secret attached
In order for IAP to work on any Google Compute Engine deployment (kube or otherwise), the backend service must have the correct-for-IAP OAuth clientId + secret attached. This can only be altered manually via command line as there is no GUI exposing these values. By default, you should be configuring this via the Kubernetes configuration listed here: https://cloud.google.com/iap/docs/enabling-kubernetes-howto#add-iap-to-backendconfig
You can check/update oauth settings manually. Find your Kubernetes backend by navigating to https://console.cloud.google.com/kubernetes/discovery?project=deephaven-dev and clicking on the Envoy marked Internal Load Balancer:

The Deployments section lists the Load Balancer Backends:

You can check the oauth settings with:
This will return nothing if no oauth key is set. You can remove the grep to see the rest of the yaml.
Finally, you can set the oauth clientId+secret by following the Google Cloud CLI Documentation.