Use Excel with Deephaven
Deephaven's Excel Client allows you to integrate Deephaven data into your spreadsheets through an Excel add-in. You can query static or dynamic tables using custom filters that you define and use the results of your queries in other calculations. As ticking data changes, the rest of the calculations in your sheet also update.
This guide shows you how to install the add-in, connect to Deephaven, and use the add-in to access your data.
Install Deephaven's Excel add-in
Before installing Deephaven's Excel add-in, ensure you have met the following prerequisites:
- Install the latest 64-bit version of Microsoft Excel with Microsoft Office 365.
- You can alternatively use Office 2021 or later.
- Ensure that you are running a 64-bit Windows operating system.
Note
Please contact Deephaven support for access to the Excel add-in installer.
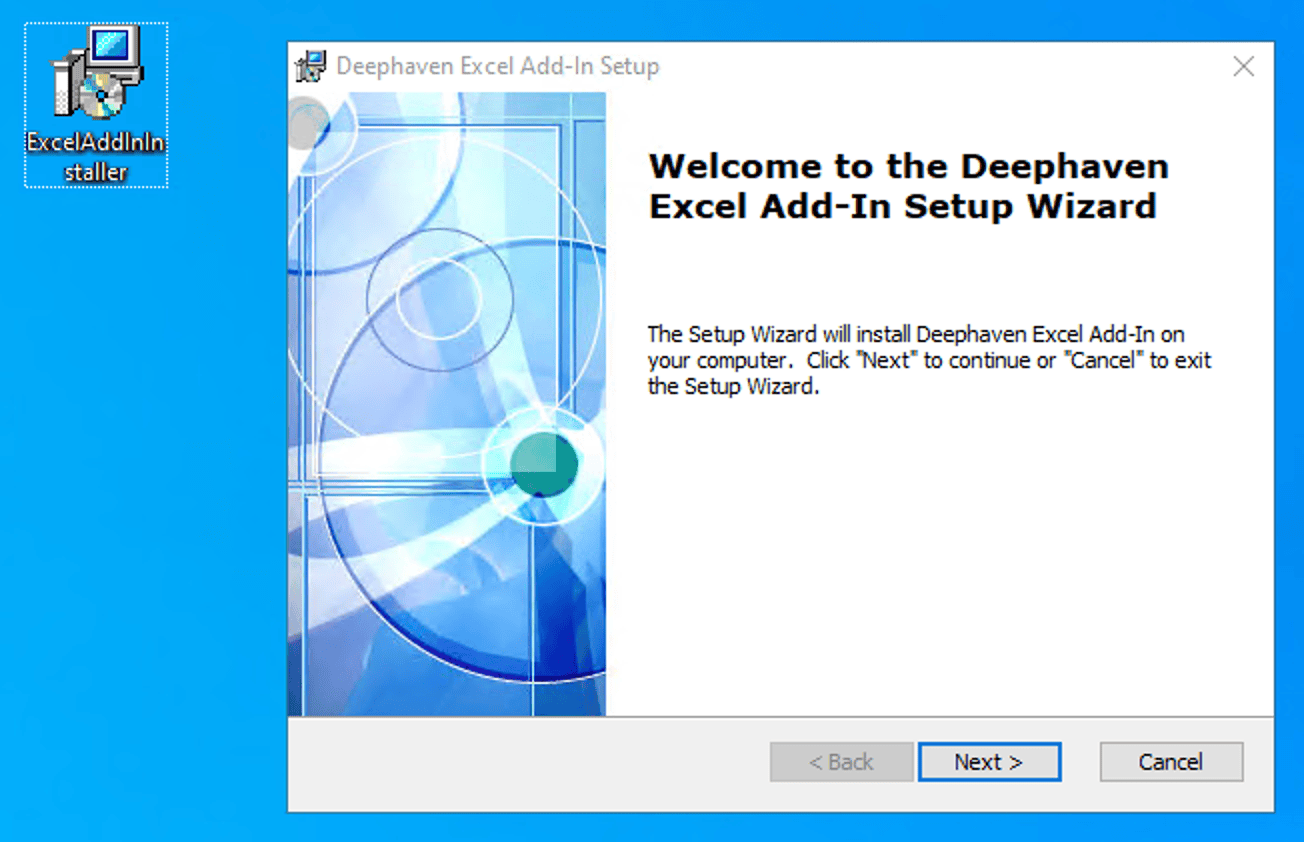
Download the Deephaven Excel add-in installer when you have met the prerequisites. Close any open instances of Excel, then run the installer.
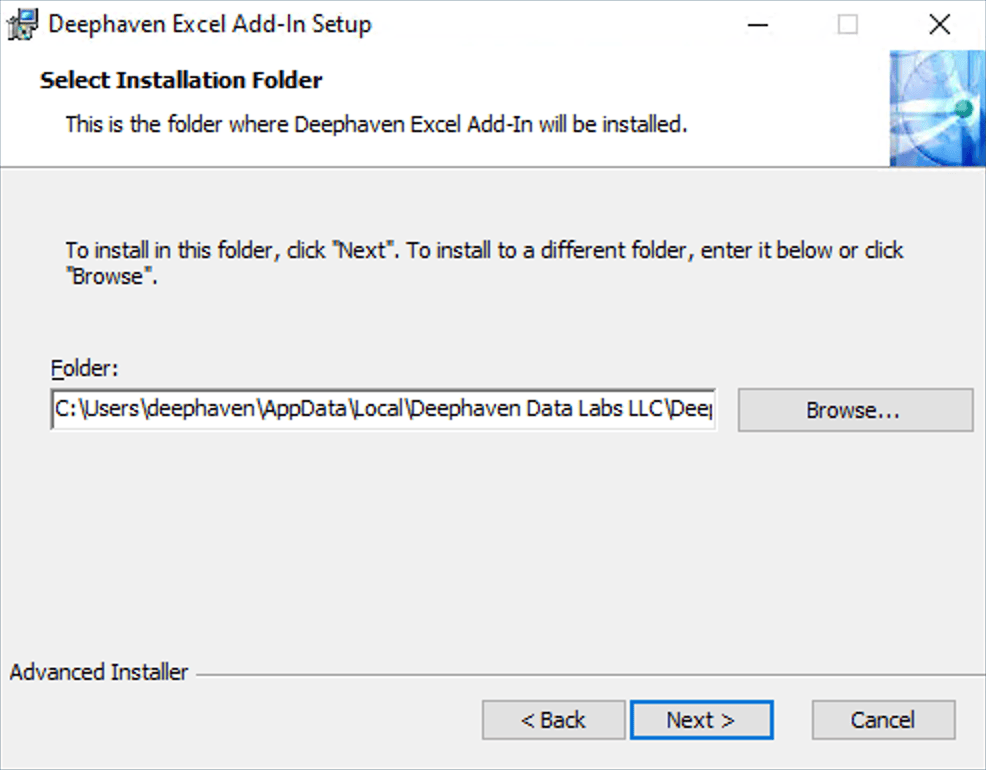
Accept the default installation path, then click Next:
Click Install to begin the installation.
At this stage in the installation process, you will be prompted to install .NET Desktop Runtime if you do not already have it. This is a prerequisite for the Deephaven Excel add-in. Click Install to continue.
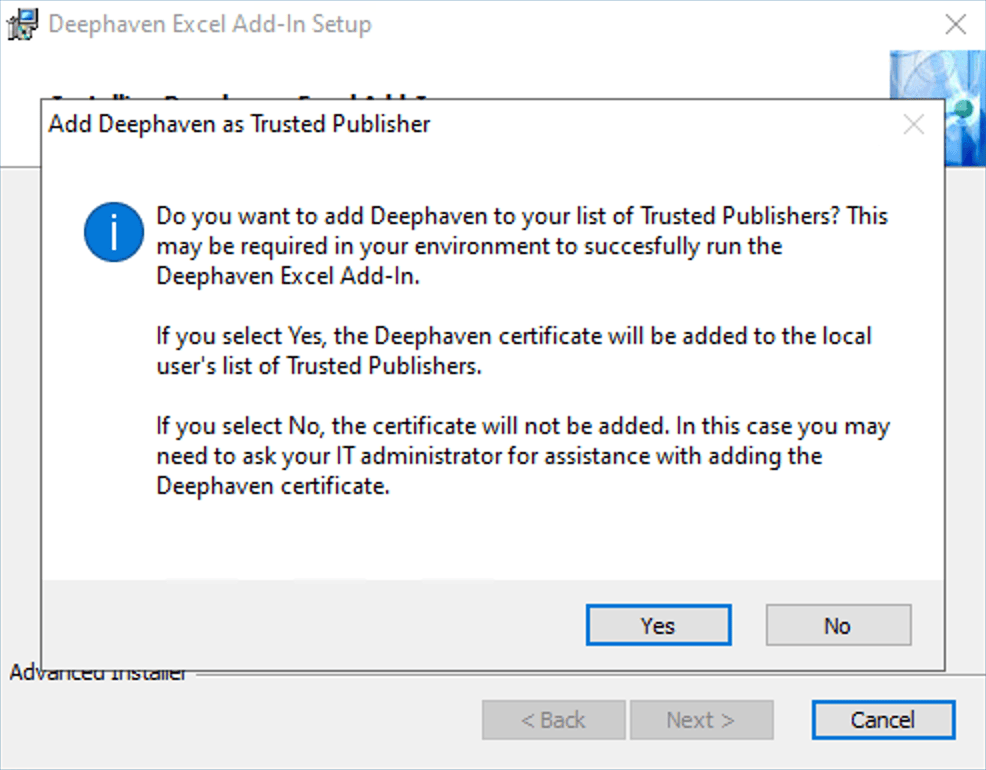
When you see an Add Deephaven as Trusted Publisher dialog box, choose:
- Yes to add Deephaven to your computer's list of Trusted Publishers. This is needed so that Excel can run Deephaven code.
- No if you are unsure or your company's policy prohibits it. In this case, the add-in will not run. To proceed, you should consult with your company's IT administrator.
Finally, click Finish to complete the installation.
Connect to Deephaven
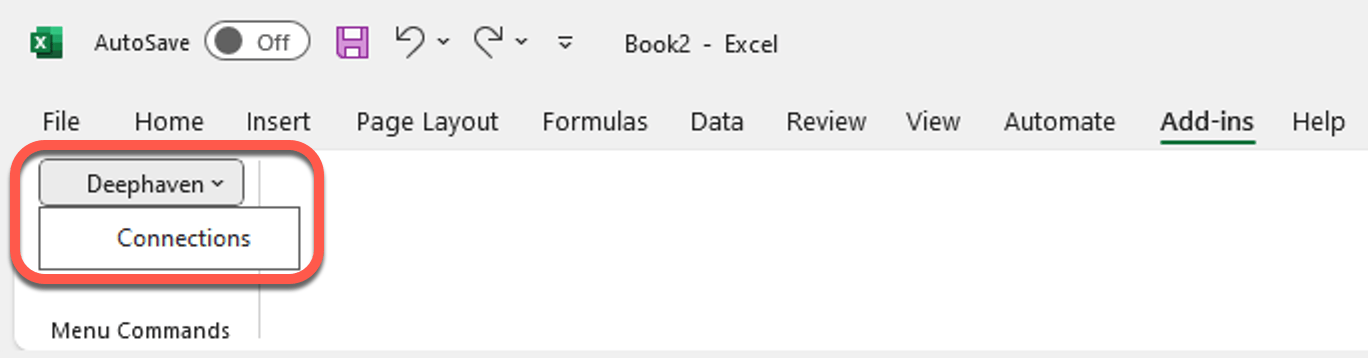
To connect Deephaven's Excel client with Deephaven, find "Add-ins" in Excel's menu and look for the "Deephaven" section in the ribbon that appears. Inside the Deephaven drop-down menu, click on Connections.
Note
If the Deephaven add-in was not installed correctly or does not have the correct permissions, the add-ins menu might not appear. In this case, you may need to consult your IT administrator for assistance.
Next, in the Connection Manager, select New to create a new connection.
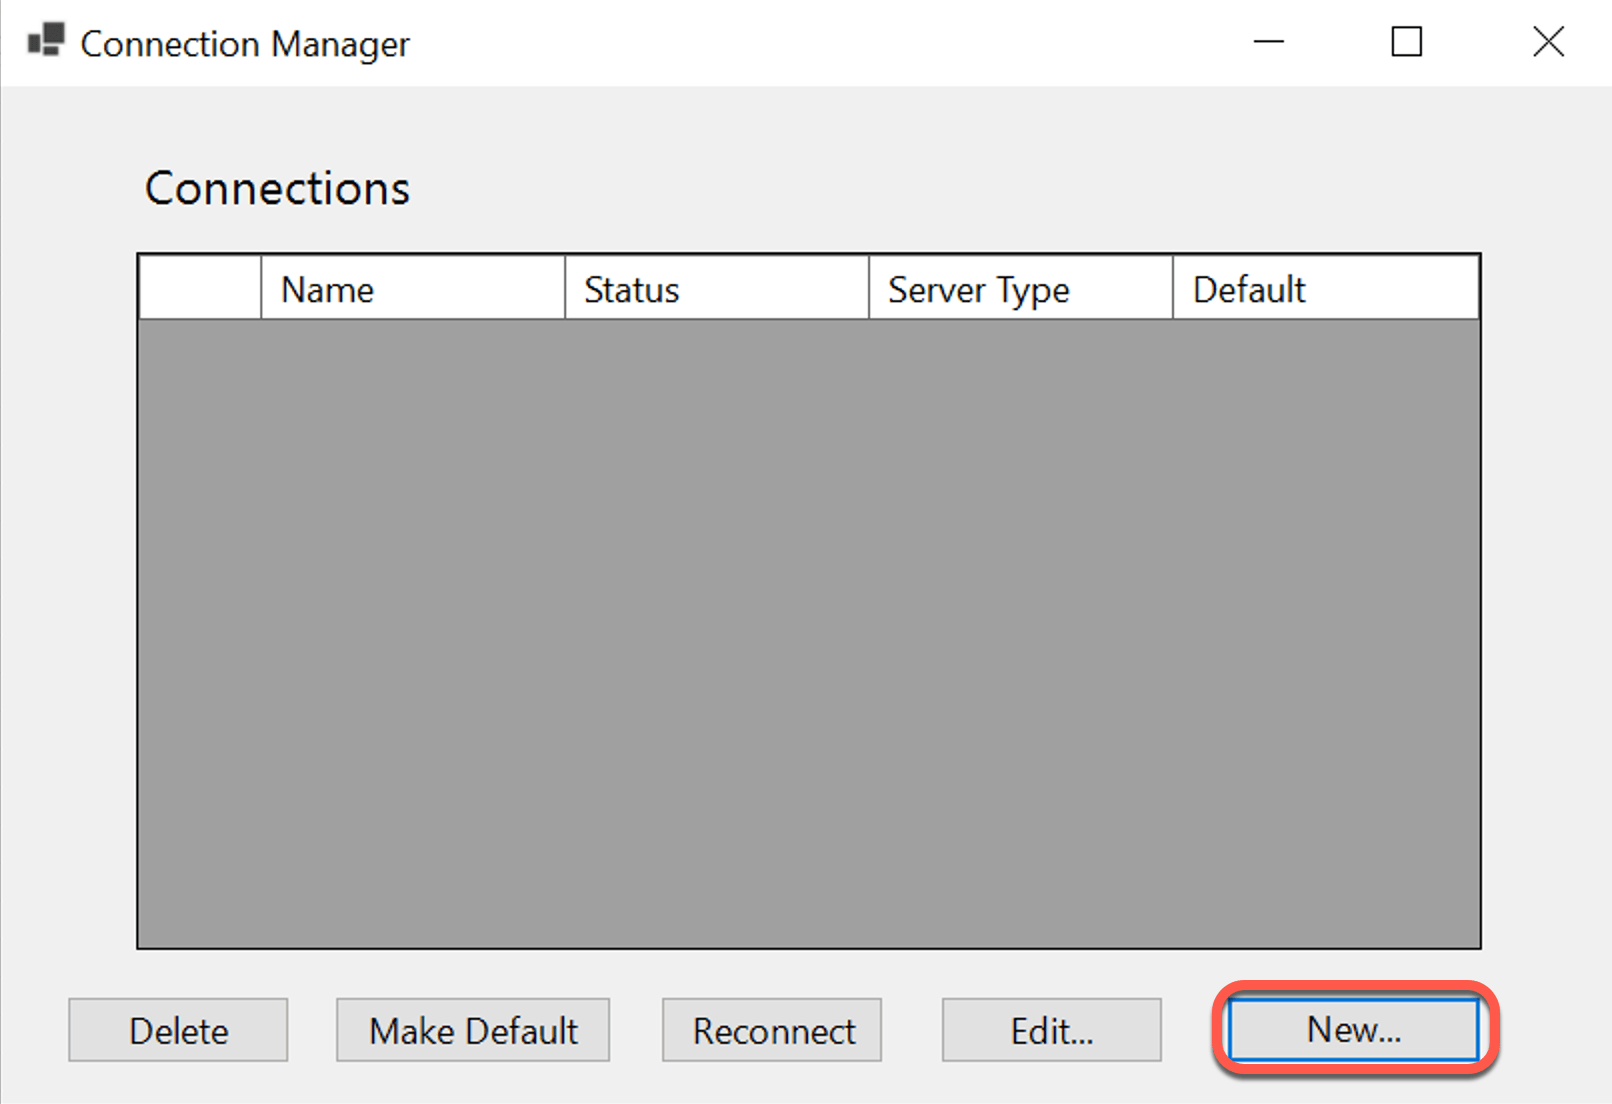
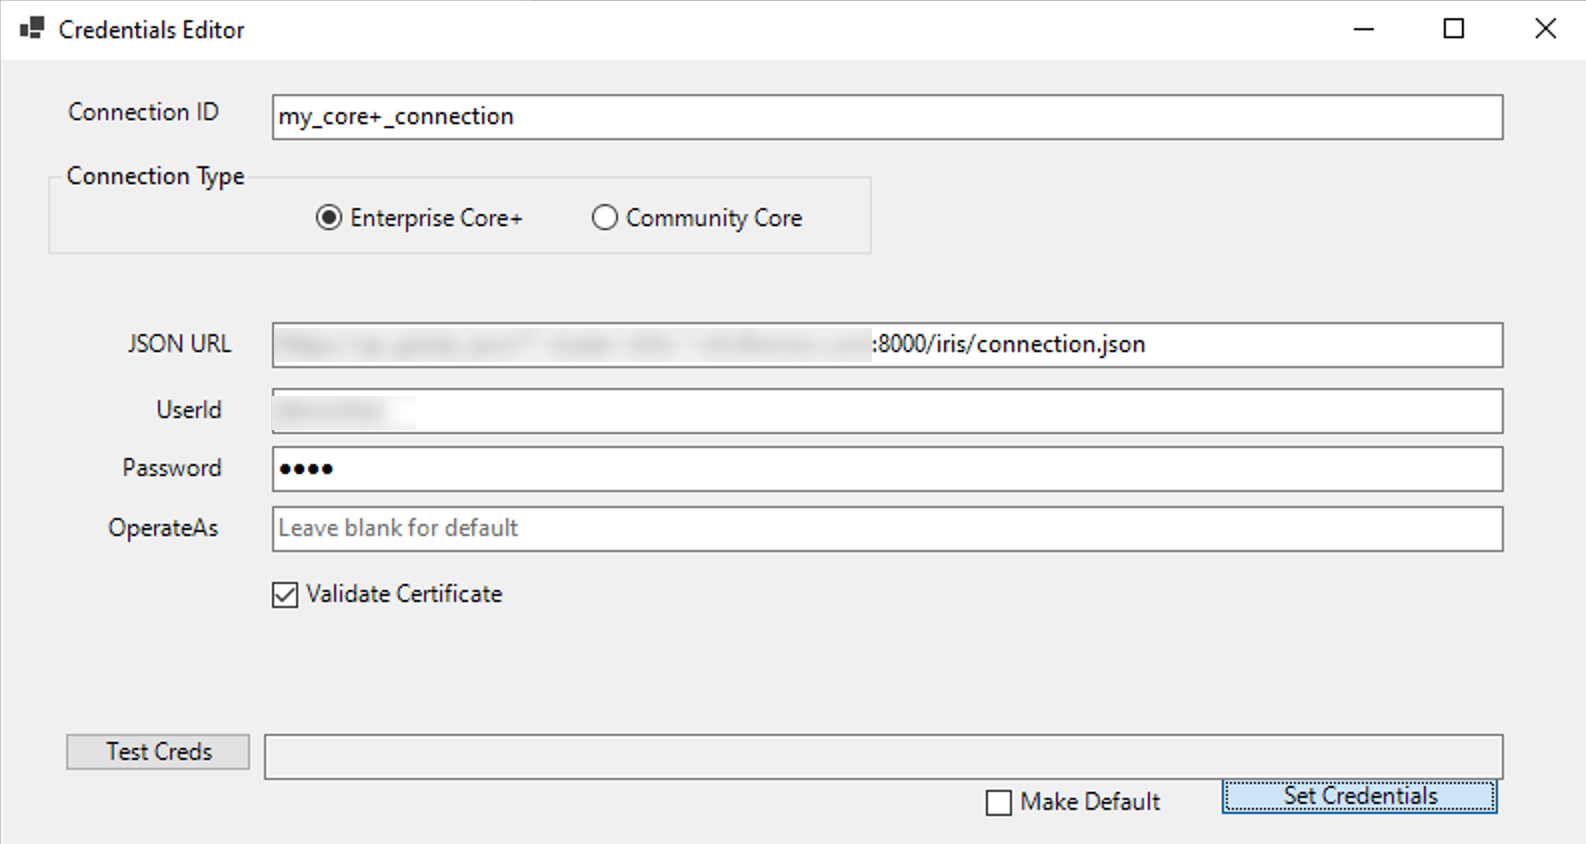
Select Enterprise Core+ and choose a Connection ID. The Connection ID is a short string of your choosing that you can use to reference this connection from your Excel formulas.
Next, enter the JSON URL for your Deephaven Core+ server, <your_server_address>:<port>/iris/connection.json. Use port 8000 for servers with an Envoy service and port 8123 for servers without an Envoy service.
For example, https://mydeephavenserver.example.com:8000/iris/connection.json.
Enter the UserId and Password that you use to log onto your Deephaven Core+ server. If you have permissions, you can enter another user's name in the OperateAs field to operate as that user.
Before setting the credentials, click Test Creds to ensure the connection is valid. Finally, click Set Credentials to save the connection.
That's it! You're connected to Deephaven, and you can now use the Deephaven Excel client to access your data.
Usage
You can use two functions to access data in Deephaven from Excel: DEEPHAVEN_SNAPSHOT and DEEPHAVEN_SUBSCRIBE. Both methods have the same syntax; they differ in that DEEPHAVEN_SNAPSHOT retrieves a single snapshot of the data, while DEEPHAVEN_SUBSCRIBE subscribes to the data and updates it in real time. Each method takes the following parameters:
TABLE_DESCRIPTOR: A string that points the Deephaven Excel client to the Deephaven connection and table you want to access.- If you are using a Core+ connection, the format is
"<ConnectionID>:<PersistentQueryName>/<TableName>". For example,"con1+:pq1/t1"to access tablet1in persistent querypq1in connectioncon1+.
- If you are using a Core+ connection, the format is
FILTER_STRING(optional): A conditional expression interpreted by the Deephaven server to filter the data that Excel receives. For example,"Symbol = `AAPL` && Quantity > 50".WANT_HEADERS(optional): A Boolean value that determines whether Excel includes the headers (column names) from the Deephaven table. IfTRUE, Excel will include the headers. The default isFALSE.
DEEPHAVEN_SNAPSHOT
To retrieve a snapshot of a table from Deephaven, use DEEPHAVEN_SNAPSHOT. This function fetches data from a Deephaven table, optionally filtered by a filter string, at a specific point in time. It works on both static and ticking tables.
The Deephaven Excel client can fetch tables from any Persistent Query you have access to.
For this example, create a new Persistent Query called test_pq and save a script that generates a simple table:
Next, from your Excel sheet, use =DEEPHAVEN_SNAPSHOT("con1+:test_pq/static_table",,FALSE) to retrieve a snapshot of the table static_table from connection con1+:
DEEPHAVEN_SUBSCRIBE
To subscribe to updates from ticking tables, use DEEPHAVEN_SUBSCRIBE. This function fetches the data from a ticking Deephaven table and updates as the source table changes.
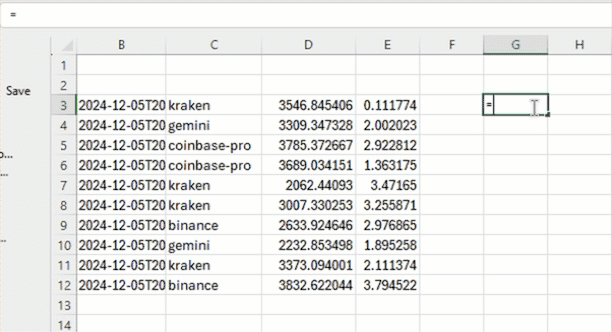
For this example, create a new Persistent Query called test_pq and save a script that generates a ticking table:
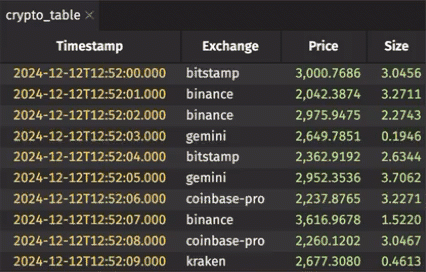
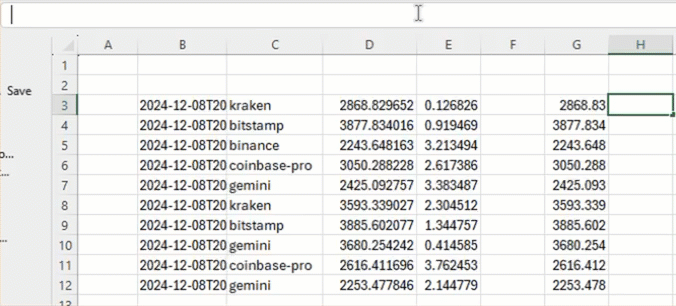
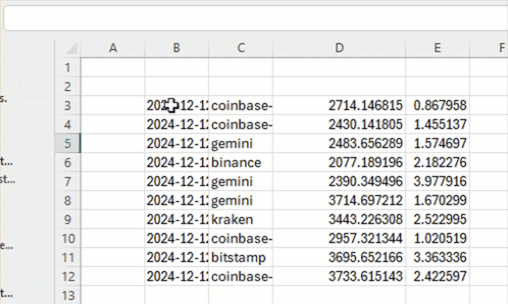
Next, fetch the table with =DEEPHAVEN_SUBSCRIBE("con1+:test_pq/crypto_table",,FALSE):
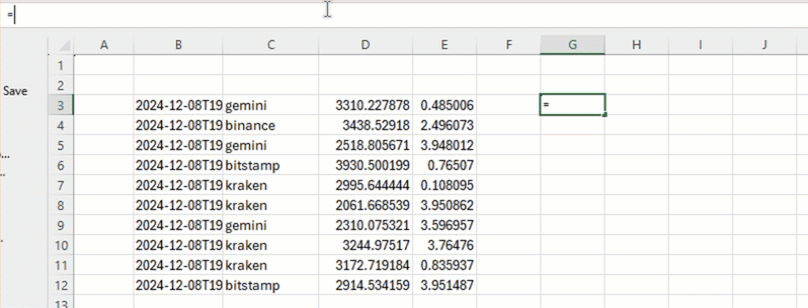
Cells that depend on the data in our new ticking rows will also update when the data changes. For example, you can use relative references in the formula =D3 * E3 to multiply the Price and Size columns for individual rows:
Note
For ticking data, you should expect Excel to update your sheet every few seconds.
Cell references vs. dynamic array references
Cell references like the formula =B3 copy the value of the referenced cell and update when the referenced cell changes. Dynamic array references like =B3# copy the entire array of values from the referenced cell and update when the referenced cell changes.
Note
If you change your table's definition on the server, your DEEPHAVEN_SNAPSHOT and DEEPHAVEN_SUBSCRIBE functions may still reference data from the original table. To address this, press the Reconnect button in the Connection Manager.
Extract a column from a dynamic array
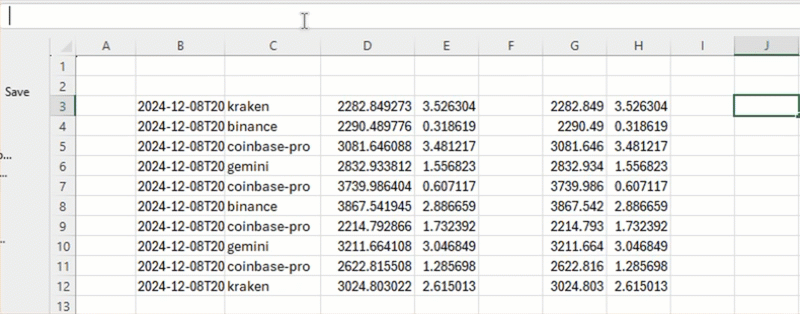
Say you want to take column 3 of the ticking table above and use it elsewhere in your spreadsheet. You can use the Excel formula INDEX as in =INDEX(B3#,,3) to extract column 3 from the dynamic array at B3#:
Extract column 4 by using =INDEX(B3#,,4):
Multiply one column by another
You can multiply one column by another using dynamic array references, such as =G3# * H3#:
Inline Excel INDEX commands
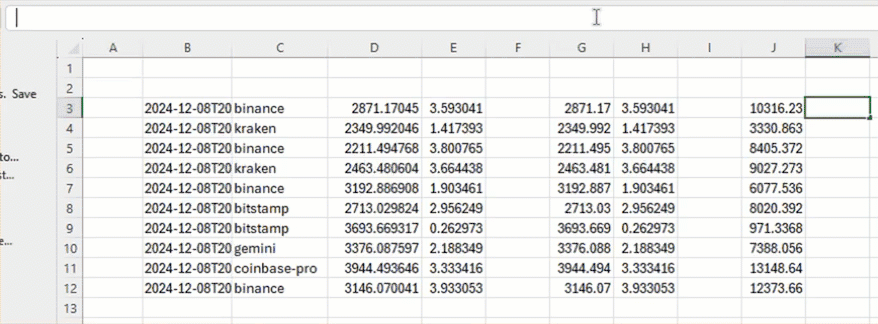
You don't have to extract columns somewhere on the sheet before you can use them in a formula. Instead, you can refer to them inside a formula directly. For example, we can get the same result as the formula in the previous section with =INDEX(B3#,,3) * INDEX(B3#,,4):
Filter dynamic arrays with FILTER
You can use a filter expression on one dynamic array to control what rows are selected from another dynamic array.
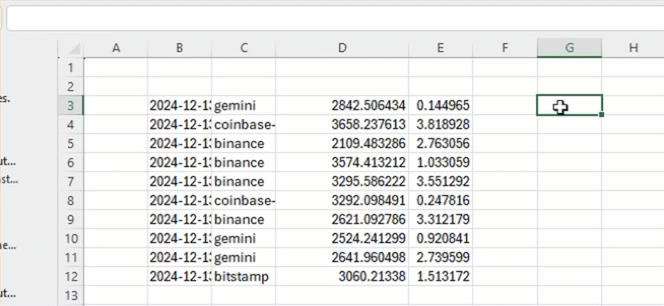
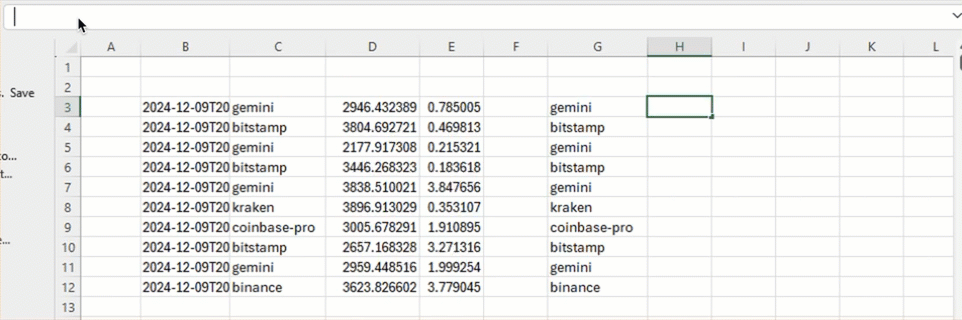
First, use the INDEX command to extract the Exchange column from the B3# table and store it at G3#. Use the formula =INDEX(B3#,,2):
Next, Excel looks at the filter G3# = "kraken" to determine which rows of G3# match "kraken", then pulls in the corresponding rows from B3# to form the result. The full expression is =FILTER(B3#,G3#="kraken"):
To make this filtering operation more compact, you can inline the expression that defines the filter source rather than having it occupy space on your sheet. This allows us to combine the previous two formulas into one: =FILTER(B3#,INDEX(B3#,,2)="kraken").
Filter server-side
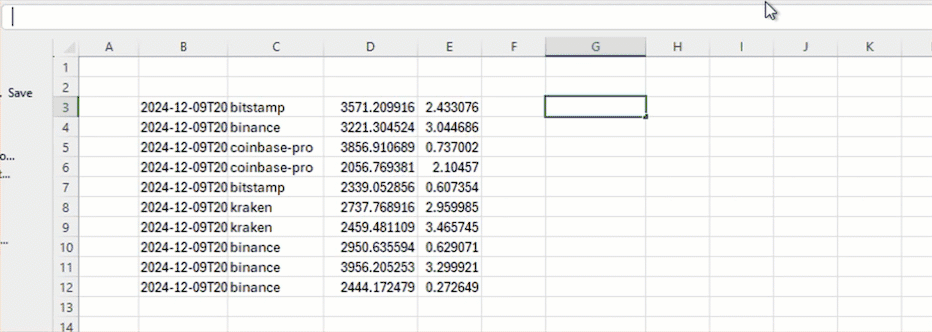
If you are working with a large table, you may prefer to filter the table on the server side before it reaches the client. Do this by using DEEPHAVEN_SUBSCRIBE with a filter string, such as =DEEPHAVEN_SUBSCRIBE("con1+:test_pq/crypto_table","Exchange = `kraken`",FALSE):
You can also make the DEEPHAVEN_SUBSCRIBE formula dependent on a cell value. For example, =DEEPHAVEN_SUBSCRIBE("con1+:test_pq/crypto_table", F2, FALSE), with F2 containing the formula ="Exchange = `" & C2 & "`". This way, you can change the filter string by changing the value in cell C2: