Core+ Flight SQL ODBC
The Deephaven Enterprise Flight SQL ODBC Driver enables Open Database Connectivity (ODBC)-compliant applications such
as Microsoft Power BI, Microsoft Excel, and Tableau to connect to Deephaven Core+ servers. The driver is built
on Flight SQL, a protocol on top
of Arrow Flight that exposes SQL-like capabilities. Deephaven Core+
workers provide a built-in Flight SQL server that makes tables in the global query scope available as named tables,
queryable through the default Flight SQL catalog using standard SQL.
Important
The Deephaven Enterprise Flight SQL ODBC Driver is available for Windows only (64-bit).
Note
Only SELECT statements are supported; data modification statements (INSERT, UPDATE, DELETE) are not.
While Flight SQL / ODBC may be a convenient starting point for business intelligence (BI) tool integration, the Flight SQL APIs are not Live Dataframe APIs. If you need to receive real-time updates, use a Deephaven-native client instead, such as the Deephaven Core+ Python client, the Deephaven Core+ C++ client, or the Deephaven Core+ Java client.
Quick start
- Install the driver — Run the MSI installer. The installer registers the driver automatically. See Installation.
- Configure a DSN — Open
odbcad32.exe, create a new DSN, and fill in your connection details. See Configure a DSN. - Test your connection — Click Test Connection in the DSN configuration dialog to verify connectivity. See Create a DSN for details.
- Connect from an application — Open Power BI, Excel, or another ODBC-compliant tool, select your DSN, and choose the
Default or Custom credential option. Supply a SQL
SELECTstatement to load just the data you need, or pick tables from the Navigator. See Application integration.
Prerequisites
- Operating system: Windows 10 or Windows 11 (64-bit).
- Administrator privileges for installation.
- Access to a running Deephaven Core+ instance with Flight SQL enabled (Grizzly version 1.20240517.491 or later).
- The name of a running Persistent Query (PQ) you want to connect to.
Important
The Persistent Query must already be Running before you connect, and you must be on the VPN (Virtual Private Network) if your server requires one. If the PQ is not running, the connection fails immediately. If the VPN is disconnected, the connection hangs for several minutes before failing. See Diagnosing connection errors.
Installation
Download and run the MSI installer
-
Obtain
Deephaven-Enterprise-Flight-SQL-ODBC-<version>-win64.msifrom your Deephaven administrator or download location. -
Double-click the MSI file. If prompted by User Account Control (UAC), click Yes to allow the installation.
-
Follow the installation wizard:
-
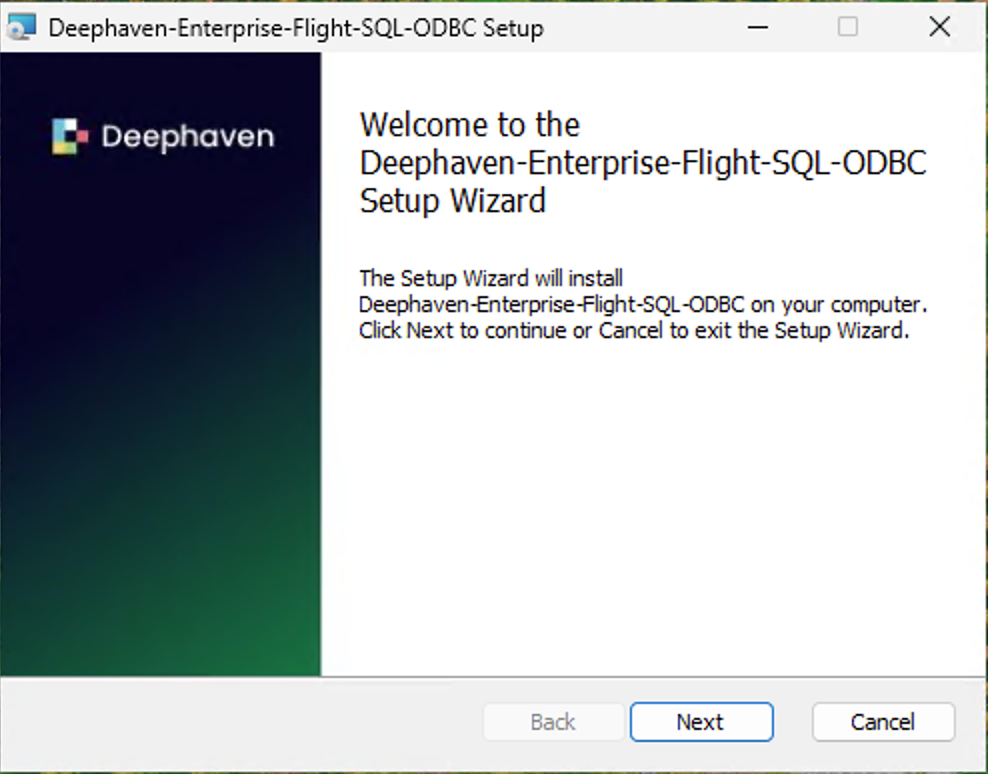
Click Next on the welcome screen.
-
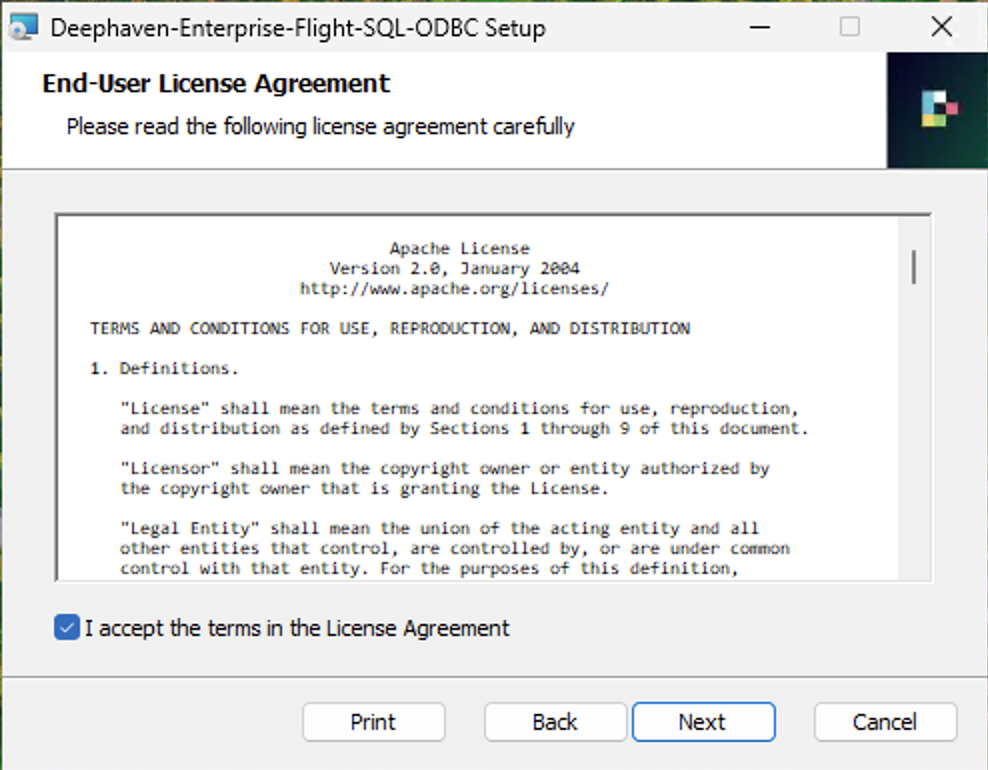
Review and accept the Apache 2.0 license agreement.
-
Choose the installation directory (default:
C:\Program Files\Deephaven Enterprise Flight SQL ODBC\). -
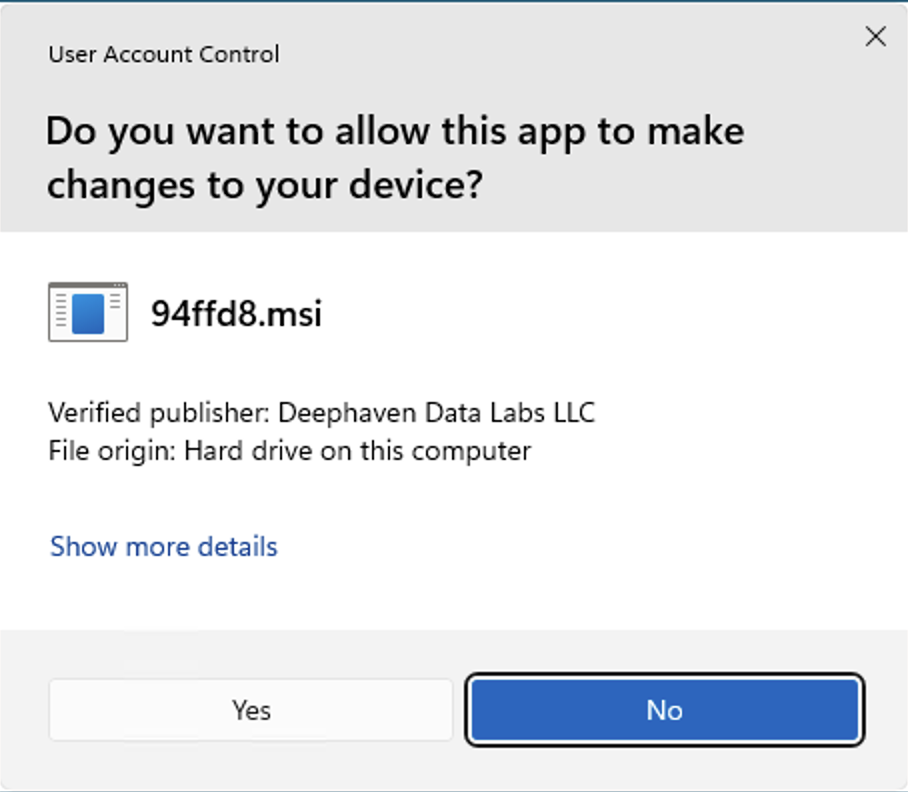
Verify the program is signed by Deephaven when prompted by UAC.
-
Click Yes to allow the installer to make changes to your system and complete the installation.
-
Verify installation
- Open ODBC Data Source Administrator (64-bit):
- Press
Win + R, typeodbcad32.exe, and press Enter; or - Search for "ODBC Data Sources (64-bit)" in the Start menu.
- Press
- Go to the Drivers tab.
- Confirm that Deephaven Enterprise Flight SQL appears in the list with version information and a file path.
Important
Always use the 64-bit ODBC Administrator (C:\Windows\System32\odbcad32.exe). Do not use the 32-bit version (
C:\Windows\SysWOW64\odbcad32.exe). The driver is 64-bit only.
Configure a DSN
A Data Source Name (DSN) stores your connection settings so you don't have to enter them every time you connect from an application. Windows supports two types of DSN:
- User DSN — Available only to the current Windows user. Recommended for personal workstations.
- System DSN — Available to all users on the machine. Recommended for shared servers and service accounts.
Create a DSN
-
Open ODBC Data Source Administrator (64-bit) (see Verify installation).
-
Go to the User DSN tab or the System DSN tab, depending on the scope you need.
-
Click Add..., select Deephaven Enterprise Flight SQL, and click Finish.
-
Fill in the connection fields:
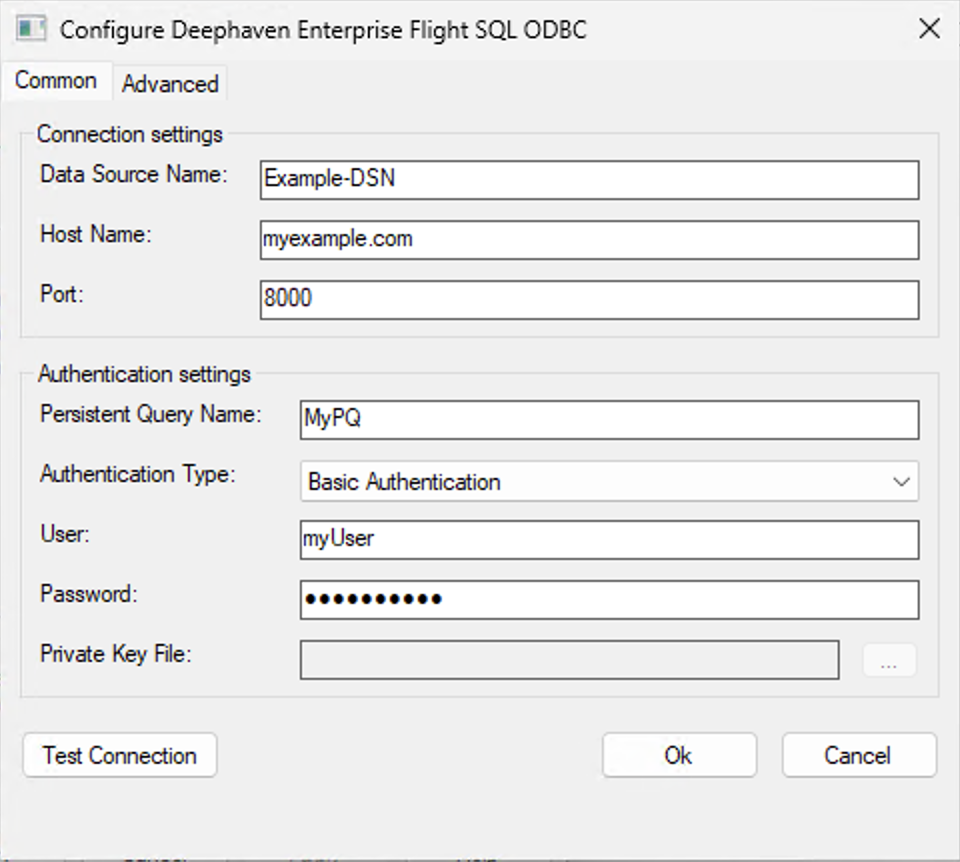
Field Required Description Data Source Name Yes A descriptive name (e.g., Deephaven Production). This is the name you select in applications like Power BI.Host Name Yes Deephaven server hostname or IP address (e.g., deephaven.mycompany.com).Port Yes Server port. Contact your Deephaven administrator for the correct value. Persistent Query Name Yes Name of the Persistent Query to connect to (e.g., my_analytics_pq).Authentication Type Yes Basic Authentication (username/password), Private Key Authentication (key file), or SAML (SSO) Authentication (browser-based single sign-on). See Authentication. -
Click Test Connection. If successful, you'll see a Test Connection Success dialog.
-
Click OK to save the DSN.
The Advanced tab
The Advanced tab contains an Encryption settings group: Use Encryption, Certificate, Use System Certificate Store, and Disable Certificate Verification.
Important
Leave the Encryption settings controls alone. They are inherited from the upstream Apache Arrow Flight SQL ODBC driver and have no effect on Deephaven connections. In particular, you do not need to supply anything in the Certificate field: the connection always uses TLS (Transport Layer Security), and the driver resolves the required trust roots on its own.
The Advanced properties key/value table on the same tab is honored. It accepts the upstream Arrow driver's metadata tuning properties, which are rarely needed:
| Property | Default | Description |
|---|---|---|
StringColumnLength | Unset | Reported length for string columns, for clients that require a bounded column size. Minimum 1. |
UseWideChar | true | Whether to report character data as wide (UTF-16) types. |
ChunkBufferCapacity | 5 | Number of result chunks buffered while fetching. Minimum 1. |
Authentication
The driver supports three mutually exclusive authentication methods, selected from the Authentication Type dropdown shown in Create a DSN above. The dialog enables only the fields relevant to the selected method and disables the rest.
Basic Authentication
Enter your User and Password in the DSN dialog. Both fields are enabled when Basic Authentication is selected.
Private Key Authentication
When Private Key Authentication is selected, the User and Password fields are disabled. Instead, provide the
Private Key File — the full path to your Deephaven-format private key file (e.g.,
C:\Users\yourusername\deephaven_key.txt). The username is read from the private key file itself.
Type the path directly, or click the ... button to browse for it.
Tip
The Browse dialog filters for *.pem and *.key files by default. Deephaven private key files commonly use a .txt
extension, so if you don't see your key file, change the file-type dropdown to All Files (*.*).
See private key authentication for more details on how private key authentication works in Deephaven. Your Deephaven administrator should provide you with a private key file if your environment is configured to use this authentication method.
SAML (SSO) Authentication
When SAML (Security Assertion Markup Language) / SSO (Single Sign-On) Authentication is selected, the User, Password, and Private Key File fields are all disabled; no local credentials are stored in the DSN. When you connect, your default web browser opens to your identity provider's sign-on page. After you complete sign-on, the connection proceeds automatically.
The driver also writes the authentication URL to standard error. This is only visible if the host process has a console attached, for example, a Python script run from a command prompt, or a command-line ODBC tool. GUI applications such as Power BI Desktop and Excel have no console, so the message is discarded there and you simply see the browser open.
Warning
SAML (SSO) authentication is not suitable for non-interactive services such as the Power BI on-premises data gateway, SSIS, or IIS. These run in a non-interactive Windows session where the driver cannot launch a browser, and where the standard error message is not visible either, so there is no way to complete the sign-on. Use Basic or Private Key authentication for unattended and scheduled-refresh scenarios.
By default, a successful SAML login is cached per server for the lifetime of the client process and reused by subsequent
connections, so the browser is not reopened on every connect. Set SamlSessionCache=false to force a fresh SAML login on
each connection. See Connection string format.
Your Deephaven administrator must have SAML/SSO configured on the server for this method to work. See SAML authentication for details.
Connection string format
To connect programmatically (without a pre-configured DSN), use an ODBC connection string. The AuthType parameter is
required and selects the authentication method.
Parameter names are case-insensitive: AuthType and authtype refer to the same parameter. The value of AuthType
is also case-insensitive: Basic, BASIC, and basic all work. All other parameter values are case-sensitive and
used verbatim.
Basic Authentication:
Private Key Authentication:
SAML (SSO) Authentication:
Connection string parameters:
| Parameter | Required | Default | Description |
|---|---|---|---|
HOST | Yes | — | Server hostname or IP address. |
PORT | Yes | — | Server port. |
PQName | Yes | — | Persistent Query name. |
AuthType | Yes | — | Authentication method: Basic, PrivateKey, or SAML. |
UID | Basic auth only | — | Username. |
PWD | Basic auth only | — | Password. |
PrivateKeyFile | Key auth only | — | Path to Deephaven-format private key file. |
SamlSessionCache | No (SAML auth only) | true | When true, a successful SAML login is cached per server for the process lifetime and reused, avoiding repeated browser prompts. Set to false to force a fresh login on each connection. Ignored for other auth types. |
Application integration
Power BI and Excel can load data from Deephaven in two ways:
- SQL
SELECTstatement (recommended): Column projections, filters, and aggregations are evaluated on the Deephaven server, so only the rows and columns you need cross the network. This matters most for large tables and for scheduled or repeated refreshes. - Navigator: Browse what a Persistent Query exposes, or load a small table in full. Selecting a table loads it in its entirety, which can be slow and memory-intensive for large datasets.
Tip
Filtering in the SQL statement is far more efficient than importing a whole table and filtering afterwards in Power
Query or Excel. For example, prefer
SELECT Symbol, Price FROM trades WHERE Date = '2026-01-15' over importing all of trades.
Power BI Desktop
-
Open Power BI Desktop.
-
Click Home → Get Data → Other.
-
Search for
ODBC, select ODBC, and click Connect.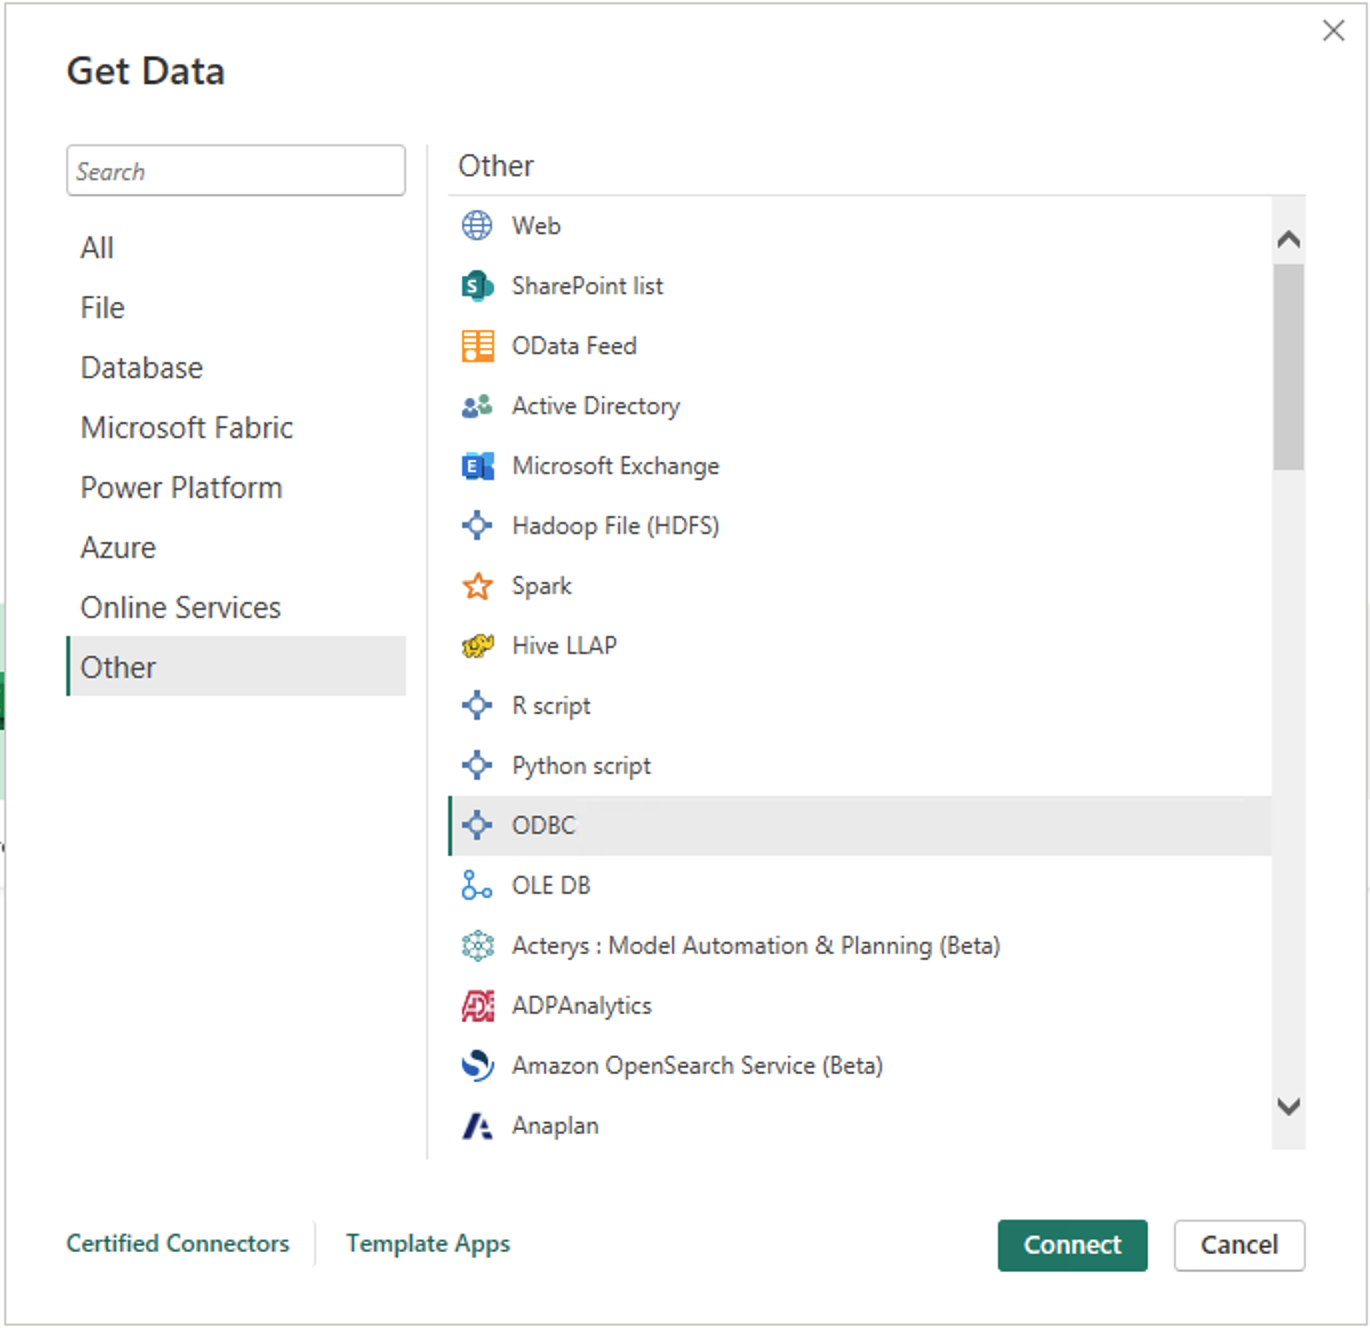
-
Select your DSN from the Data source name (DSN) dropdown.
Optionally expand Advanced options and enter a SQL
SELECTstatement in the SQL statement box, then click OK.Note
Do not include a trailing semicolon (
;) in the SQL statement.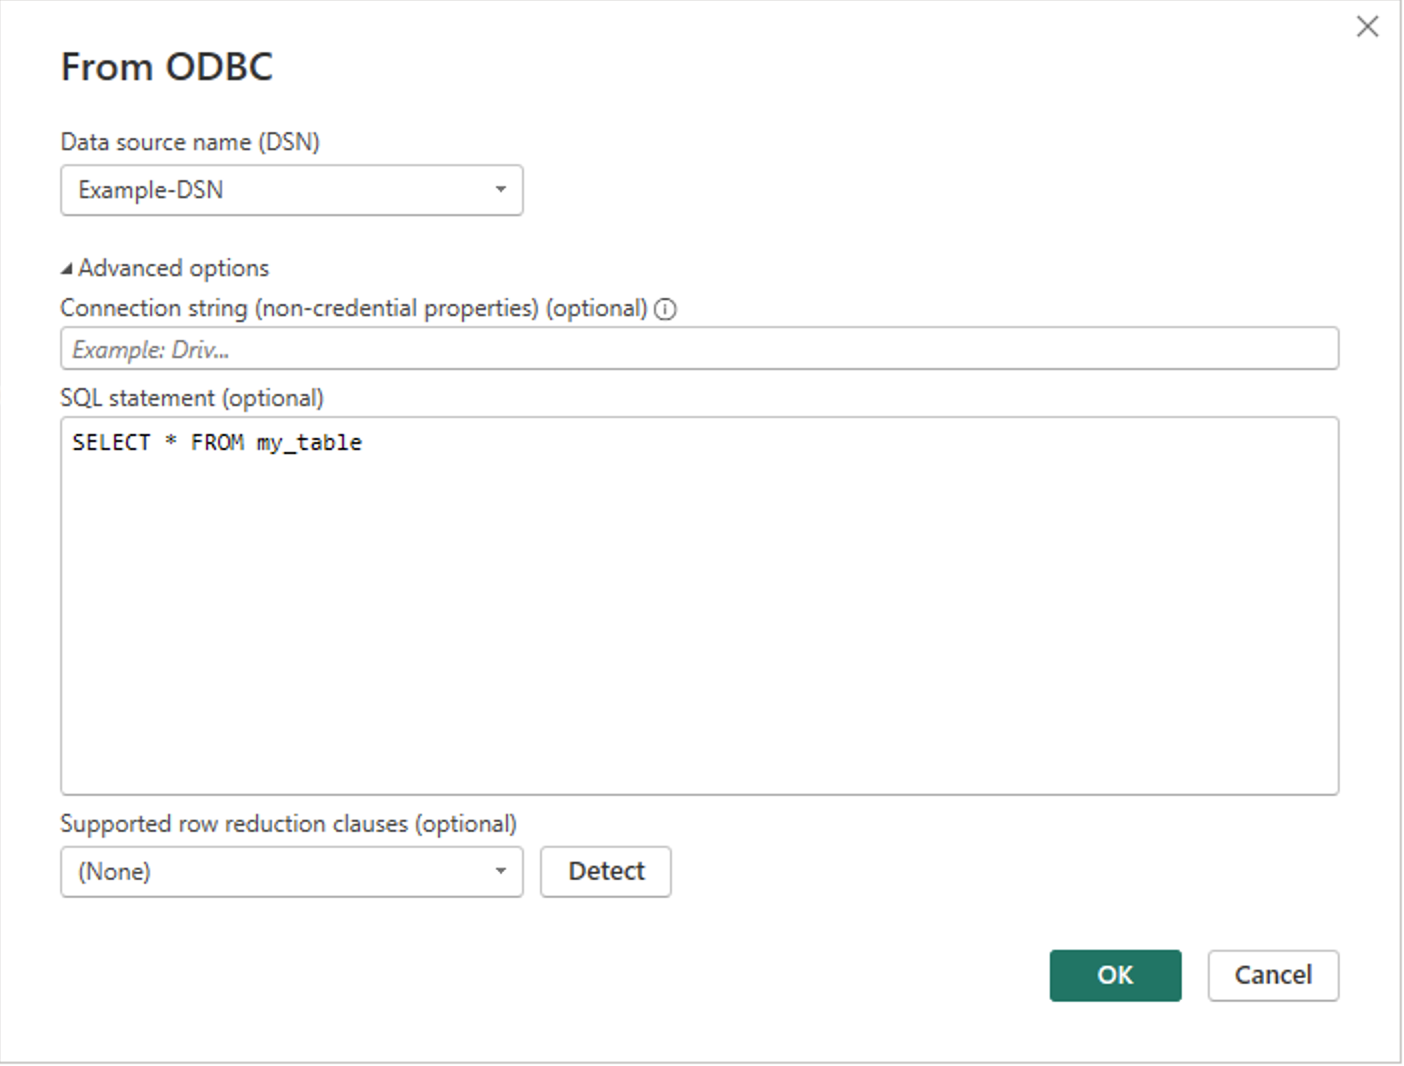
-
Power BI displays an ODBC driver credential dialog, which opens on the Database tab by default and asks for a user name and password regardless of how the DSN is configured. Select the Default or Custom tab in the left sidebar, leave the credential fields blank, and click Connect. This tells Power BI to use the authentication settings already stored in the DSN.
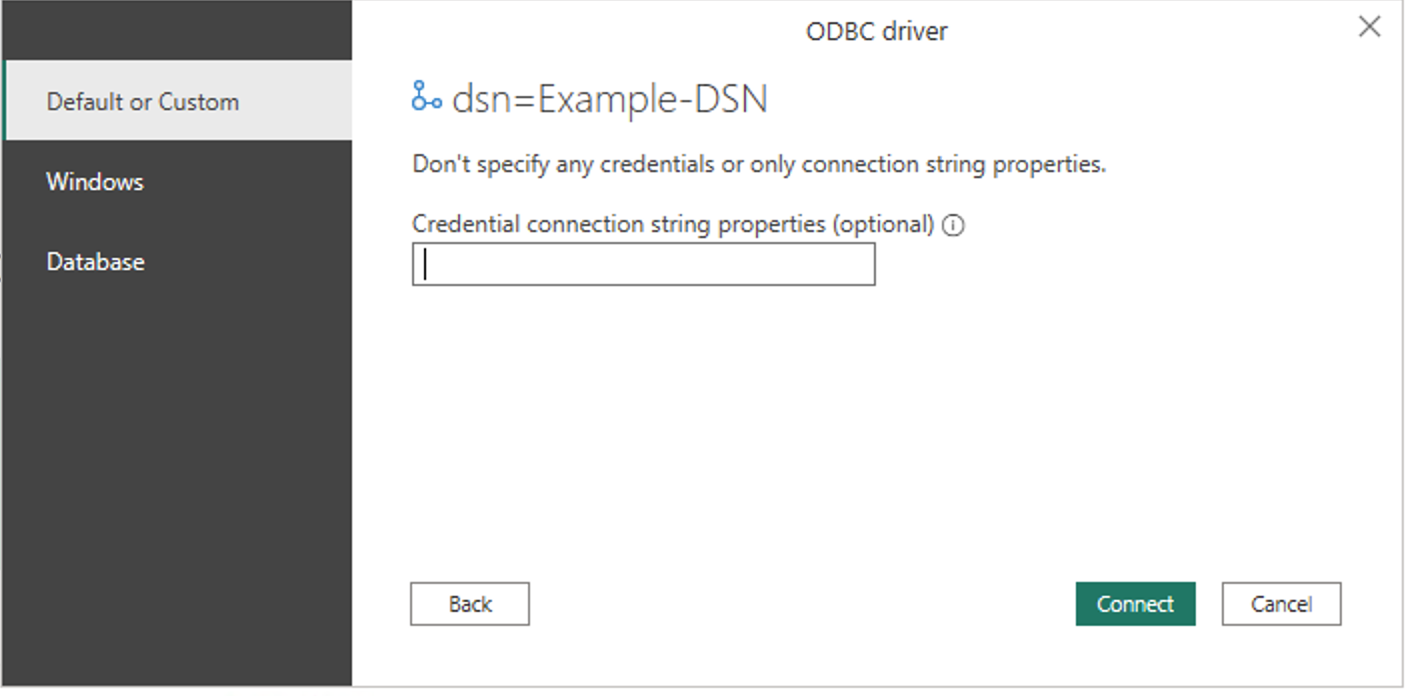
Important
Do not use the Database tab unless you deliberately want to override the DSN with a different username and password. Entering credentials there forces basic authentication and will fail for DSNs configured for Private Key or SAML (SSO) authentication.
You are prompted for credentials only the first time you connect to a given DSN; Power BI remembers the choice. To change it later, use File → Options and settings → Data source settings.
-
If you supplied a SQL statement, its result loads directly. Otherwise, the Navigator window lists the tables in your Persistent Query — select the ones you want, preview the data on the right, then click Load to import, or Transform Data to open the Power Query Editor first.
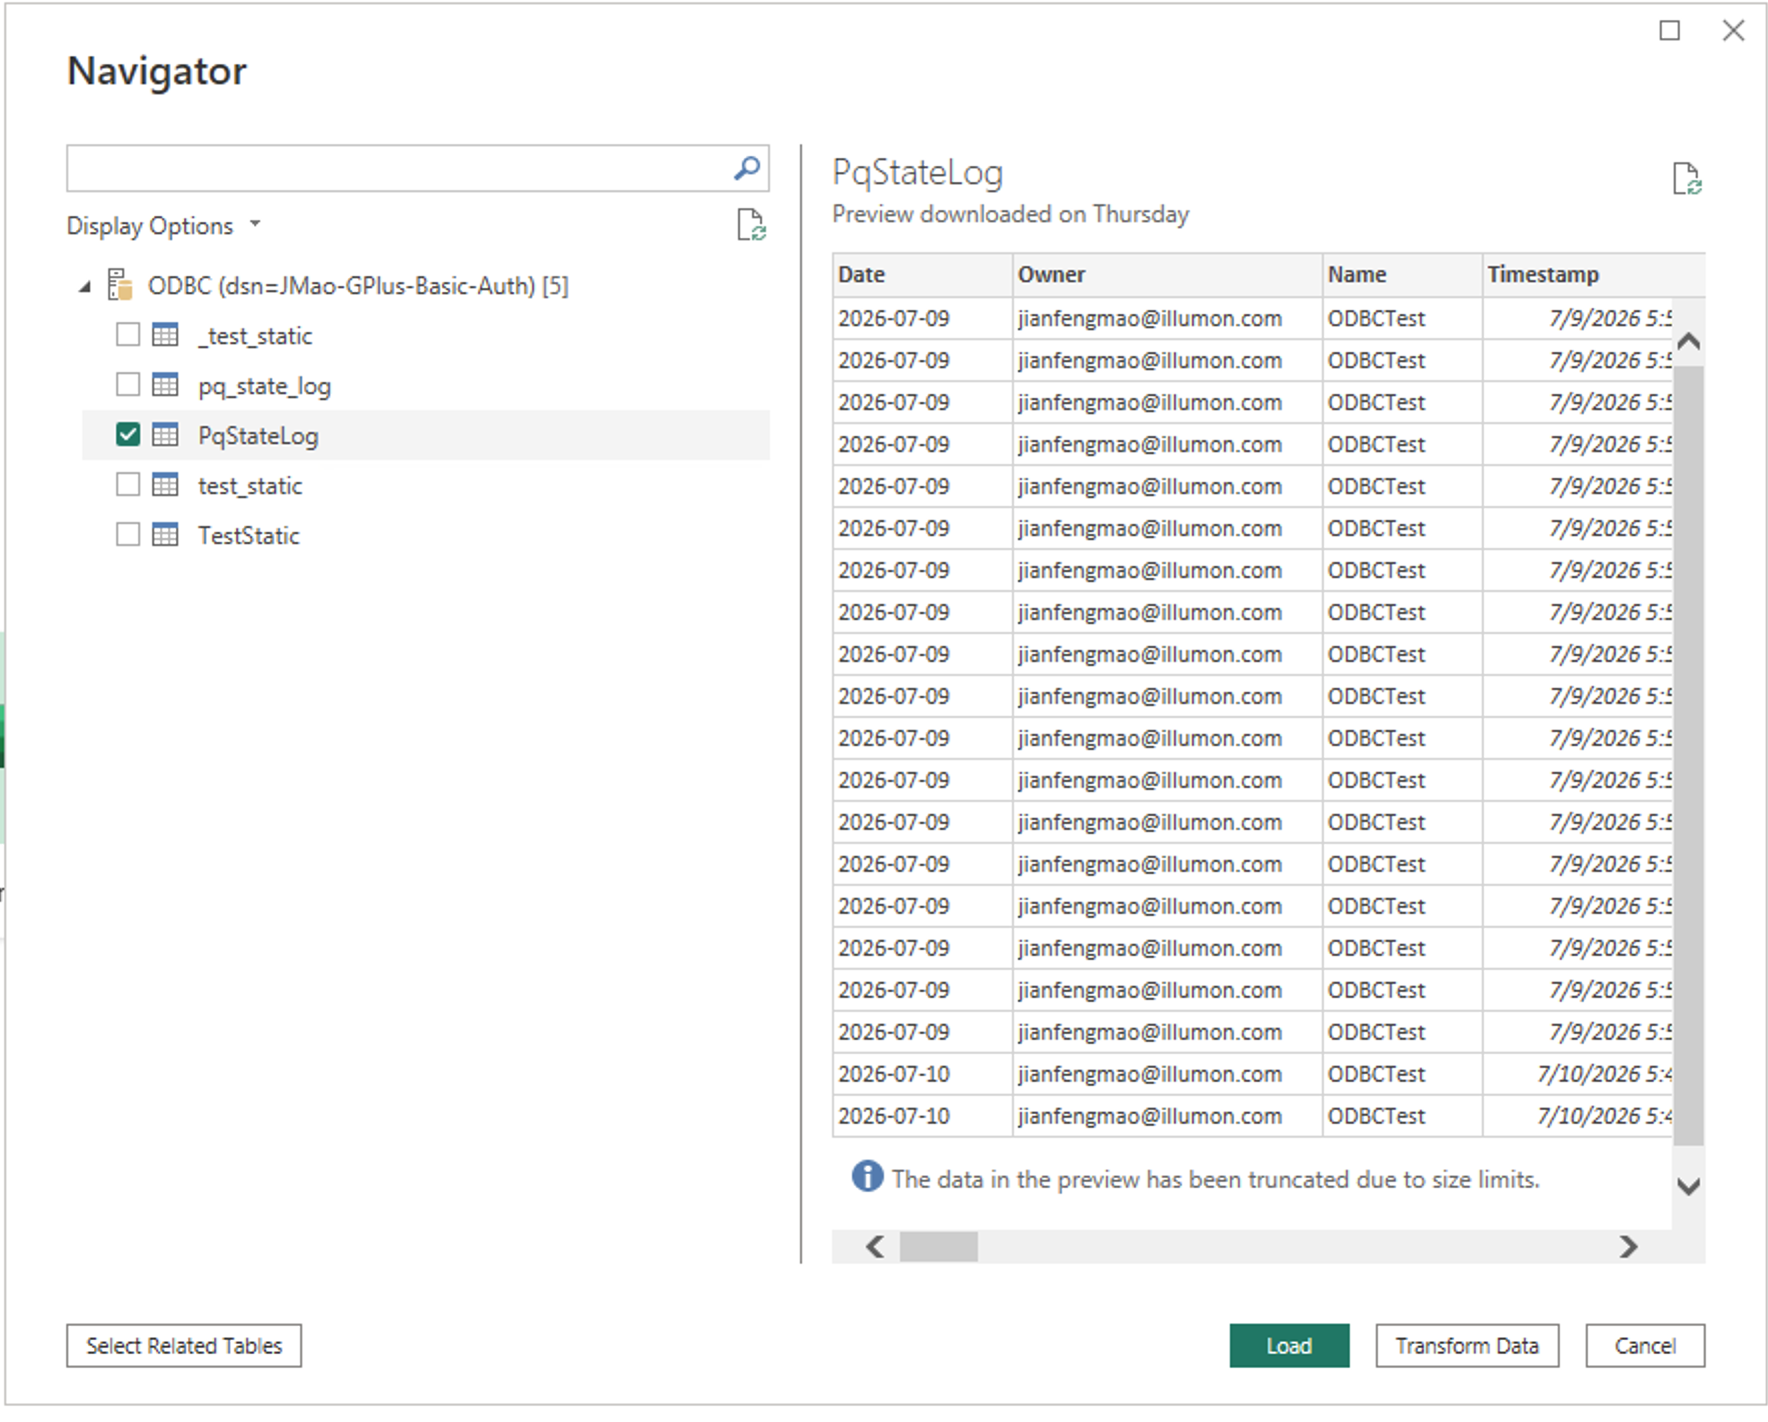
-
The data is loaded into Power BI.
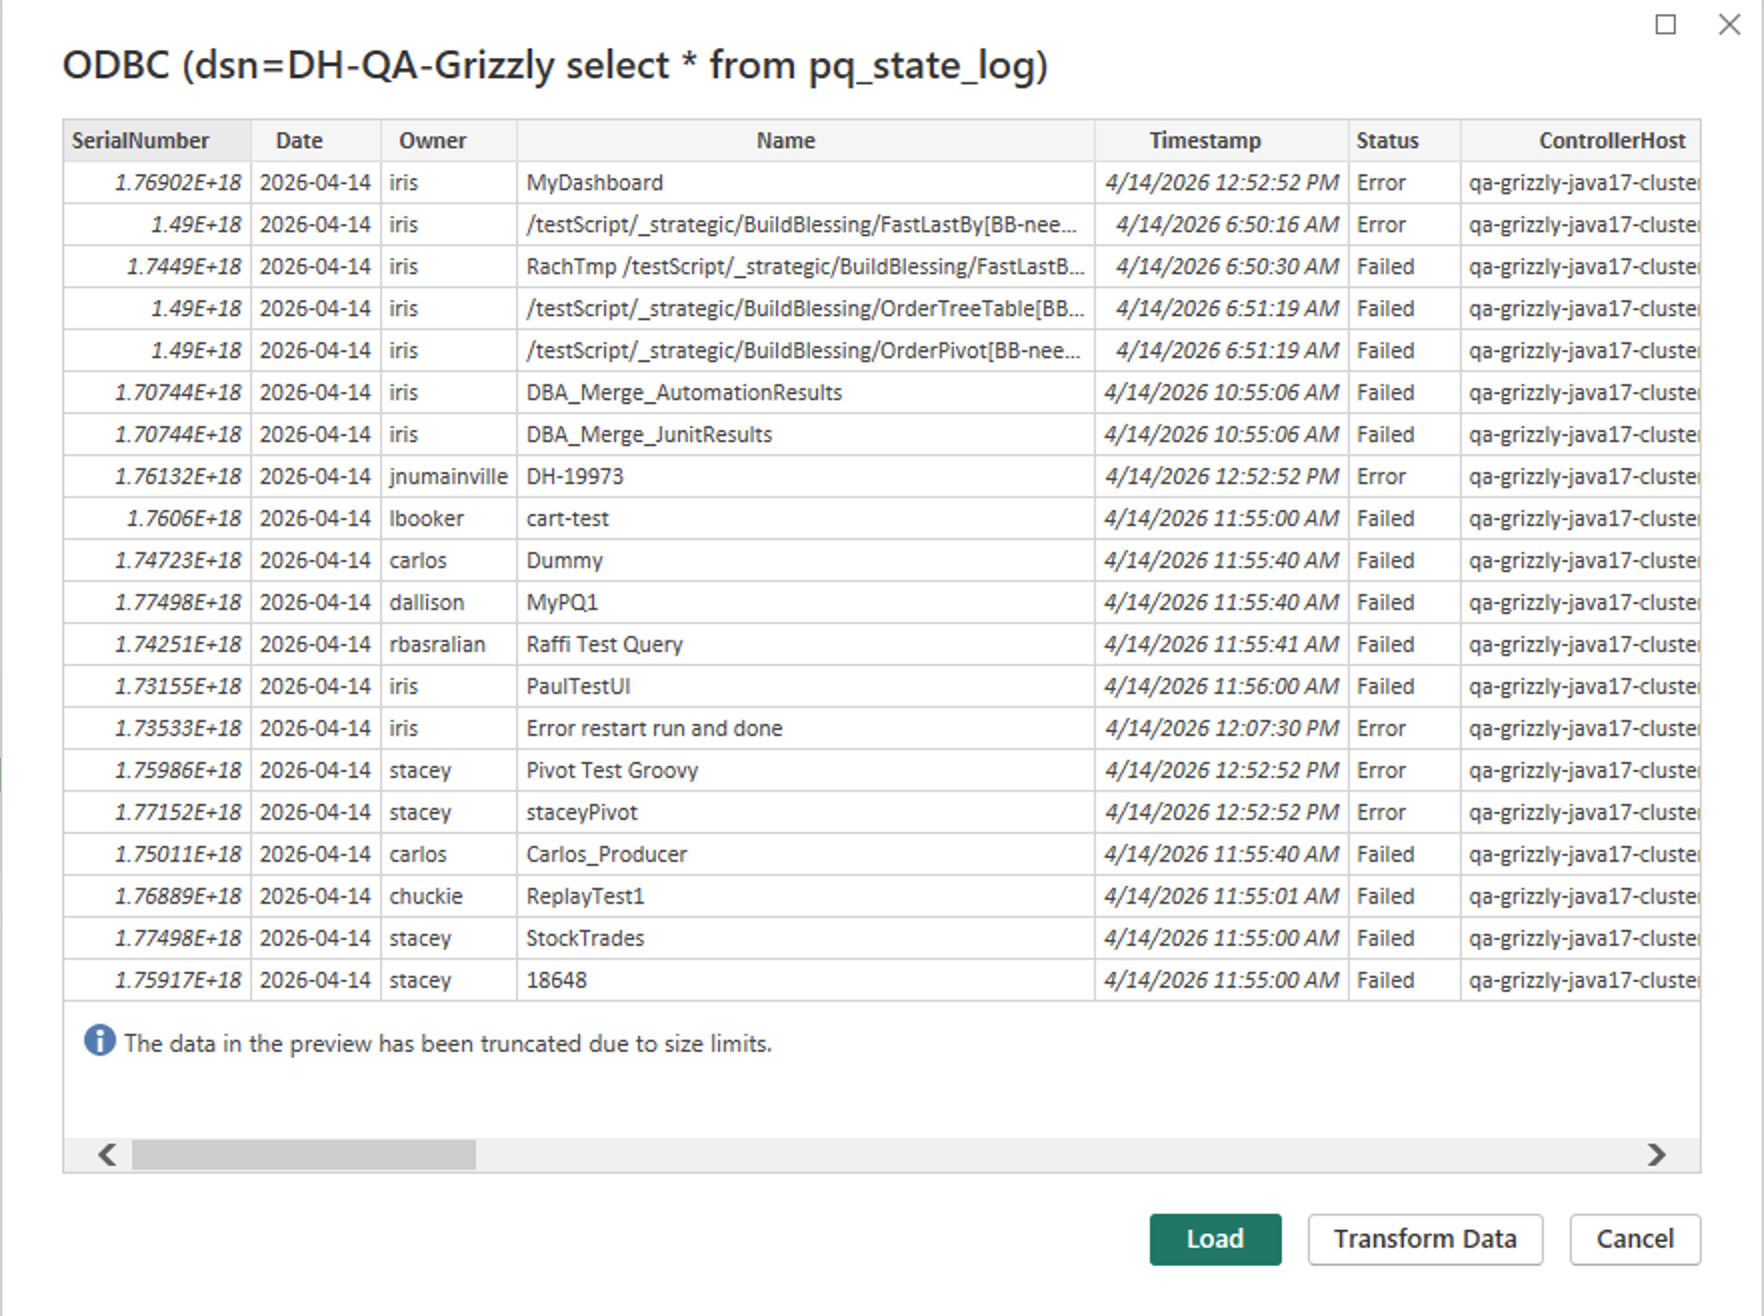
Example query result loaded from a Deephaven Core+ Persistent Query.
Microsoft Excel
-
Open Excel.
-
Go to Data → Get Data → From Other Sources → From ODBC.

-
Select your DSN from the Data source name (DSN) dropdown.
As with Power BI, you can optionally expand Advanced options and enter a SQL
SELECTstatement. Click OK.Note
Do not include a trailing semicolon (
;) in the SQL statement.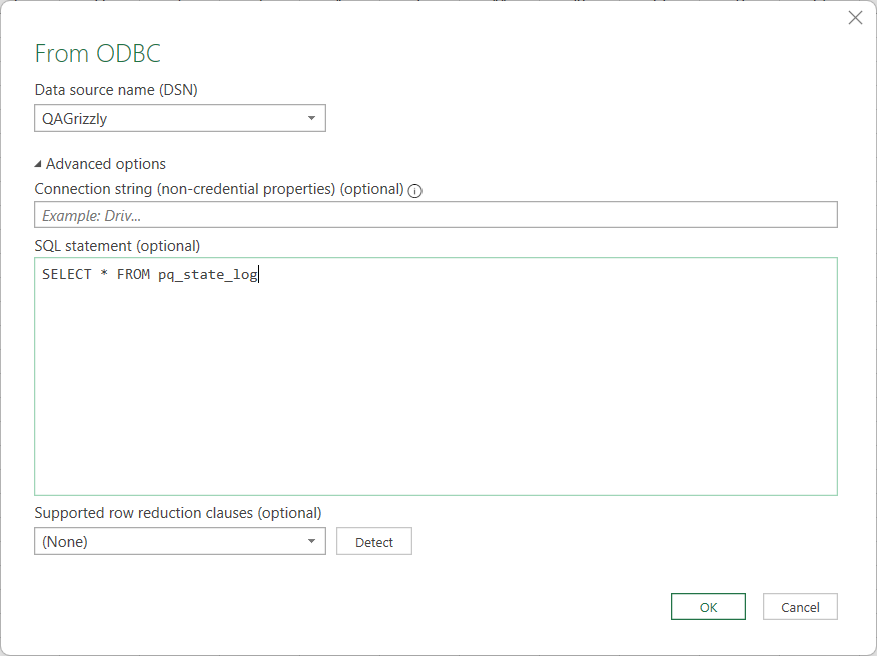
-
Complete the ODBC driver credential prompt: select the Default or Custom tab, leave the fields blank, and click Connect, just as described for Power BI Desktop above. Do not use the Database tab.
-
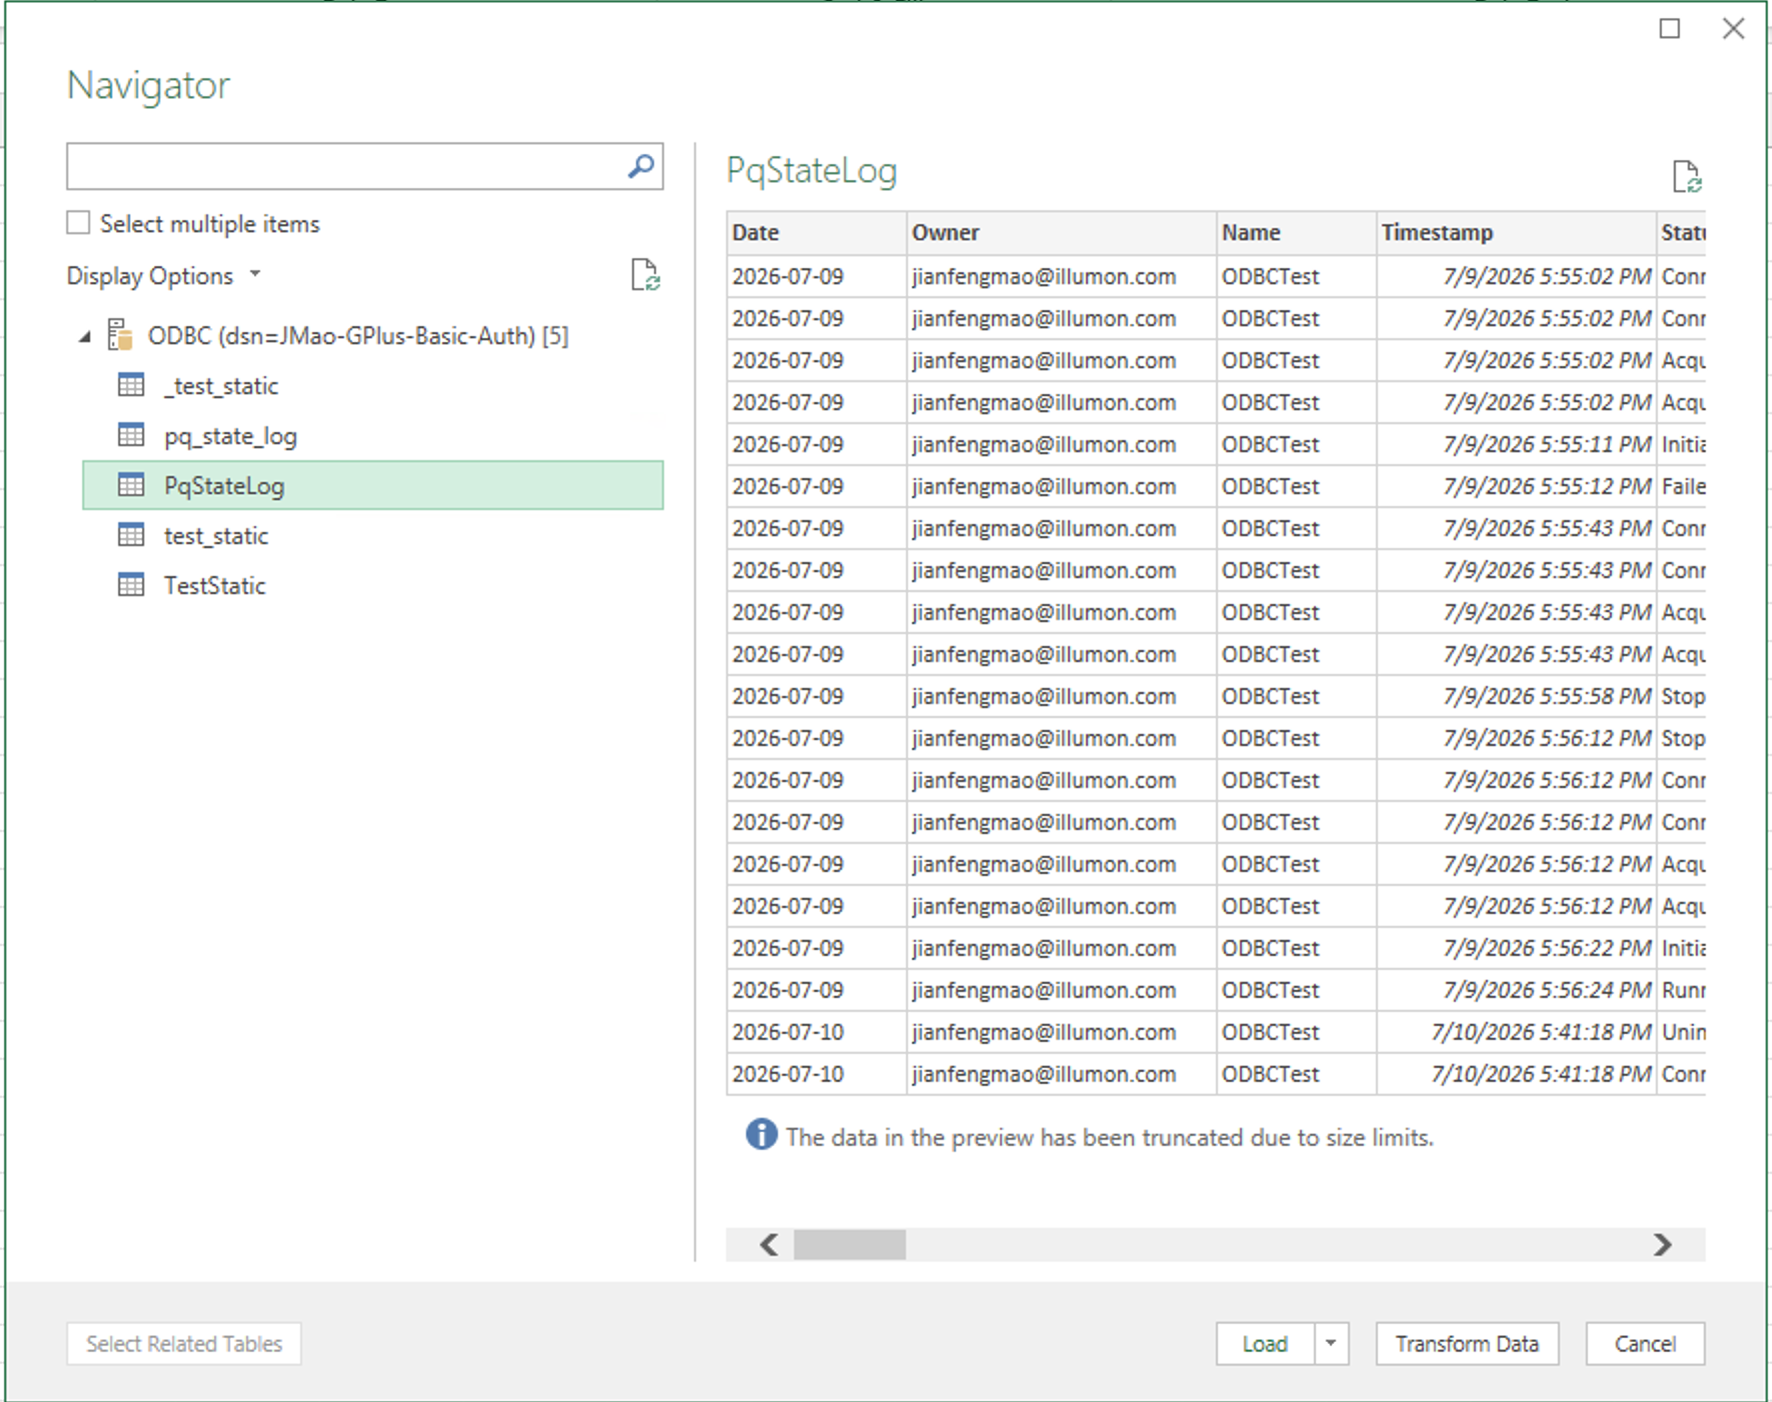
If you supplied a SQL statement, its result loads directly. Otherwise, the Navigator window lists the tables in your Persistent Query. Select a table to preview it, then click Load. To import more than one table, check Select multiple items first.
-
The data is loaded into Excel.
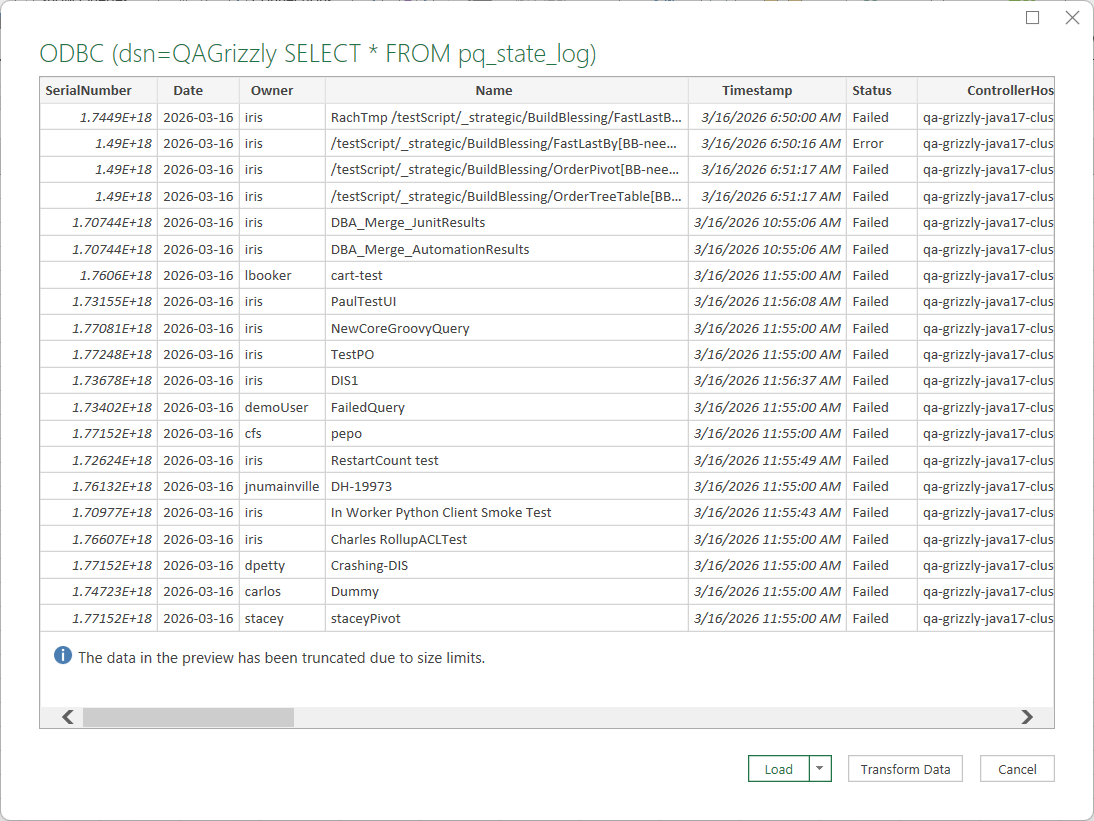
Example query result loaded from a Deephaven Core+ Persistent Query.
Python
Use the pyodbc library to connect to Deephaven Core+ from Python on Windows.
Important
Always pass autocommit=True to pyodbc.connect(). The driver does not implement the SQL_ATTR_AUTOCOMMIT
attribute, so omitting this parameter will cause a HYC00 Optional feature not implemented error.
Install pyodbc
Connect using a DSN
Connect using a connection string
Basic Authentication:
Private Key Authentication:
SAML (SSO) Authentication:
Connecting with AuthType=SAML opens your default browser to complete single sign-on. The authentication URL is also
printed to standard error, which (unlike in GUI applications) is visible when you run the script from a terminal, so
you can open the URL manually if the browser does not launch.
Troubleshooting
Diagnosing connection errors
When a connection fails, look for a short phrase in the error message that identifies the cause. Most connection
failures contain Failed to connect to Deephaven server followed by a key phrase; the long diagnostic detail after it
can be ignored. Find the key phrase in the table below:
| Error contains | Cause | Fix |
|---|---|---|
Could not connect to server | Nothing is listening at that host and port. | Check the Host and Port, and that the Deephaven server is up. |
Timeout was reached | The host cannot be reached. This error can take several minutes to appear. | Connect to your VPN, then retry. |
is in terminal state | The Persistent Query is not running. The message names it, such as pq_name='myPQ'. | Start the Persistent Query in the Deephaven Web UI. |
pq name=... not found | No Persistent Query by that name is visible to you. | Check the spelling, and that you have permission to access it. |
Missing required properties | A required connection parameter is missing, most often AuthType. | See Connection string format. |
HYC00 Optional feature not implemented | Connecting with pyodbc without autocommit=True. | Pass autocommit=True to pyodbc.connect(). See Python. |
Tip
If the connection takes several minutes to fail, your application appears frozen while it waits. To check
reachability without waiting, open https://<host>:<port>/iris/connection.json in a browser. If it does not return
JSON, the ODBC connection cannot succeed either, and the problem is with your network rather than the driver.
Important
Setting SQL_ATTR_LOGIN_TIMEOUT (for example, pyodbc.connect(..., timeout=30)) does not shorten that wait.
It limits queries made after connecting, not the connection attempt itself.
Two other causes produce no error at all, and simply appear to hang:
- SAML sign-on not completed. With
AuthType=SAML, the connection waits until you finish signing in. Look for a browser window or tab that opened behind your application. See SAML (SSO) authentication. - Blocked access to the certificate bundle. See Certificate downloads below.
Certificate downloads
The driver validates the server's TLS certificate against a set of trusted root certificates. You do not supply these yourself; the driver finds them automatically, in this order:
- A trust store published by your Deephaven server, if your administrator has configured one.
- A local file, if you set the
GRPC_DEFAULT_SSL_ROOTS_FILE_PATHenvironment variable. - Otherwise, a public certificate bundle downloaded from
https://curl.se/ca/cacert.pem.
Important
Step 3 means the driver may need outbound internet access when connecting. On air-gapped or egress-restricted networks, this can cause the connection to stall or fail with a certificate error.
If that applies to you, ask your Deephaven administrator to publish a trust store on the server, which requires no
client-side setup at all. Alternatively, point GRPC_DEFAULT_SSL_ROOTS_FILE_PATH at a local PEM file containing the
certificates that signed your server's certificate:
Restart the application afterwards so it picks up the new environment variable.
Credential dialog keeps reappearing, or authentication fails unexpectedly
In Power BI and Excel, make sure you selected the Default or Custom tab rather than Database. See Power BI Desktop.