Use Deephaven in a GCP Linux instance
This guide shows you how to use the Google Cloud Platform (GCP) to run deephaven-core from Docker. You launch a single VM instance, deploy the Deephaven server container to it, and connect to it from your local machine.
GCP is one of the most popular cloud computing services currently available. Its popularity isn't just for external users: it powers Google's own services such as Gmail, Google Drive, and even YouTube. So why not take advantage of it yourself?
Get started
You need a Google Cloud account with billing enabled and a project to create the VM in. Note the project ID, because you use it in the SSH command later.
GCP has its own command line interface, the gcloud CLI. This guide uses it to SSH into the VM and open the tunnel, so install and configure it. Follow the instructions for your OS in Google's installation guide.
After you install the gcloud CLI, run the following command to give it authorized access to manage cloud services:
This opens your browser and prompts you to log in to your Google account.
Create a VM instance
This guide creates the VM in the Google Cloud console. You can also create it with the gcloud CLI, as Google's documentation describes.
In the Google Cloud console, go to Compute Engine > VM instances and click Create instance.
Name, region, and zone
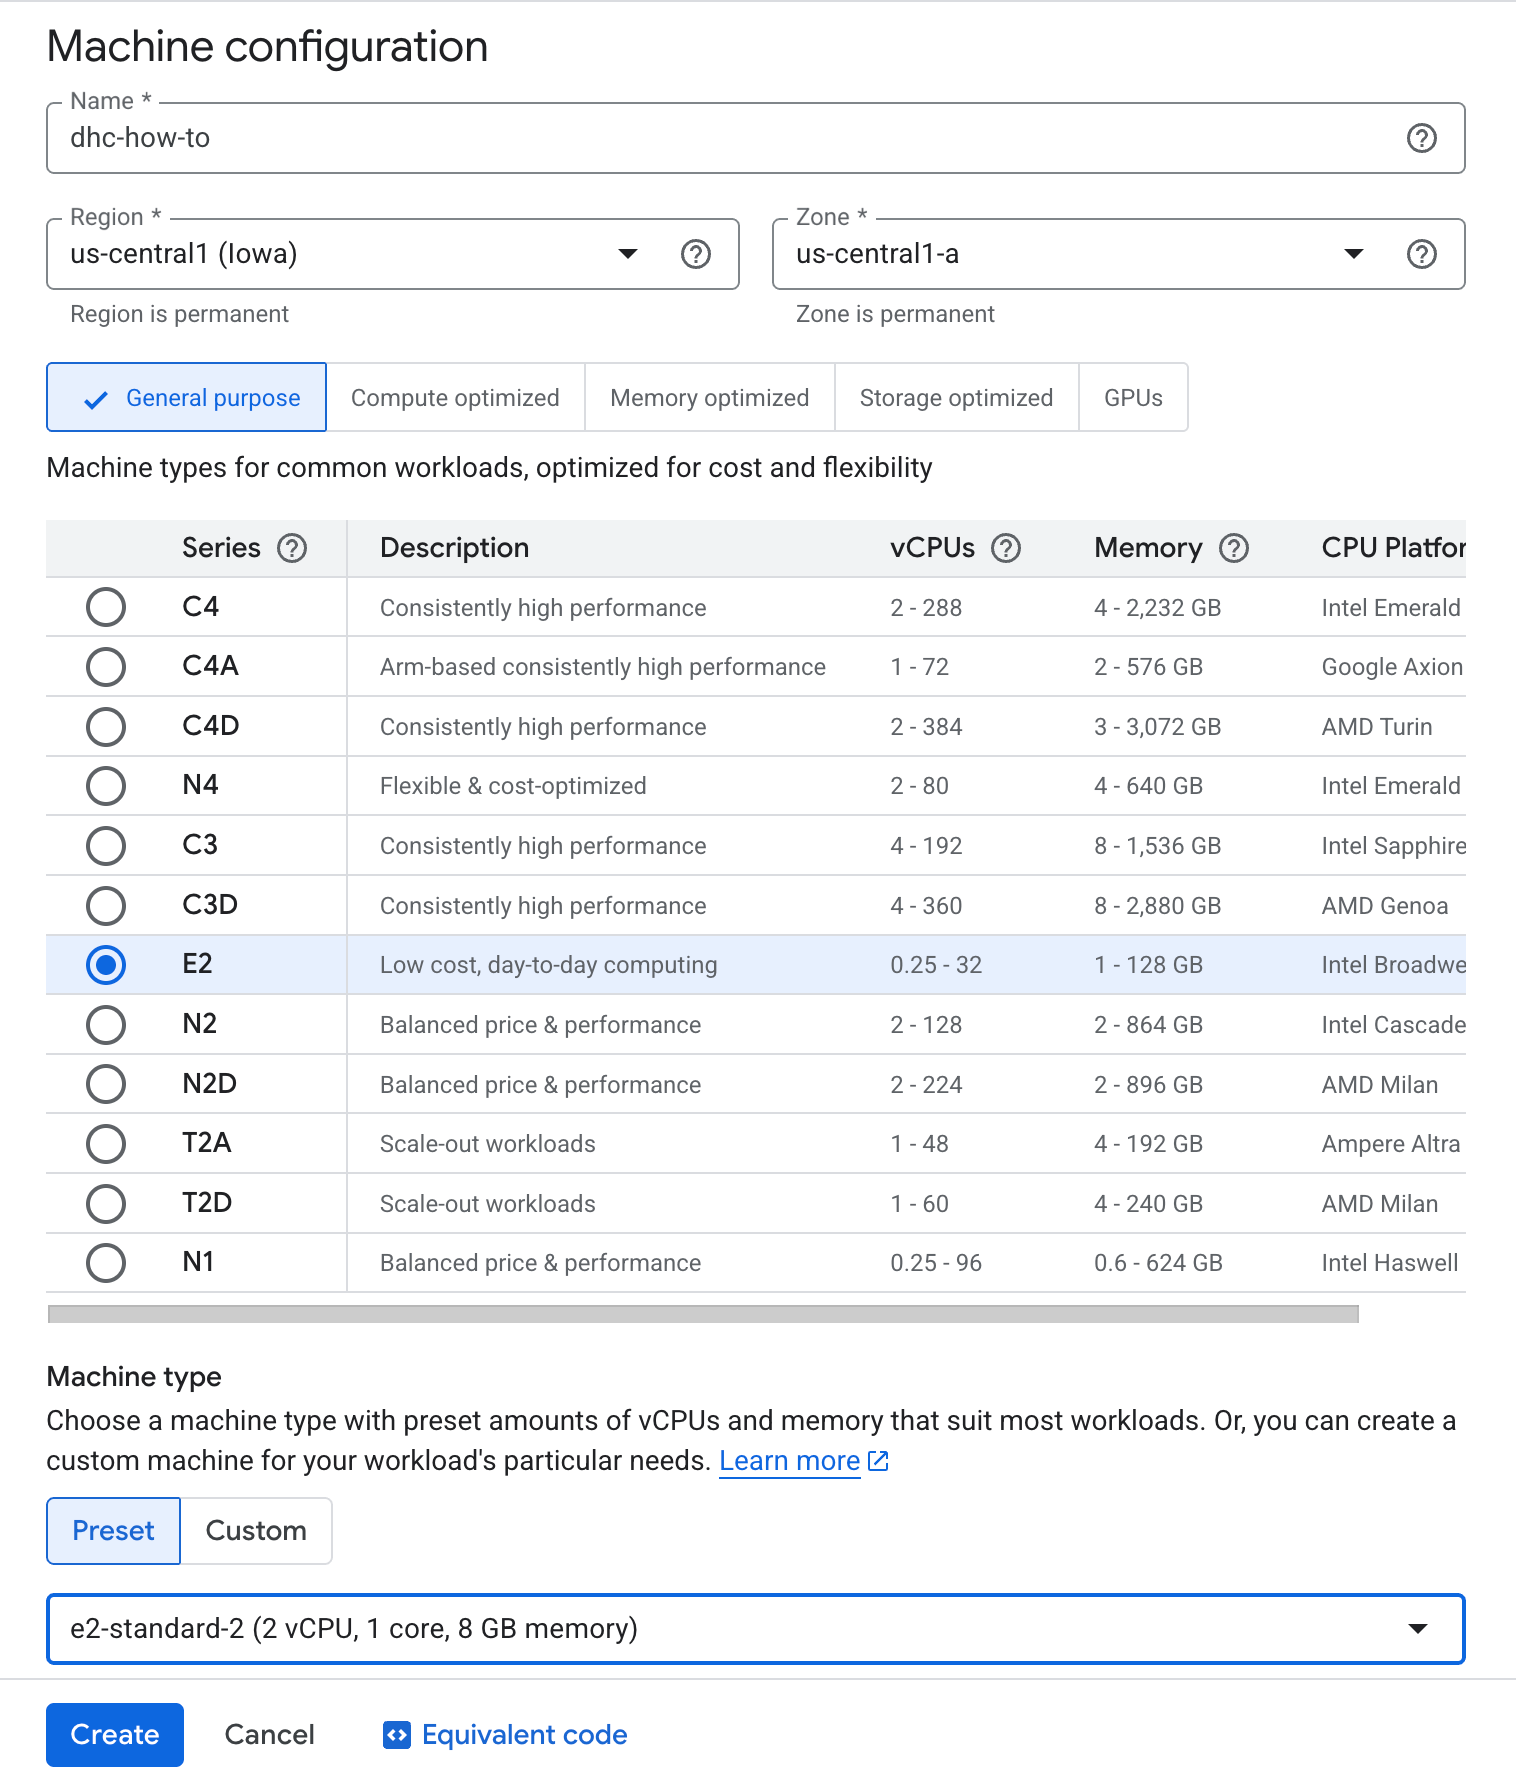
Name the VM dhc-how-to, set the Region to us-central1 (Iowa), and set the Zone to us-central1-a. See Google's regions and zones documentation.
Machine configuration
The Machine configuration options specify the hardware your cloud instance uses. Choices include the number of processor cores, the amount of memory, and an optional GPU. It's important to consider your needs, as the hardware configurations are critical to the success of your endeavors in the cloud.
This guide uses:
- Machine type:
e2-standard-2(2 vCPUs, 8 GB memory) - CPU platform: default
- GPU: none
- Display device: none
Another option is confidential computing, which encrypts your data while it's being processed. If you work with sensitive data, consider enabling it. This guide does not enable confidential computing.
OS and storage
Next, navigate to OS and storage on the left of the page, then click Change.
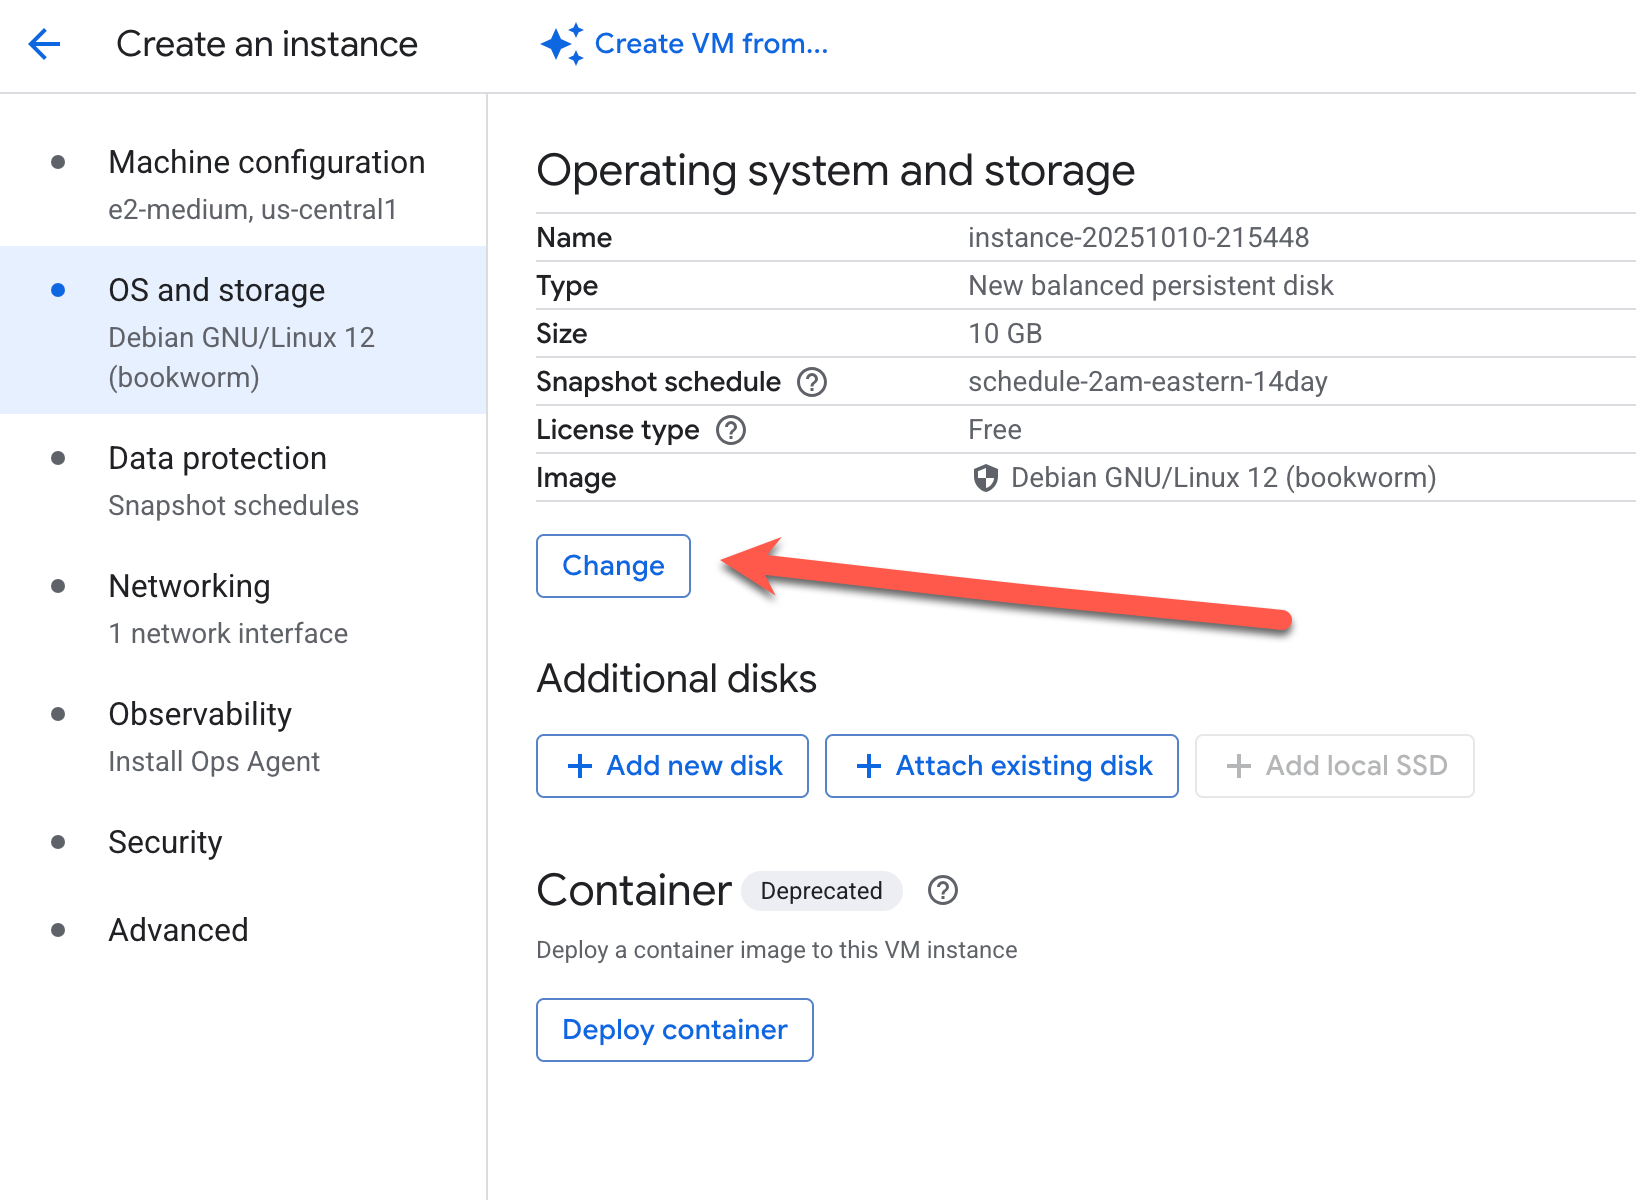
Ignore the Container section on this screen. It is deprecated, and this guide runs the container from the startup script instead.
Container-Optimized OS is a Linux distribution Google built for running containers, and it comes with Docker pre-installed. To select it:
- Choose Container-Optimized OS from the operating system list.
- Select the newest stable version listed.
- Click Select to confirm.
If you keep the default Debian image or choose Ubuntu, the startup script in the next section installs Docker on first boot.
Choose a Docker image
Deephaven can be launched from pre-built Docker images. Images include:
- Python:
ghcr.io/deephaven/server:{VERSION}(also published asghcr.io/deephaven/server-ui:{VERSION}, an alias for the same image) - Python with NLTK:
ghcr.io/deephaven/server-nltk:{VERSION} - Python with PyTorch:
ghcr.io/deephaven/server-pytorch:{VERSION} - Python with scikit-learn:
ghcr.io/deephaven/server-sklearn:{VERSION} - Python with TensorFlow:
ghcr.io/deephaven/server-tensorflow:{VERSION} - Python with all of the above:
ghcr.io/deephaven/server-all-ai:{VERSION} - Basic Groovy:
ghcr.io/deephaven/server-slim:{VERSION}
Note
{VERSION} in the list above is the Deephaven Core version number. See the deephaven-core releases page for version numbers. Use the number without a leading v, for example 42.7. {VERSION} can also be latest, which pulls the most recent release. Because the script pulls on every boot, latest can upgrade Deephaven when the VM restarts. Pin a specific version for reproducible deployments.
This guide uses the basic Groovy image ghcr.io/deephaven/server-slim:latest. If you choose a different image, set it as CONTAINER_IMAGE in the startup script in the next section.
Startup script for Docker container
You can configure a Google Cloud VM to run Docker containers on startup with a script. This guide creates a startup script that pulls and runs the Deephaven container when the VM starts.
To configure the startup script:
- Expand the Advanced options section at the bottom of the VM creation page.
- Expand the Management section.
- In the Automation section, find the Startup script text box.
- Paste the following script, replacing
YOUR_PASSWORD_HEREwith your own password. You use this password to log in to the IDE. The password must contain only letters and digits, because the startup script's launcher parsesSTART_OPTSwithxargs, which strips quotes and backslashes and splits on spaces. Use a long, random password.
This startup script does the following:
- Installs Docker if it isn't already present, using Docker's official installation script.
- Stops and removes an existing container named
deephaven-server, which matters when the VM restarts. - Pulls the latest Deephaven image.
- Runs the container with these options:
--restart=alwaysrestarts the container if it exits or when the Docker daemon starts.--publish 10000:10000exposes the port the Deephaven IDE listens on.--env START_OPTS=...passes JVM options to the server.-Xmx4gsets the maximum JVM heap to 4 GB.-Dauthentication.psksets the password you use to log in. See pre-shared key authentication.
Important
If you omit -Dauthentication.psk, the server generates a random key and prints it to the container log (sudo docker logs deephaven-server).
GCP stores the startup script in the VM's metadata, so anyone who can view the instance in your project can read the password in it.
Note
If you choose a VM with more memory, increase the -Xmx4g value in the START_OPTS variable, leaving headroom for the operating system and non-heap memory. For example, use -Xmx12g on a 16 GB VM.
Note
This guide does not cover persistent storage in the cloud. There are several options, including Docker bind mounts and gcloud storage, for workflows that require storage of large datasets.
Remaining options
For the remaining options, this guide uses the defaults, including the access scopes and the firewall. You do not open port 10000 in the firewall, because you reach Deephaven through the SSH tunnel.
Create the VM
After you've set the name, machine configuration, OS, and startup script, you can create the VM in either of two ways:
- Click the Create button at the bottom of the page.
- Click Equivalent code at the bottom of the page, then do one of the following:
- Click Copy and run the command in your local terminal.
- Click Run in Cloud Shell to run it in Cloud Shell, a browser-based terminal with the gcloud CLI installed.
Google Cloud creates the VM and then runs the startup script, which pulls the Deephaven image. The container is not available until the startup script finishes pulling the image, which can take a few minutes after the VM shows as running. The next section shows how to check.
Check that Deephaven is running
Connect to the VM over SSH to confirm the Deephaven container started. When the VM is ready, SSH into it with gcloud compute ssh, which uses the same syntax as ssh. The Google Cloud console shows the exact command for your VM.
First, head to your list of VMs.
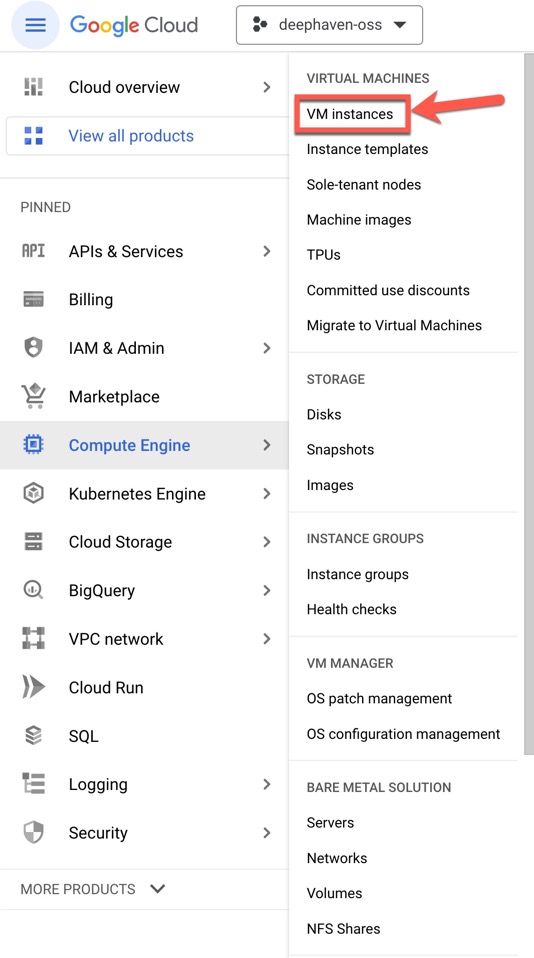
Then, find the VM you created in the list of VMs. Click the downward-facing arrow on the right-hand side.

From the drop-down menu, click View gcloud command.
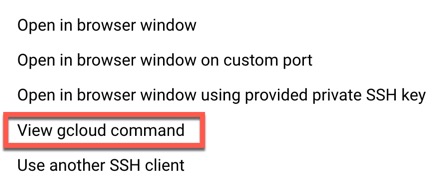
This brings up a pop-up window where you can copy the command to SSH into your VM.
Copy that into your terminal to connect.
Run sudo docker container ls to confirm the container is running. If the list is empty, wait a minute and run it again.

Connect to Deephaven
Deephaven's IDE runs in a browser, so reach it from your local machine through an SSH tunnel. The tunnel forwards a port on the VM to a port on your machine. The View gcloud command pop-up shows the zone, instance name, and project ID the command needs. Type exit to leave the VM session, then run the tunnel command in a terminal on your local machine.
The command looks like this:
<ZONE>is the zone you created your VM in. This guide creates it inus-central1-a.<INSTANCE>is the name of the VM. This guide names itdhc-how-to.<PROJECT>is your Google Cloud project ID. It appears in the console URL as?project=<PROJECT_ID>and in the project selector.-NLdoes two things.- The first,
-N, tells SSH not to run a remote command, so the session only forwards ports. - The second,
-L, specifies the port forwarding between the local and remote hosts.
- The first,
<LOCAL_PORT>is the port on your local machine that you use to reach Deephaven.- Use a different port if a local Deephaven server already uses
10000. - This guide uses
10000.
- Use a different port if a local Deephaven server already uses
<HOST_PORT>is the port that Deephaven listens on in the VM. This guide uses10000.&runs the tunnel in the background so you can keep using the same terminal.
With the zone and instance name from this guide and my-project standing in for your own project ID, the command looks like this:
To keep the tunnel in its own terminal window or tab instead, omit the &.
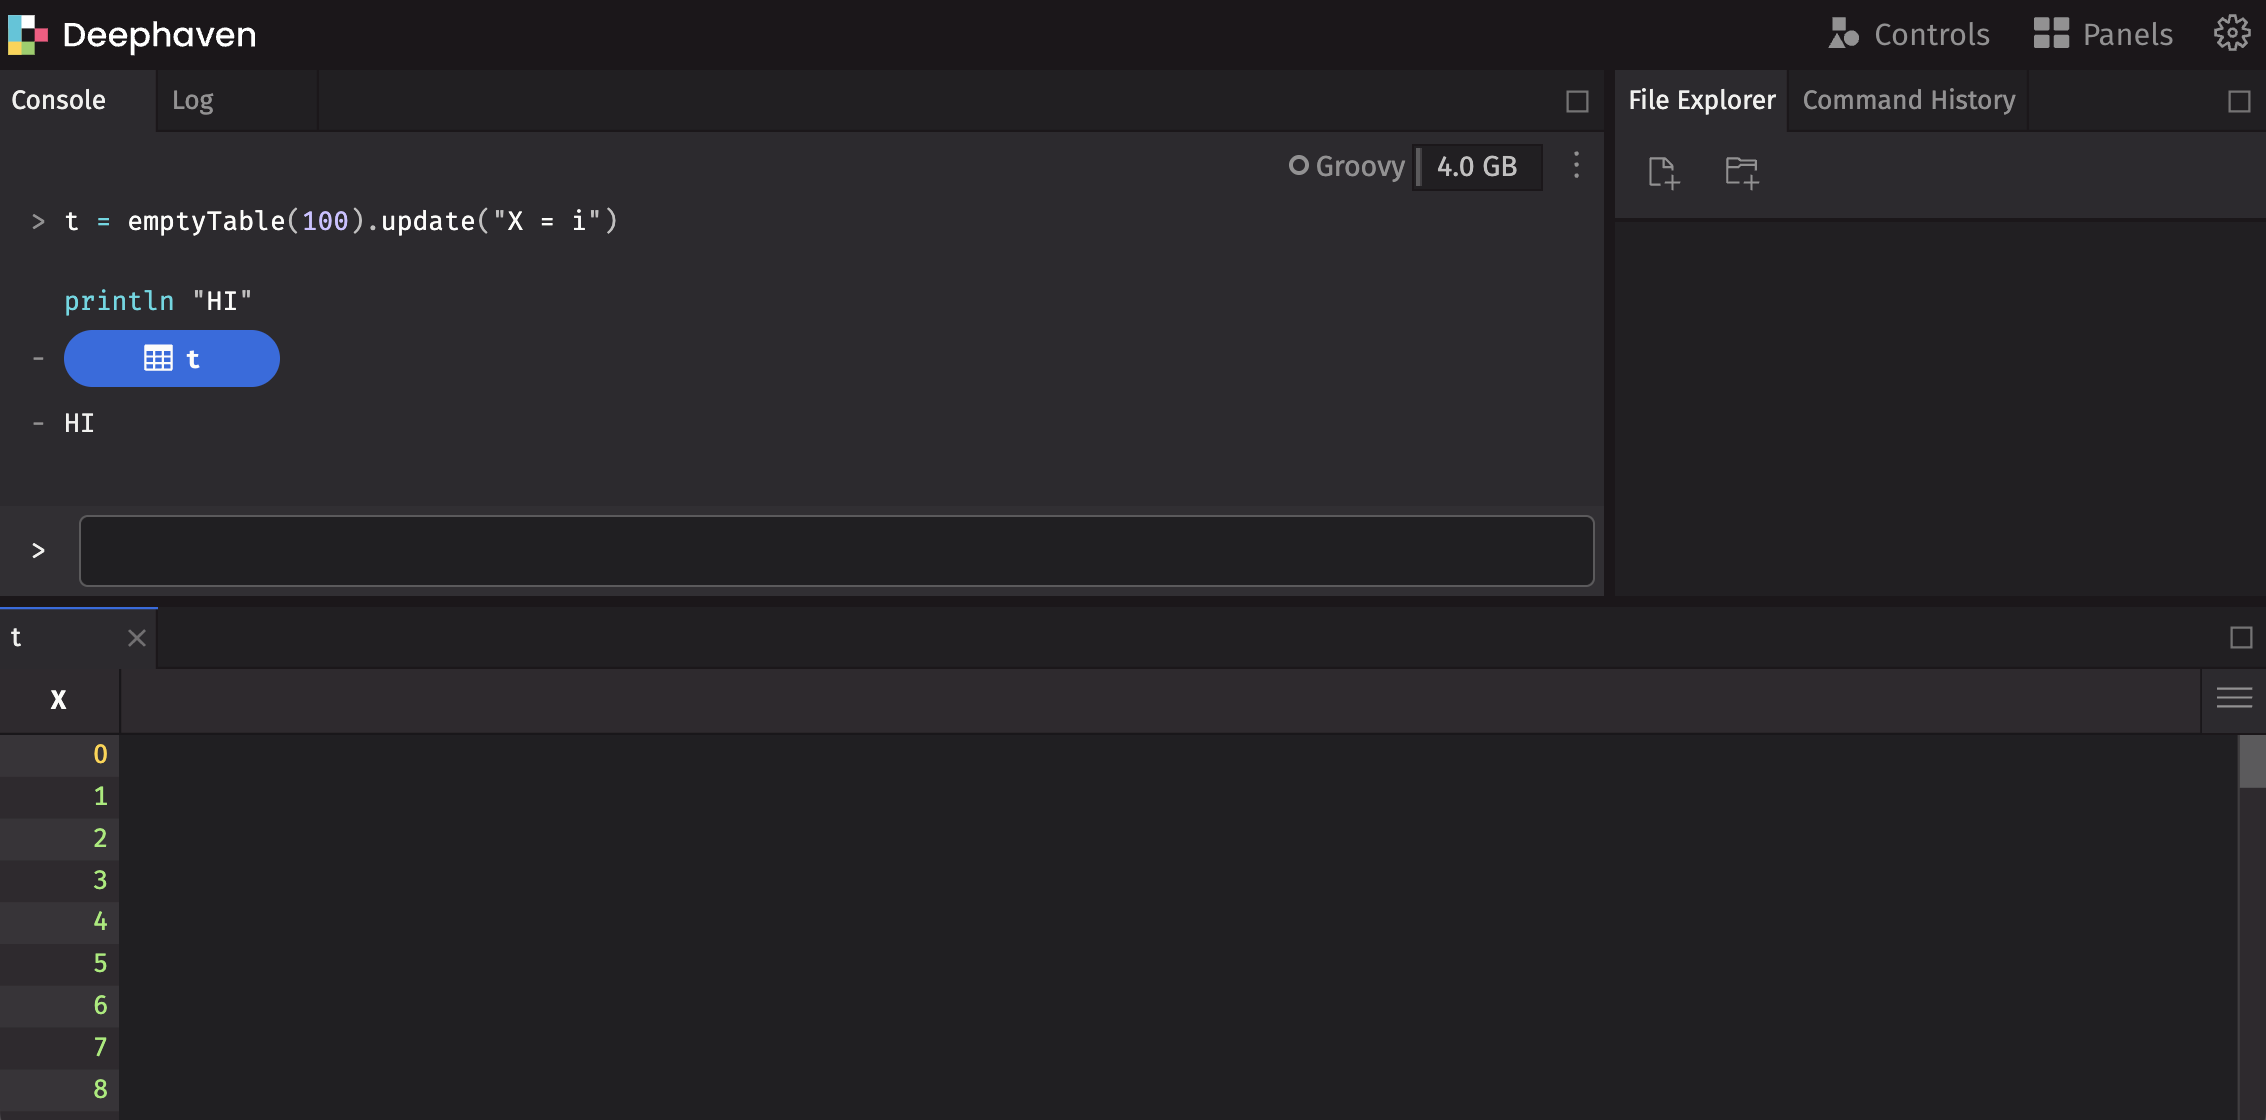
With the tunnel running, open localhost:10000/ide/ in your browser and enter the password you set in the startup script. The tunnel connects your browser to the Deephaven server on the Google Cloud VM, not to a local server.
Clean up
-
Stop the background tunnel. Run
jobsto find it, then runkill %<JOB_NUMBER>, replacing<JOB_NUMBER>with the numberjobsshows. If you ran it in its own terminal window, press Ctrl+C. -
Delete the VM so you are not billed for it. In the Google Cloud console, go to Compute Engine > VM instances and delete
dhc-how-to. Or run: