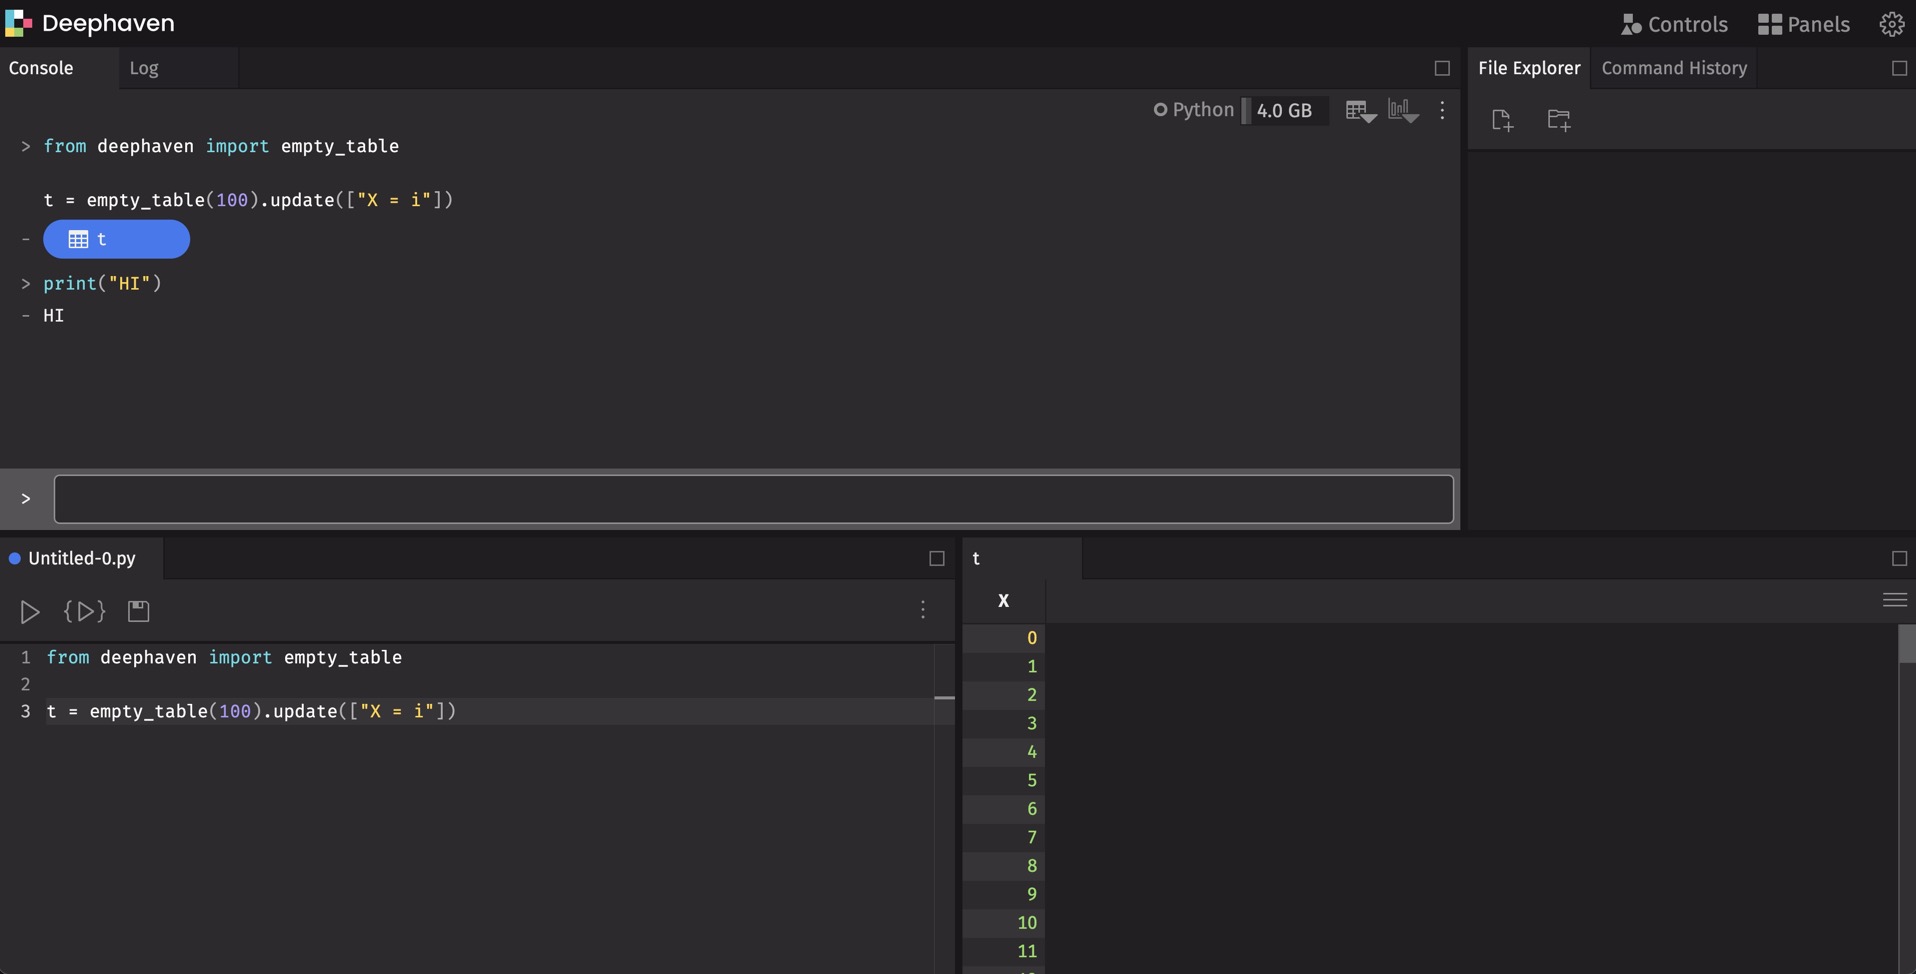
Use Deephaven in a GCP Linux instance
This guide will show you how to use the Google Cloud Platform (GCP) to run deephaven-core from Docker. It will show you how to launch a single VM instance, deploy the Deephaven server container to it, and then connect via your local machine.
GCP is one of the most popular cloud computing services currently available. Its popularity isn't just for external users - it powers Google's own services such as Gmail, Google Drive, and even YouTube. So why not take advantage of it yourself?
Get started
GCP has its own command line interface that is recommended for interacting with instances. For this guide, it is necessary to install and configure the CLI. Follow the instructions for your OS in Google's installation guide to get started.
Once you've installed the gcloud CLI, run the following command to give it authorized access to manage cloud services:
This will bring up your browser and have you log in to your Google account.
Create a VM instance
There are two ways you can create a GCP VM instance. The first is via your web browser. The second is via the gcloud CLI. Both are described in Google's documentation. We will use the web interface.
Name, region, and zone
We're going to name our VM dhc-how-to, set the region to us-central1 (Iowa), and the zone to us-central1-a. More information on regions and zones can be found here.
Machine configuration
The Machine configuration options specify the hardware your cloud instance will use. Choices include processor cores, amount of memory, GPU, etc. It's important to consider your needs, as the hardware configurations are critical to the success of your endeavors in the cloud.
For this demo, we will be using:
e2-standard-2machine type- 2 vCPUs
- 8 GB memory
- The default CPU type
- No GPU
- No display device
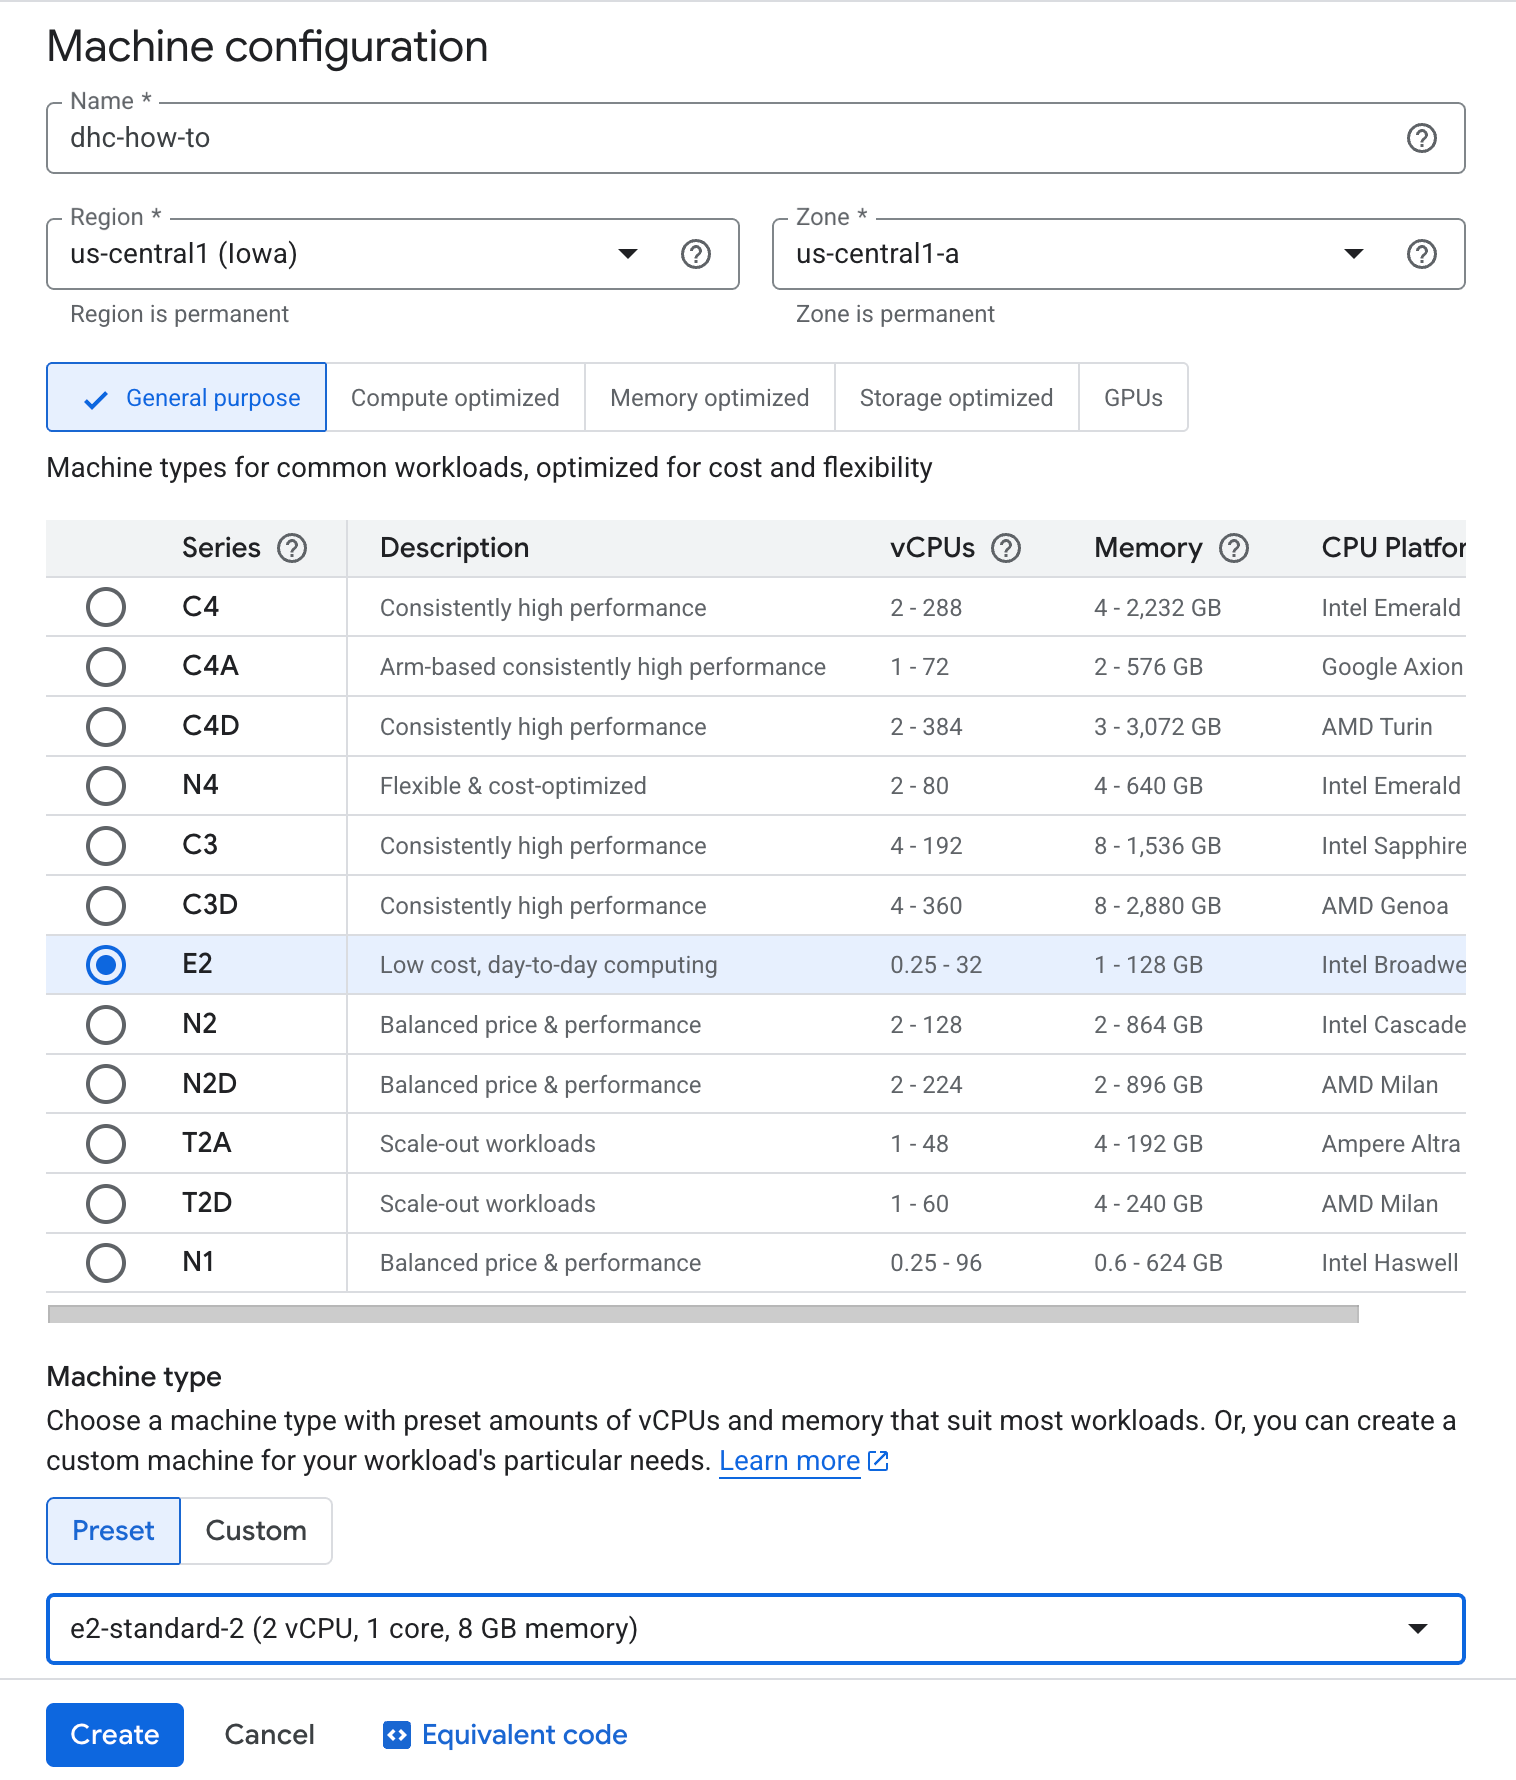
Another option is confidential computing, which encrypts your data while it's being processed. If you are working with sensitive data, this option is likely important to enable. For this guide, we will not be enabling confidential computing.
OS and storage
Next, navigate to OS and storage on the left of the page, then click Change.
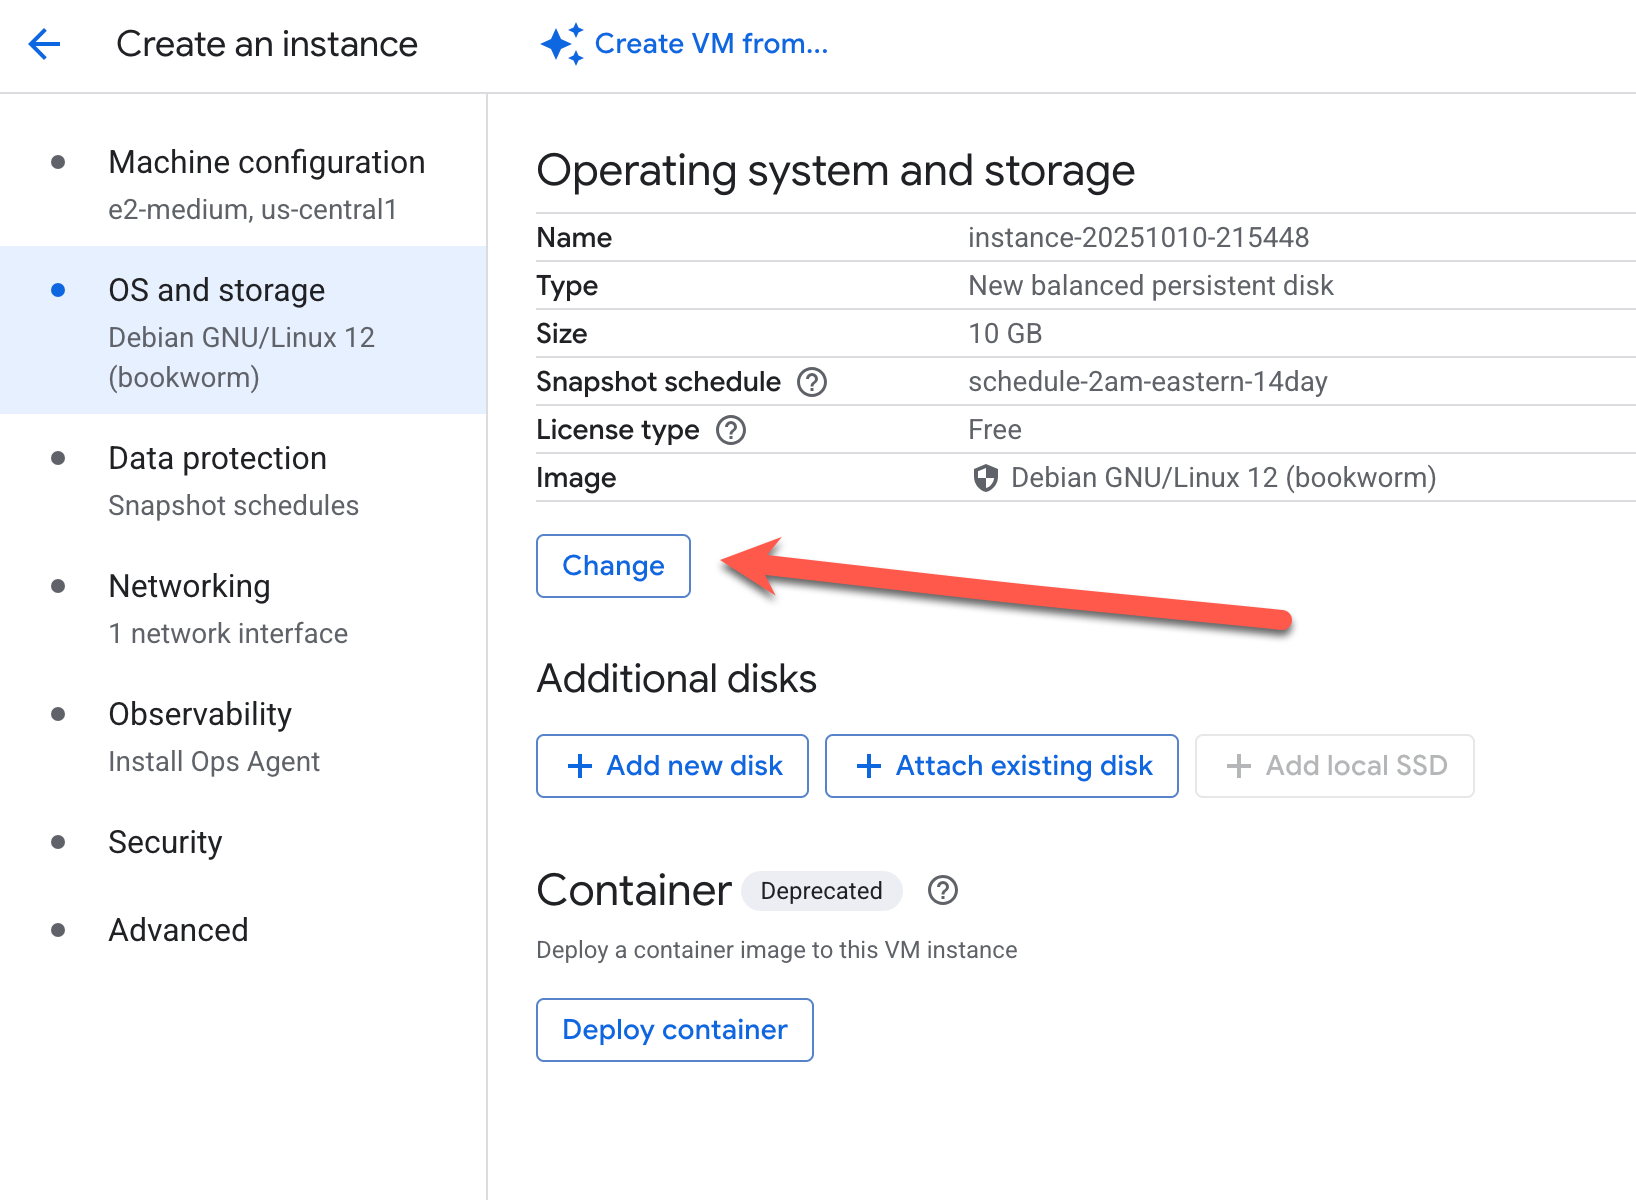
For the operating system, select Container-Optimized OS, which is a Linux distribution created by Google that comes with Docker pre-installed and is optimized for running containers:
- Look for the Boot disk section and click CHANGE.
- Select Container-Optimized OS from the operating system list.
- Select the latest stable version.
- Click SELECT to confirm.
Alternatively, you can use other Linux distributions like Ubuntu or Debian. The startup script will automatically install Docker if it's not already present.
Startup script for Docker container
A Google Cloud VM can be configured to run Docker containers on startup using a script. Since Deephaven can be launched from pre-built Docker images, we'll create a startup script that automatically pulls and runs the Deephaven container when the VM starts.
Deephaven has several pre-built Docker images to choose from. Your choice should depend on your needs.
Note
{VERSION} in the list below is the Deephaven Core version number. Version numbers can be found here. Additionally, {VERSION} can be latest, which will always pull the latest version number.
- Basic Python:
ghcr.io/deephaven/server:{VERSION} - Python with NLTK:
ghcr.io/deephaven/server-nltk:{VERSION} - Python with PyTorch:
ghcr.io/deephaven/server-pytorch:{VERSION} - Python with SciKit-Learn:
ghcr.io/deephaven/server-sklearn:{VERSION} - Python with TensorFlow:
ghcr.io/deephaven/server-tensorflow:{VERSION} - Python with all of the above:
ghcr.io/deephaven/server-all-ai:{VERSION} - Basic Groovy:
ghcr.io/deephaven/server-slim:{VERSION}
For this guide, we'll use the basic Python image ghcr.io/deephaven/server:latest.
To configure the startup script:
- Expand the Advanced options section at the bottom of the VM creation page.
- Expand the Management section.
- In the Automation section, find the Startup script text box.
- Paste the following script:
This startup script will:
- Install Docker if it's not already present (using Docker's official installation script).
- Stop and remove any existing Deephaven container (useful for VM restarts).
- Pull the latest Deephaven image.
- Run the container with:
--restart=always: Automatically restart if the container crashes.--publish 10000:10000: Expose Deephaven's web UI port.--env START_OPTS="-Xmx4g": Configure Deephaven to use 4GB of memory (adjust based on your VM's memory).
Note
If you choose a VM with more memory, increase the -Xmx4g value in the START_OPTS variable to whatever amount suits your needs. For example, use -Xmx8g for 8GB of memory.
Remaining options
For the remaining options, we will use the defaults. These include Allow default access and Firewall. Take some time to review each option and ensure the default options (or otherwise) are right for your needs.
Note
This guide will not cover persistent storage in the cloud. There are several options, including Docker data volumes and gcloud storage, for workflows that require storage of large datasets.
Create the VM
Once that's done, there are two ways to create the VM:
- Click the CREATE button at the bottom of the page.
- Click the EQUIVALENT CODE button at the bottom of the page, then either click COPY and run it in your local terminal, or click RUN IN CLOUD SHELL.
With all that done, you've got a Google VM running Deephaven!
SSH into your VM
Google Cloud takes a bit of time to create the VM. Once that's done, you can SSH into it via gcloud compute ssh. It uses very similar syntax to ssh. One of the nice things about the gcloud CLI is that you can find relevant commands in the Google Cloud web interface.
First, head to your list of VMs.

Then, find the VM you created in the list of VMs. Click the downward-facing arrow on the right-hand side.

From the drop-down menu, click View gcloud command.
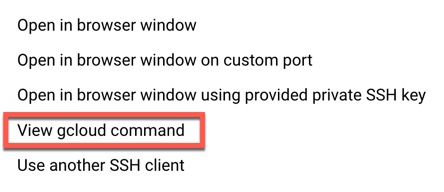
This brings up a pop-up window where you can copy the command to SSH into your VM.
Copy that into your terminal, and you'll be there!
It's always a good idea to ensure your container is up and running via docker container ls.

Connect to Deephaven
In the previous section, you connected to your VM to ensure that Deephaven is running, but didn't actually do anything with it. Deephaven uses a GUI, and you'll need access to the GUI in the cloud on your local machine. Thus, we need to take the previous section one step further and enable that GUI. The gcloud CLI has you covered.
This time around, we will create an SSH tunnel with port forwarding. Deephaven runs on a specific port, so if we forward that port on the VM to the local machine, we'll have access to the GUI. The command looks like this:
<ZONE>is the zone you created your VM in. For this guide, we created it inus-central1-a.<INSTANCE>is the name of the VM. For this guide, we called itdhc-how-to.<PROJECT>is the name of your gcloud project. This can be found in the URL when you go to the web interface at the end. It looks like?project=<PROJECT_NAME>.-NLdoes two things.- The first,
-N, enables port forwarding. It's consistent withssh. - The second,
-L, specifies the port forwarding between the local and remote hosts.
- The first,
<LOCAL_PORT>is whatever port you'd like to connect to Deephaven on locally. Deephaven is typically run on10000, although it may be useful to specify a different port here if you're running a local Deephaven server on that port. For this case, we use10000, since we're not running any local Deephaven servers on that port.<HOST_PORT>is the port on the VM which you can connect to Deephaven from. In this case, it's10000.&prevents the terminal from blocking. It allows you to continue using your terminal. It's not necessary unless you don't want to create any new terminal windows or tabs for your work. You should manually kill this process when you're done with it.
With all of the configuration options we chose, the command looks like this:
With that run, head to your web browser of choice and go to localhost:10000/ide/. The Deephaven running isn't running locally, but on a Google Cloud VM! Pretty cool.