Create and use input tables
Tip
This guide covers input tables created and used directly on the Deephaven server. To stream data from an external Python application using pydeephaven, see Send data to Deephaven from a Python client.
Input tables allow users to enter new data into tables in two ways: programmatically and manually through the UI.
In the first case, you add data with add, an input table method similar to merge. In the second case, you click cells in the UI and type their contents, as in a spreadsheet program like Microsoft Excel.
Input tables come in two flavors:
- append-only
- An append-only input table puts any entered data at the bottom. It is an append-only table.
- keyed
- A keyed input table has one or more key columns whose values identify each row. You can replace or delete existing rows by key.
This guide shows how to create and use both types.
Create an input table
First, you need to import the input_table function from the deephaven module:
You can create an input table from a pre-existing table or from a set of column definitions. In either case, specifying one or more key columns makes it a keyed input table instead of an append-only one. A key column holds values that identify each row, so no two rows share the same key value. With several key columns, no two rows share the same combination of values. The next two sections create append-only input tables, and Create a keyed input table shows how to add key columns.
From a pre-existing table
Here, we create an input table from a table that already exists in memory. The example creates that source table with empty_table.
From column definitions
Here, we create an input table from a set of column definitions. You can pass the column definitions as a dictionary that maps column names to data types, a TableDefinition, or a list of ColumnDefinition objects. The following example uses a dictionary.
The resulting table is initially empty and ready to receive data.
Create a keyed input table
By default, input_table creates an append-only input table. To create a keyed input table instead, pass one or more key column names in the key_cols argument.
Let's first specify one key column.
In the case of multiple key columns, specify them in a list.
When you create a keyed input table from a pre-existing table, the input table keeps one row per key. If several rows of the initial table share a key, the input table keeps the values from the last of those rows. With multiple key columns, a key is a combination of values. Take, for instance, the following table:
No two rows share the same combination of X and Y values, so a keyed input table with X and Y as key columns keeps all 10 rows:
Sym and Marker together take only four distinct combinations of values, so a keyed input table with Sym and Marker as key columns has four rows. Each row holds the values from the last source row with that combination:
Add data to the table
Programmatically
Two methods add data to an input table programmatically:
An append-only input table adds new rows to the end of the table. In a keyed input table, an added row whose key already exists replaces the existing row with that key, and the other added rows become new rows.
Note
To add data to an input table programmatically, the table you add must have the same column names and data types as the input table.
add blocks until Deephaven finishes adding the data. To add data without blocking, use add_async. It returns immediately and accepts optional on_success and on_error callbacks, which Deephaven calls when the queued addition succeeds or fails. If you don't pass on_error, Deephaven prints that error instead of raising it. Problems that Deephaven detects before it queues the addition, such as a table whose column names or types don't match the input table, still raise a DHError immediately.
Deephaven processes asynchronous calls from the same thread in the order you make them, but it doesn't guarantee an order across threads. The following code block creates a keyed input table with the keys A, B, and C. It then asynchronously adds a row with a new key, D, and replaces the row with the existing key A:
Manually
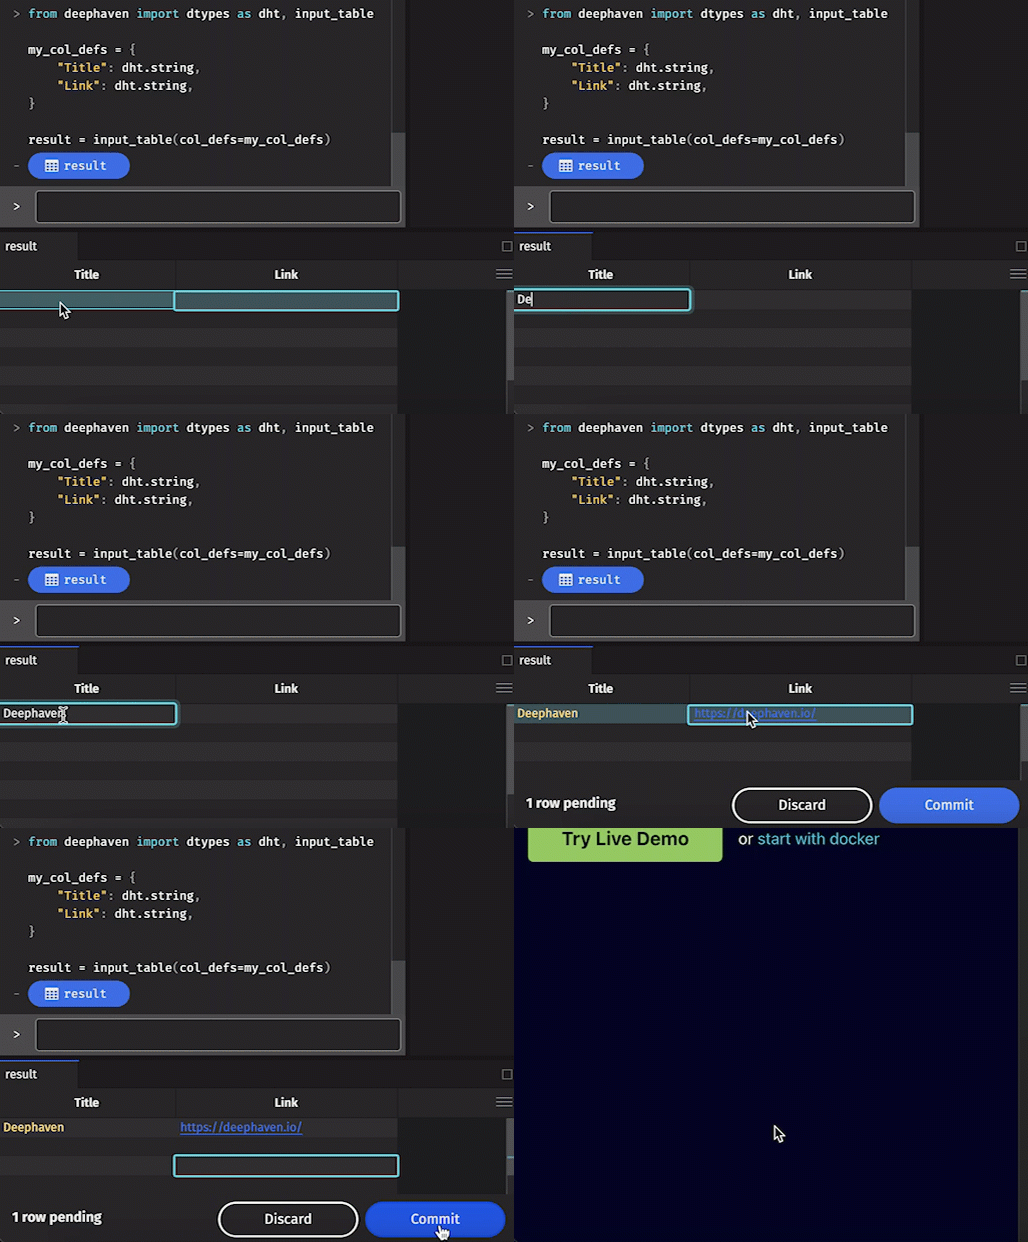
To manually add data to an input table, click the cell in which you wish to enter data, type the value, and press Enter.
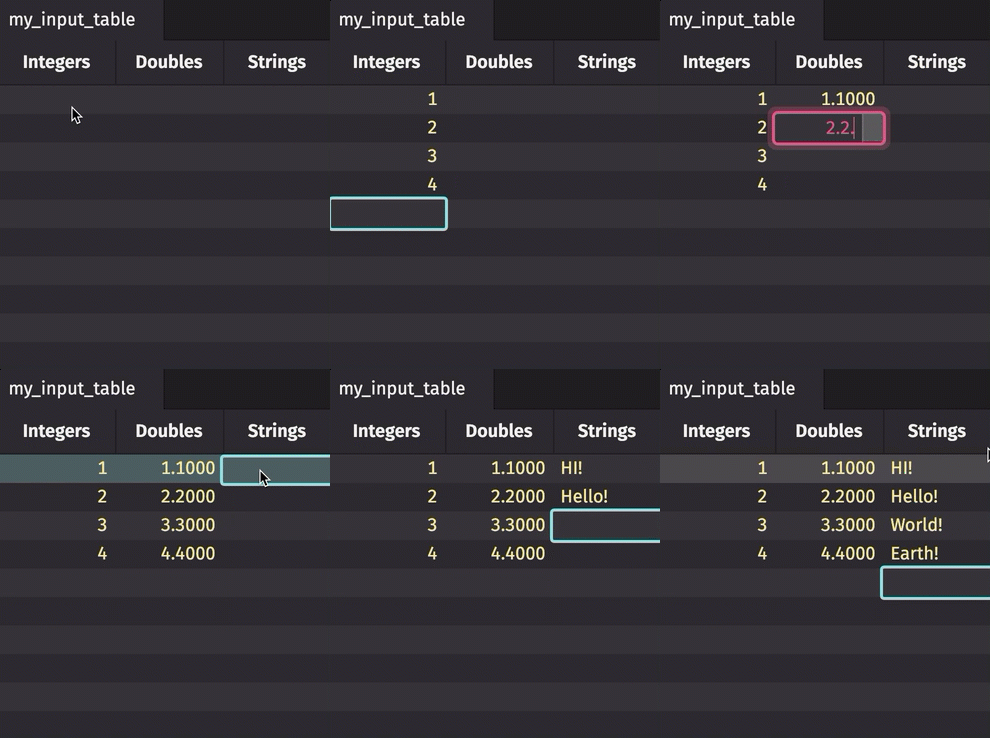
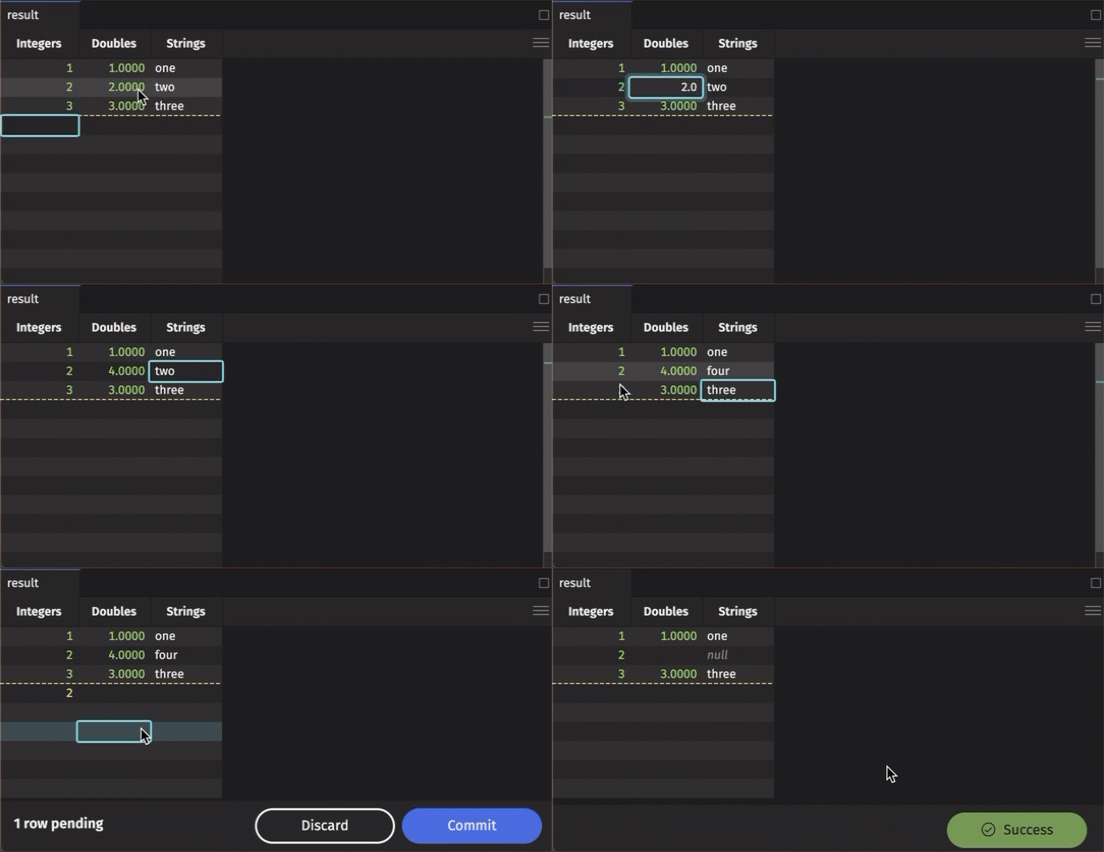
In a keyed input table, you can edit existing rows. An append-only input table only lets you add new rows. In a keyed input table, adding a row whose key already exists replaces the existing row with that key.
Important
Added rows aren't final until you click the Commit button. If you edit an existing row in a keyed input table, the result is immediate.

Here are some things to consider when manually entering data into an input table:
- Data added manually to a table must be of the correct type for its column. For instance, attempting to add a string value to an
intcolumn fails. - Entering data in between populated cells and pressing Enter adds the data to the bottom of the column.
Delete data from a table
You can delete data only from a keyed input table. Calling delete or delete_async on an append-only input table raises a DHError. To delete data from a keyed input table, use one of the following methods:
delete: Synchronous deletion.delete_async: Asynchronous deletion.
To delete table data, supply a table that contains only the key columns, with the key values of the rows you wish to delete. For instance, the asynchronous example in Programmatically creates a keyed input table whose key column is Key. The following code deletes the row with the key value B:
To delete data asynchronously, use delete_async. It accepts the same optional on_success and on_error callbacks as add_async and follows the same ordering rules. The following code block asynchronously deletes the row with the key value C:
Enter clickable links in an input table
Input tables are a convenient way to try out clickable links, because you can type links directly into their cells. Any string column in Deephaven can contain a clickable link if the string is formatted correctly. See Add clickable links for examples of strings that are and aren't displayed as links.
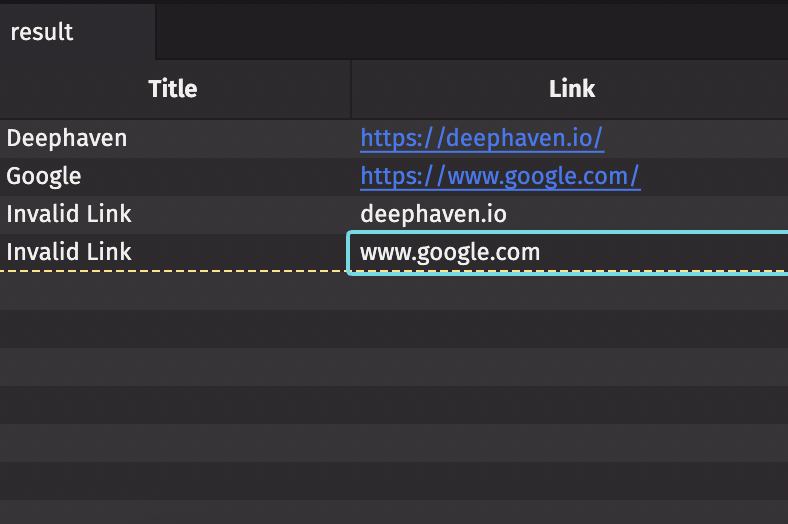
Let's create an input table that we can add links to manually: