Filter without writing queries
This guide shows you how to filter tables and plots directly in the user interface, without writing queries. The Deephaven Query Language provides a comprehensive toolbox of methods ranging from simple to complex that allow you to fine-tune and thoughtfully combine your filters, with the advantage of being able to save, re-run, or share those queries. Here, we focus on the shortcuts built directly into the IDE.
Several filter options are available throughout Deephaven's UI menus:
-
Controls menu:
-
Column header context menu:
-
Table data context menu:
-
Table Options menu:
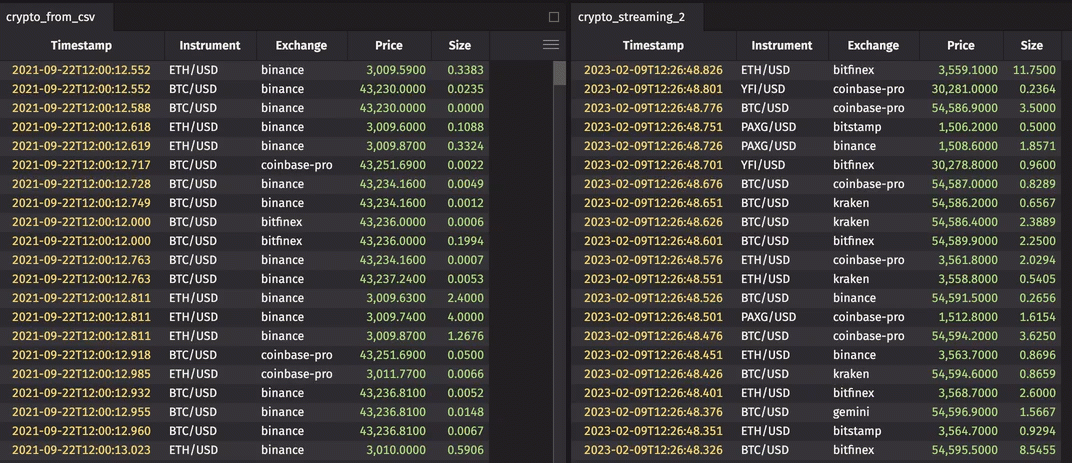
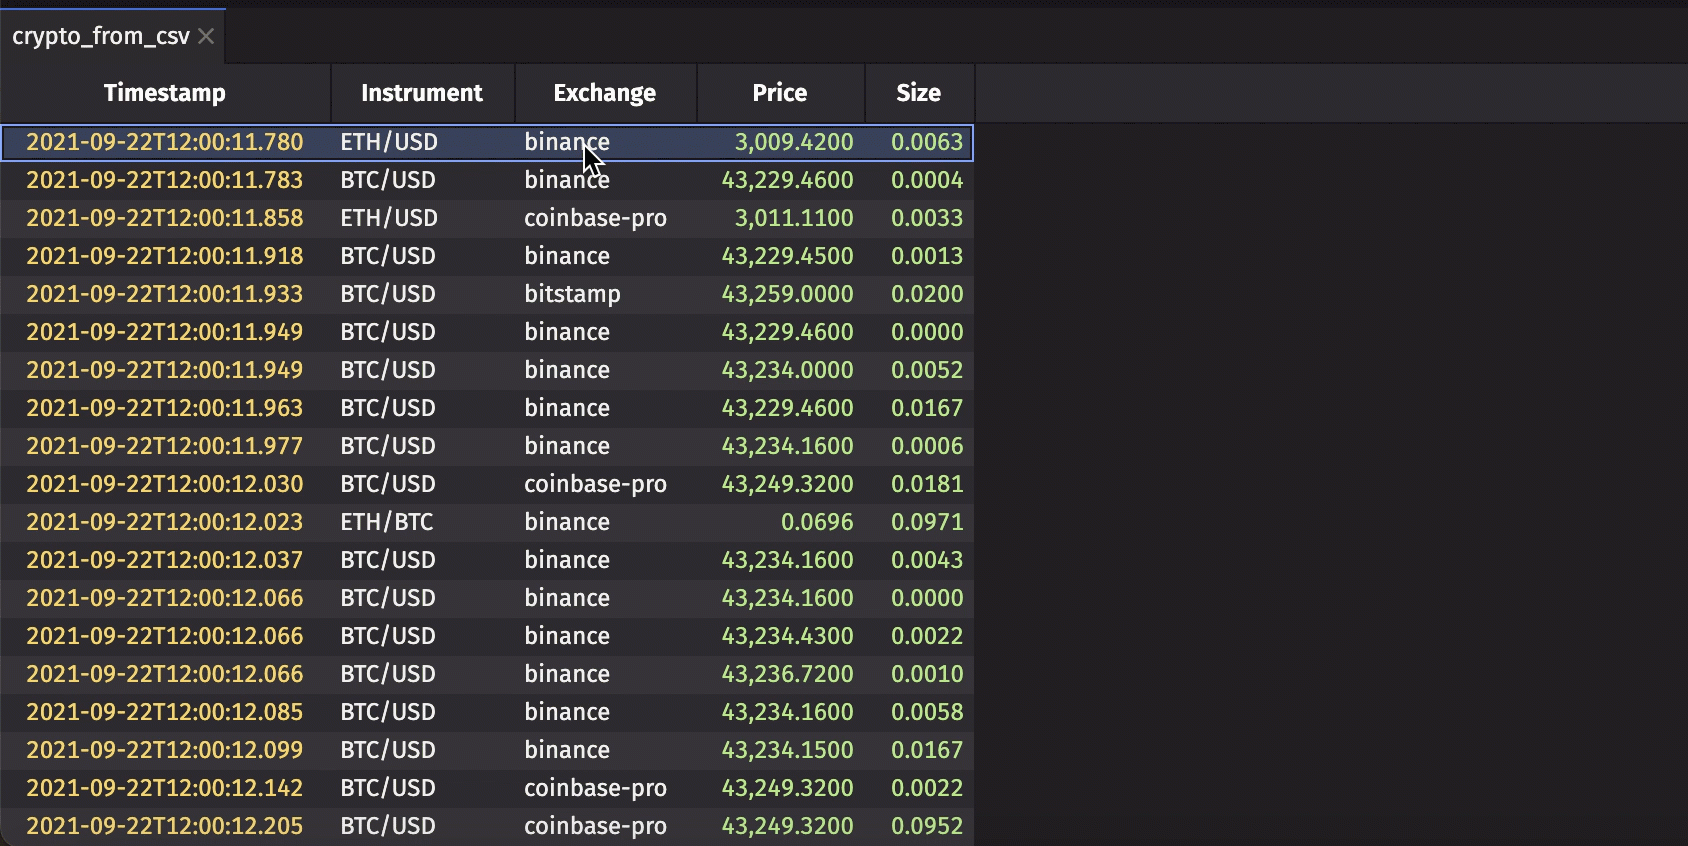
We'll discuss each option below as we interact with tables of crypto data.
Input Filters
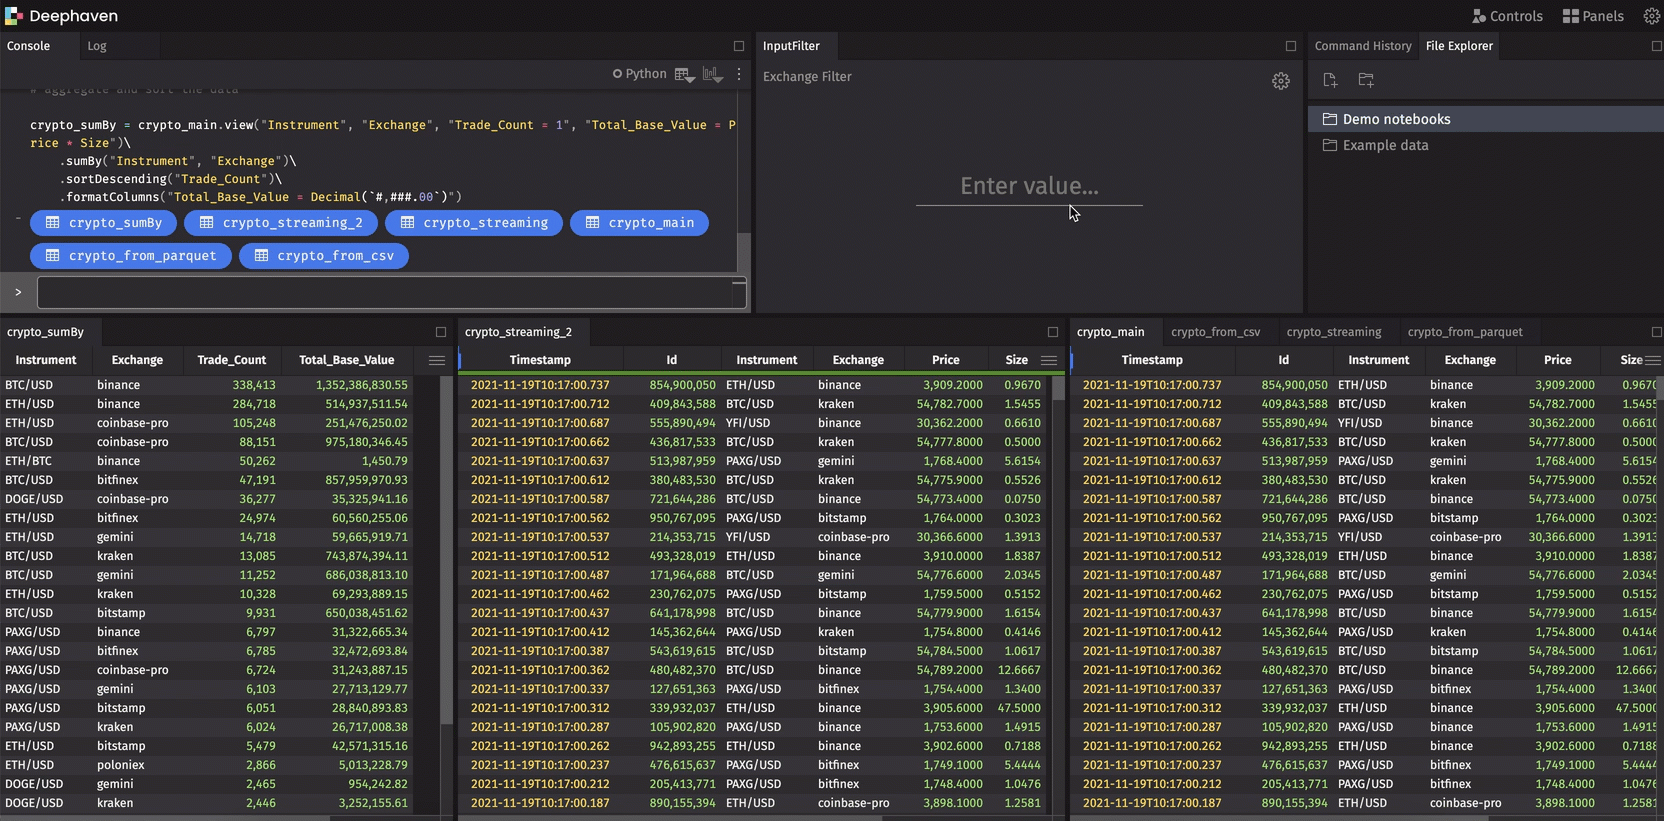
Input Filters apply your specified filter to all the tables in your dashboard, and can be opened from the the Controls menu:
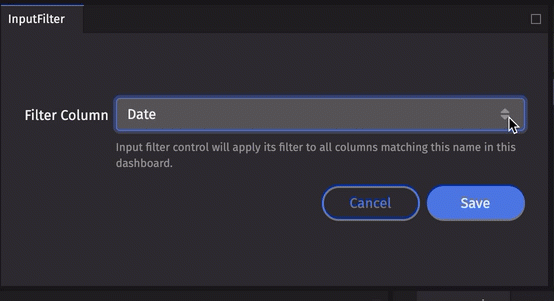
Once you choose a Filter Column from the drop-down list, you can enter a value. Once a value is entered, the filter will be immediately applied to your dashboard.
In this example, we filter all the open tables to one exchange:
Closing the Input Filter panel removes all the associated filters from your layout.
Note
Input Filters also apply to Chart Builder plots that are set to Sync State.
Dropdown Filter
The Dropdown Filter control does what it implies - it creates a dropdown list of values that you can use to easily switch among filters.
In the dialog, choose a:
- source column - this populates the list of filter options.
- filter column - all columns in the workspace that match this name will be filtered by the selected value.
The dropdown list expects unique values for the column source. You can create a new table for this purpose in one of two ways:
- apply a
select_distinctin a table's query. - use Select Distinct Values in a table's Options menu.
Note
Dropdown lists are user friendly for a small number of options. We enforce a max number of 256 option values.
- Sorting and filtering the source table will update the values in the Dropdown Filter.
- To edit your configuration, click the gear icon at the top right.
- Deleting a source column or closing the source table unlinks the Dropdown Filters.
Linker
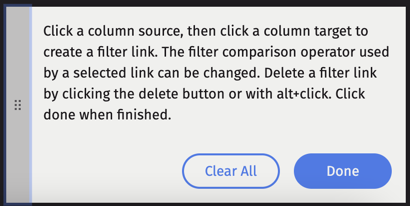
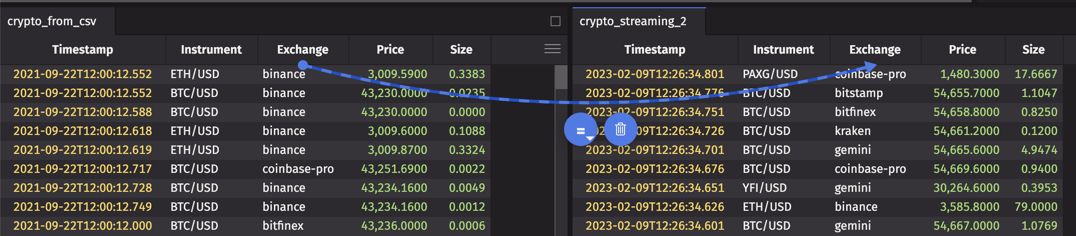
The Linker feature in Deephaven enables you to interactively filter the content in one table based on the content selected in another table. The objects must first be "linked" with each other, with one table as the source and one or more as the target. When a cell in the source table is double-clicked, the respective columns in the target table are filtered to that value.
When you select the Linker tool from the Controls menu, the following instructions will appear in Deephaven:
After you click a column source, drag the arrow cursor to your desired target:
Expand the menu for filter options:
Click Done to save your changes.
Now that the tables are linked, double-clicking on a row in the source column automatically filters the target table:
You can also link multiple tables at once, as shown below:

After you've linked tables, your selections are saved and will reopen to allow you to edit or clear the links when you access the Linker tool.
Quick Filters
The Quick Filters features adds a filter row above the header of a table. Type a value in the filter field above any column and it will filter accordingly.
Quick filters can be added in a table's option menu, or by right-clicking a column header:
Tip
You can also open or close the Quick Filters bar using the keyboard shortcut Ctrl+F or ⌘F.
Quick Filters support all standard column types, including Vector and Array columns. When filtering Vector or Array columns, the filter searches for matching elements within the arrays.
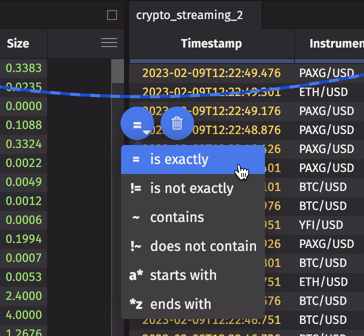
Advanced Filters
As the name implies, the Advanced Filters feature provides advanced options to filter data in a table. They can be accessed by right-clicking a column header, or by clicking on a column's funnel icon within the Quick Filters bar:
Sorting options
The top of the Advanced Filters window provides two buttons that sort the entire underlying table based on the column selected. You can sort the table in descending or ascending order by clicking the appropriate button:

Enter value(s)
The first section of the dialog provides options for filtering the data in the selected column. These options depend on the data type:
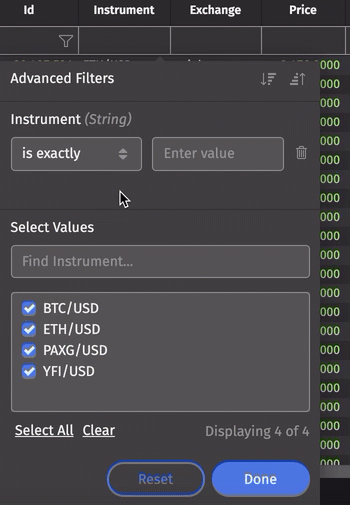
You can filter the table by a secondary value by clicking on the AND or OR buttons just below the value field.
Selecting either of them will add a new filter set to the dialog window:

In the example above, we added a second filter using the OR option. The table filters to only those rows of data where the Instrument value contains BTC or ETH.
Click the trash can icon to the right of the filter value to remove it.
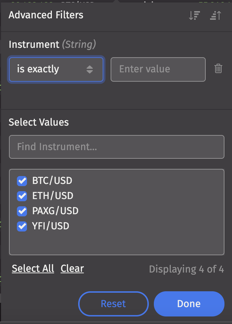
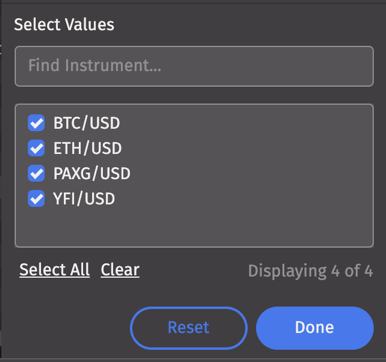
Select value(s)
The lower portion of the Advanced Filters dialog enables you to filter the underlying table by selecting specific values. Search for a value in the Find... field, or scroll through to select or deselect values:
Ordering
The upper and lower portions of the Advanced Filter work conjunctively - they both filter the same column. However the upper portion of the Advanced Filter is processed first. Therefore, if you filter a table using the upper filter criteria, the filtering specified in the lower section will be applied to the table after it has been filtered by the upper portion.
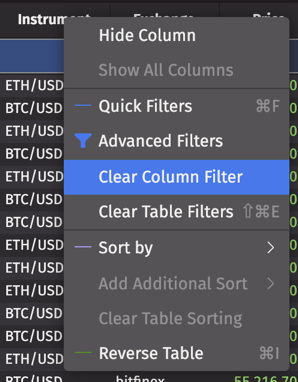
Removing filters
- Use the Reset button to remove all filters.
- Remove one or all filters by using the Column Header context menu:
Filter By Value(s)
Right-clicking a table cell will show the Filter By Value feature:
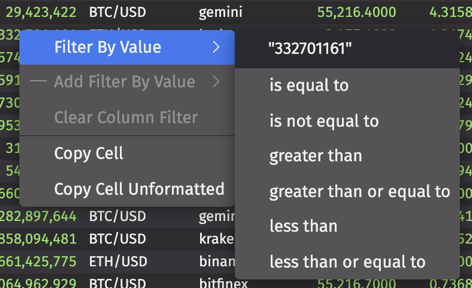
You can also select multiple values to filter by:
There are six options to filter the column based on the value of the table cell. After the first filter is applied, the context menu provides option to apply additional filters, or clear the filters.
Search bar
When the Search Bar button is set to On in a table's Options menu, a search bar will be added to that table:
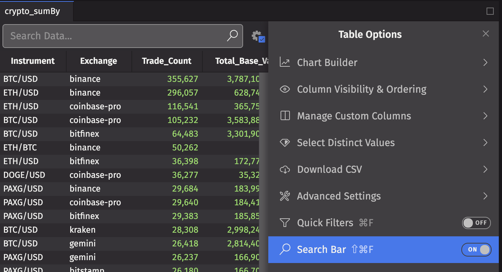
By default, all columns will be searched for your term. You can configure cross-column search using the Settings dialog at the right of the search bar:

Tip
You can also open or close the search bar using the keyboard shortcut Ctrl+S or ⌘S.
Filter Sets
Filter Sets capture the current state of all filters applied across the current dashboard (including plots, tables, etc.) into one "set" that can then be reapplied at a later time.
From the Controls menu, choose Filter Sets. Enter a name for your set and click Save. This opens a drop-down list of all available sets:
Select a set name to apply the saved filters.
Click the gear at the top right of the Filter Set Manager to return to the editor. You can update, rename, or delete the highlighted Filter Set. Select Capture new filter set to create a new Filter Set.
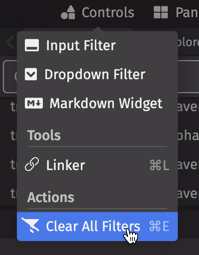
Clear all filters
The Clear All Filters option in the Controls menu removes all filters of any type in the active workspace at once:
Advanced Settings
Advanced filter settings can be found in the Table Options menu.
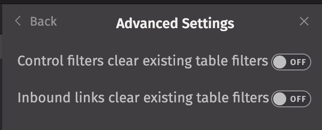
Two options are available:
-
Control filters clear existing table filters - Control filters are applied by a control, such as an input filter or dropdown filter. Setting this button to "On" will allow control filters to clear / override any filters previously applied.
-
Inbound filters clear existing table filters - Inbound filters are applied to a table by the Linker tool. Setting this button to "On" will allow inbound filters to clear / override any filters previously applied.